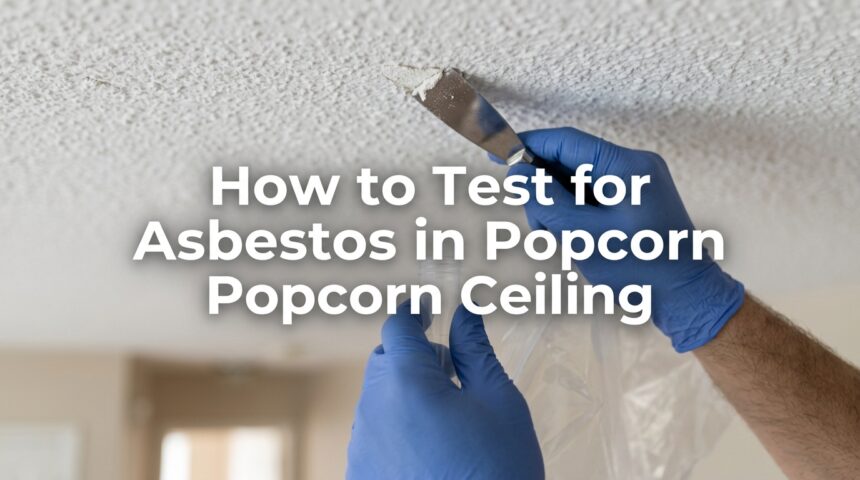
If you live in an older home and you’re worried about the texture on your ceiling, learning how to test for asbestos in popcorn ceiling material is the safest first step you can take. Many homes built before the 1980s used popcorn ceiling texture that contained asbestos fibers, and these fibers can become dangerous once the surface is disturbed.
Instead of guessing or ignoring the issue, a proper test tells you exactly what you’re dealing with. This guide walks you through every stage of the process, from spotting the warning signs to collecting a sample and reading your lab results. By the end, you’ll know exactly how to protect your family and handle the situation with confidence.
What Is a Popcorn Ceiling and Why Does It Matter?
Popcorn ceiling, also called textured or acoustic ceiling, was a popular design choice from the 1950s through the late 1980s because it hid imperfections and reduced noise. The bumpy texture became a concern later because many manufacturers mixed asbestos fibers into the spray-on material for added durability and fire resistance.
Why Homeowners Chose This Style
Builders loved popcorn ceilings because they were cheap to install and covered uneven drywall seams without extra labor. The texture also muffled sound between rooms, which made it especially popular in apartments and shared living spaces during that era.
The Hidden Asbestos Connection
Manufacturers added asbestos to ceiling texture because the mineral fibers strengthened the material and made it fire resistant. Once health researchers linked asbestos to serious lung diseases, the practice was phased out, but millions of older homes still carry the original ceilings today.
Understanding Asbestos and Its Health Risks
Asbestos is a naturally occurring mineral fiber that was once prized for its strength and heat resistance. When the fibers stay undisturbed inside a ceiling, they generally pose little threat, but sanding, drilling, or water damage can release them into the air.
How Asbestos Fibers Enter the Body
Once airborne, microscopic asbestos fibers can be inhaled and settle deep inside lung tissue. Over years, this exposure has been linked to serious illnesses such as asbestosis, lung scarring, and mesothelioma, a rare but aggressive cancer.
Why Age of the Home Matters
Homes built before 1980 carry the highest likelihood of asbestos-containing ceiling texture, since regulations tightened significantly after that period. If your home was constructed or renovated between the 1950s and late 1970s, treating the ceiling with caution is a wise starting point.
Signs You Might Have an Asbestos Popcorn Ceiling
Visual inspection alone can never confirm asbestos, but certain clues raise the likelihood enough that testing becomes necessary. Knowing these warning signs helps you decide how urgently you should act.
Visual and Textural Clues
A slightly yellowed, coarse, or uneven popcorn texture often points to an older, original installation rather than a modern touch-up. However, appearance is not proof, since asbestos-free versions can look nearly identical to older asbestos-containing ones.
Renovation and Purchase Records
Checking your home inspection report, previous renovation permits, or seller disclosure documents can reveal whether the ceiling was ever tested or replaced. If no records exist, it’s best to assume testing is needed before any renovation work begins.
Safety Precautions Before You Begin Testing
Before touching the ceiling in any way, preparing the space properly reduces the risk of releasing fibers into your home’s air. Skipping this step is one of the most common mistakes homeowners make.
Protective Gear You’ll Need
Wearing a properly fitted N100 or P100 respirator mask is essential, since standard dust masks do not filter asbestos fibers effectively. Disposable gloves, safety goggles, and old clothing that can be washed or discarded afterward add another layer of protection.
Preparing the Room Safely
Turning off fans, air conditioning, and heating systems prevents fibers from spreading through the ductwork during sampling. Covering the floor with plastic sheeting and closing doors to isolate the room also keeps any released particles contained to a small, manageable area.
Methods to Test for Asbestos in Popcorn Ceiling
There are two realistic paths available to homeowners: hiring a certified professional or collecting a sample yourself for lab analysis. Each option has its own advantages depending on your budget, comfort level, and local regulations.
Hiring a Certified Asbestos Inspector
A licensed inspector brings specialized equipment and experience, which reduces the chance of accidental fiber release during sampling. This option is strongly recommended in areas where regulations require licensed handling, and it often includes a written report useful for future home sales.
Using a DIY Asbestos Testing Kit
DIY kits are widely available online and in hardware stores, and they include sampling tools along with a prepaid mailer to a testing lab. This route is more affordable, but it requires strict adherence to safety steps to avoid contaminating your living space.
Step-by-Step Guide to Collecting a Popcorn Ceiling Sample
If you choose the DIY route, following each step carefully ensures both your safety and the accuracy of your results. Rushing through this process increases the risk of exposure and unreliable lab findings.
Gathering Your Tools and Materials
You’ll need a spray bottle with water, a small utility knife or scraper, a resealable plastic bag, gloves, and your respirator mask. Having everything ready before you start prevents unnecessary movement around the exposed ceiling area.
Sampling the Ceiling Texture
Lightly mist the target area with water to weaken dust before scraping a small, coin-sized piece directly into your sealed bag. Working slowly and keeping the bag pressed against the ceiling during collection minimizes the chance of particles escaping into the room.
Sealing, Labeling, and Cleanup
Double-bag the sample, label it with the date and exact location it was taken from, and store it away from foot traffic. Afterward, wipe down all surfaces and tools with a damp cloth and dispose of the cloth and gloves as instructed by your test kit.
Where to Send Your Sample for Lab Testing
Choosing the right laboratory determines how accurate and trustworthy your results will be. Not every lab follows the same standards, so verifying accreditation matters before you mail anything.
Choosing an Accredited Laboratory
Look specifically for labs accredited under the National Voluntary Laboratory Accreditation Program, since this ensures they follow standardized testing procedures. Most accredited labs use Polarized Light Microscopy, a method recognized for reliably identifying asbestos fiber types and concentration.
What Happens After You Mail the Sample
Once received, the lab typically examines the sample under magnification and issues a written report within a few business days to two weeks. Turnaround time and pricing vary, so confirming both before sending your sample helps you plan accordingly.
The table below compares the two main testing routes so you can decide which fits your situation best.
| Testing Method | Average Cost | Turnaround Time | Best For |
| Certified Inspector | $300 to $600 | 3 to 7 days | Regulated areas, home sales, larger renovations |
| DIY Testing Kit | $30 to $80 | 3 to 14 days | Small budgets, single-room checks, cautious homeowners |
Understanding Your Asbestos Test Results
Once your report arrives, knowing how to interpret it prevents unnecessary panic or false reassurance. Lab reports are usually straightforward but use specific terminology worth understanding.
Reading the Lab Report
The report will state whether asbestos was detected and, if so, list the percentage and type of fiber found, such as chrysotile or amosite. Most regulations consider anything above one percent asbestos content to be a regulated material requiring careful handling.
Deciding Your Next Steps
If no asbestos is detected, you’re generally free to renovate or remove the texture using standard home improvement precautions. If asbestos is confirmed, the safest path forward involves professional guidance rather than attempting removal on your own.
What to Do If Asbestos Is Found in Your Ceiling
Discovering asbestos doesn’t mean immediate danger, since undisturbed material is often safe to leave in place for years. However, any future renovation plans should factor in proper handling from this point forward.
Should You Remove It Yourself?
Removing asbestos-containing texture without training is strongly discouraged, since even careful scraping can release large quantities of airborne fibers. Many regions also legally require licensed abatement professionals for any removal exceeding a small sample area.
Hiring a Licensed Abatement Contractor
A licensed contractor will seal off the work area, use specialized filtration equipment, and safely dispose of the material according to local waste regulations. While professional removal costs more upfront, it protects your household from prolonged exposure risks tied to DIY attempts.
Local Laws and Regulations to Keep in Mind
Asbestos handling rules differ significantly depending on where you live, so checking local guidelines before starting any work is essential. Ignoring these regulations can lead to fines or unsafe handling practices.
Why Regulations Vary by Location
Some states and countries require licensed professionals for both testing and removal, while others allow limited homeowner sampling for personal use. Contacting your local environmental or health department clarifies exactly what’s permitted in your area.
Checking Compliance Before Renovation
Before starting any renovation involving an older ceiling, confirming permit requirements and disposal rules protects you from legal complications later. Many municipalities also maintain lists of approved testing labs and certified contractors for reference.
Common Mistakes Homeowners Make During Testing
Avoiding a few frequent errors makes the entire testing process safer and more reliable. These mistakes are easy to prevent once you know what to watch for.
Skipping Safety Precautions
Many homeowners underestimate the importance of wearing proper protective gear, assuming a quick scrape poses little risk. Even brief exposure during sampling can release fibers, making protective equipment non-negotiable regardless of how small the sample seems.
Using Non-Accredited Testing Labs
Choosing an unverified lab to save money can lead to inaccurate or inconsistent results that don’t hold up for legal or resale purposes. Always confirm accreditation status directly on the lab’s website before mailing any sample.
Frequently Asked Questions
Can I test for asbestos in popcorn ceiling without hiring a professional?
Yes, DIY testing kits are legal in most areas and allow you to collect a small sample yourself before mailing it to an accredited lab.
How much does asbestos testing typically cost?
DIY kits range from thirty to eighty dollars, while professional inspections usually cost between three hundred and six hundred dollars depending on your location.
Is it safe to live under a popcorn ceiling that contains asbestos?
Undisturbed asbestos-containing texture is generally considered low risk, though any renovation or damage should be handled with professional caution.
How long does it take to get asbestos test results back?
Most labs return results within three days to two weeks, depending on their workload and the testing method used.
Do I need a permit to remove an asbestos popcorn ceiling?
Many regions require permits and licensed contractors for asbestos removal, so checking with your local building or health department beforehand is essential.
Conclusion
Knowing how to test for asbestos in popcorn ceiling material puts you back in control of your home’s safety instead of leaving you guessing. Whether you choose a certified inspector or a careful DIY sampling approach, following proper safety steps at every stage protects your household from unnecessary exposure.
Once your results arrive, deciding between leaving the ceiling undisturbed, encapsulating it, or scheduling professional removal becomes a straightforward, informed decision rather than a stressful guess.
Related Articles
How to Store Furniture in a Storage Unit: Complete Guide 2026
Window with J-Channel: A Complete Homeowner’s Guide
How Do You Hang Wall Cabinets? A Complete Step-by-Step Guide
How Wide Is Steel Roofing? Complete Panel Width Guide
Why Does My Bathroom Smell Like Sewage? Causes, Fixes & Prevention Tips