Ceiling refinishing is one of those home improvement projects that delivers an outsized visual impact relative to its cost.
A damaged, stained, or outdated ceiling drags down the entire feel of a room, no matter how well the walls are painted or how carefully the floor is finished.
Refinishing the ceiling corrects all of that, restoring a clean, polished appearance that makes the whole space feel newer and better maintained.
Whether you are dealing with water stains from an old leak, a popcorn texture that belongs in the past, cracked drywall from settling, or simply a surface that has dulled and yellowed over time, ceiling refinishing gives you a practical and cost-effective path forward.
This guide covers every method, material, cost factor, and decision point clearly so you can approach the project with full confidence.
What Is Ceiling Refinishing?
Ceiling refinishing refers to the process of restoring, resurfacing, or recoating a ceiling to improve its appearance, texture, or structural condition.
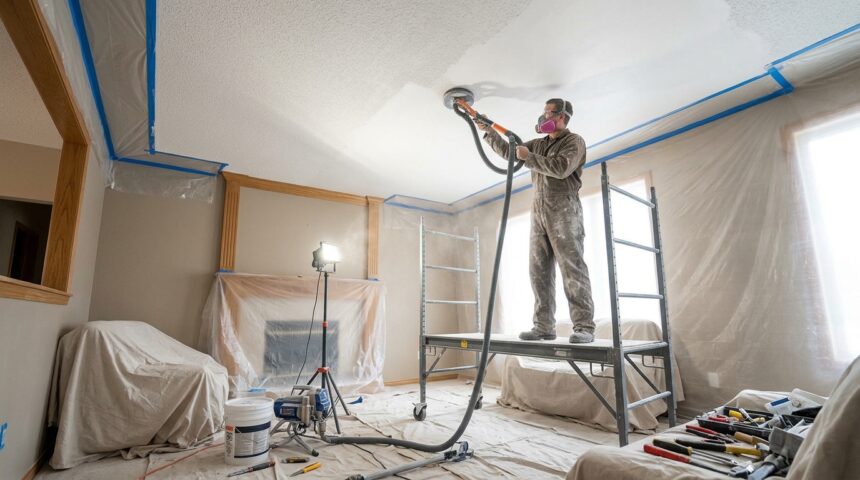
It is a broader category than simple repainting because it can involve removing existing textures, repairing damaged drywall, applying new surface treatments, and finishing with specialized ceiling paint or coatings designed for overhead application.
The scope of ceiling refinishing varies enormously depending on the current condition of the ceiling and the desired end result.
A ceiling with minor scuffs and discoloration might only need cleaning and a fresh coat of paint. A ceiling with heavy texture, water damage, or widespread cracking might require skim coating, patching, sanding, priming, and multiple finish coats before it looks right. Knowing where your ceiling falls on that spectrum determines the method, materials, time, and cost involved.
Types of Ceiling Refinishing Methods
Ceiling refinishing is not a one-size-fits-all process. Different ceiling conditions and desired outcomes call for different approaches, and choosing the right method from the start saves significant time and money.
Repainting the Ceiling
Repainting is the simplest and most affordable form of ceiling refinishing and is appropriate when the ceiling surface is structurally sound but visually tired, yellowed, or lightly stained. It involves cleaning the surface, priming if necessary, and applying one or two coats of ceiling-specific flat paint.
Ceiling paint differs from wall paint in that it is formulated to minimize spattering during roller application and to dry without the sheen that would highlight imperfections on a horizontal surface. A proper repaint can dramatically refresh a room in a single day and costs a fraction of more intensive refinishing methods.
Skim Coating
Skim coating is a technique where a thin layer of joint compound is applied over the entire ceiling surface to create a perfectly smooth, flat finish.
It is the method of choice for ceilings that have been textured and then had the texture removed, leaving an uneven or patchy surface underneath, and also for ceilings with widespread small cracks, surface roughness, or previous repairs that left visible inconsistencies. Skim coating requires skill to execute evenly because the compound must be spread thin and feathered out smoothly before it dries.
When done correctly, a skim-coated ceiling looks like new drywall and takes paint beautifully.
Popcorn Ceiling Removal and Refinishing
Popcorn ceilings, also known as acoustic texture or cottage cheese ceilings, were widely applied in homes built between the 1950s and 1990s.
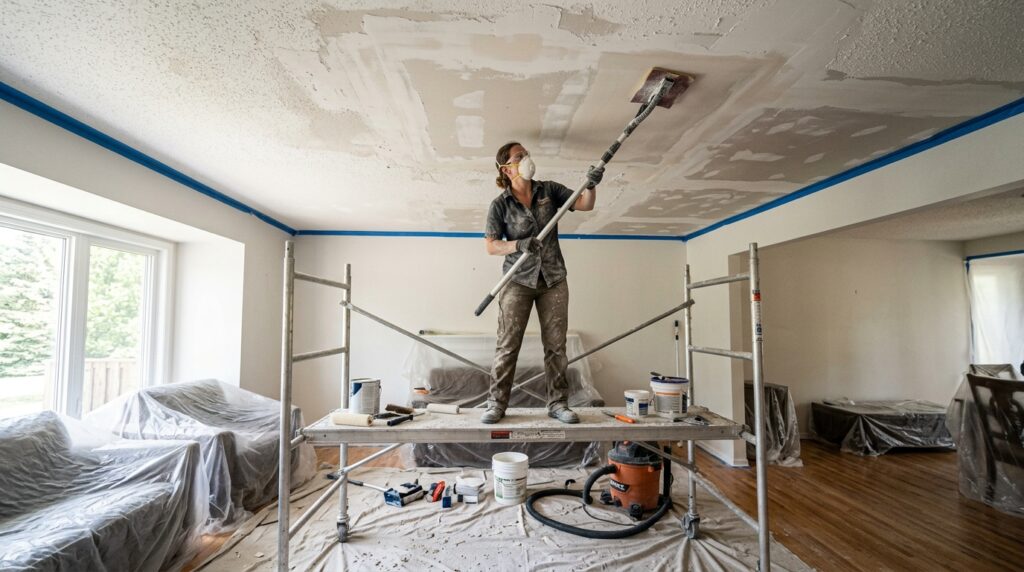
Removing them is one of the most common ceiling refinishing projects undertaken today because the texture looks dated and collects dust. The removal process involves wetting the texture with water to soften it and scraping it away with a wide drywall knife, after which the underlying surface is skim coated, primed, and painted.
One important caution is that popcorn ceilings installed before 1978 may contain asbestos, which requires professional testing and certified abatement before any removal work begins.
Drywall Patching and Refinishing
When a ceiling has localized damage from water leaks, impact, or structural movement, patching is required before any cosmetic refinishing can be effective. Drywall patches are cut to fit the damaged area, secured to existing framing or with backer boards, taped, mudded, sanded, and blended into the surrounding surface. For large or complex damage, a contractor may recommend replacing an entire drywall panel rather than patching, which produces a more seamless result. After patching is complete, the ceiling is primed and painted to match, completing the refinishing process.
Applying New Texture
Some homeowners choose ceiling refinishing not to remove texture but to add or refresh it, either because they prefer the look of a textured surface or because they want to hide minor surface imperfections that would be visible under a flat painted finish.
Common texture types include orange peel, knockdown, skip trowel, and sand texture, each applied with different tools and techniques. Texture can be applied by brush, roller, or spray, and the choice of technique and material significantly affects how the finished ceiling looks and how difficult the texture is to repair later if needed.
Ceiling Refinishing Cost Breakdown
Understanding the cost structure of ceiling refinishing helps you evaluate contractor quotes accurately and decide which portions of the project are worth doing yourself.
| Refinishing Method | DIY Cost | Professional Cost | Time Required |
| Ceiling Repainting | $50 – $150 | $200 – $800 | 4 – 8 hours |
| Skim Coating | $100 – $300 | $1,000 – $3,500 | 1 – 3 days |
| Popcorn Removal + Refinish | $200 – $500 | $1,500 – $4,500 | 1 – 3 days |
| Drywall Patching + Paint | $50 – $200 | $300 – $1,500 | 4 – 12 hours |
| New Texture Application | $100 – $300 | $800 – $2,500 | 1 – 2 days |
| Full Ceiling Replacement | Not recommended DIY | $2,000 – $6,000+ | 2 – 5 days |
Costs vary based on ceiling height, room size, accessibility, and the local labor market. High ceilings require scaffolding rather than simple ladders, which adds to both the labor time and equipment cost. Rooms with complex shapes, beams, or recessed lighting fixtures also take longer to refinish properly.
Tools and Materials Needed for Ceiling Refinishing
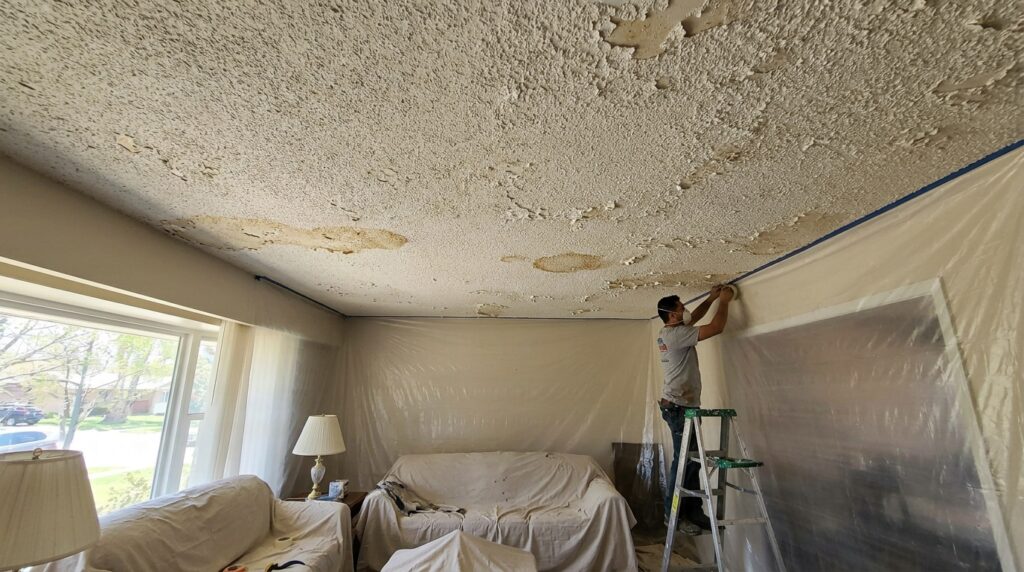
Having the right tools before starting a ceiling refinishing project makes the difference between a professional-looking result and a frustrating, uneven finish that requires correction.
- Drop cloths and plastic sheeting — Ceiling work is messy. Cover every floor surface, piece of furniture, and fixture before starting.
- Extension poles — A quality extension pole for both rollers and sanding tools reduces fatigue and produces more consistent pressure across the surface.
- Paint roller with 3/8 to 1/2 inch nap — Thicker nap covers texture better; thinner nap works for smooth surfaces.
- Ceiling-specific paint — Flat finish, low-spatter formulas designed for overhead application.
- Primer — Essential over bare drywall, patches, stains, or previously textured surfaces.
- Joint compound — For skim coating, patching, and texture applications.
- Drywall knives — 6-inch and 10-inch sizes for patching and skim coat application.
- Sanding pole with 120 and 150 grit paper — For smoothing dried compound before painting.
- Painter’s tape — To protect walls, crown molding, and light fixtures at the ceiling edge.
- Safety glasses and dust mask — Non-negotiable for overhead sanding and texture removal.
Step-by-Step Process for Ceiling Refinishing
Following a systematic process is what separates a ceiling that looks professionally refinished from one that looks like a DIY attempt. Each step builds on the previous one, and skipping steps leads to visible problems in the finished product.
Step 1: Inspect and assess the ceiling. Identify all damage, stains, cracks, and texture issues before purchasing materials or beginning work. Mark problem areas with painter’s tape so nothing is missed.
Step 2: Prepare the room. Remove or cover all furniture, cover the floor with drop cloths, remove light fixtures or cover them thoroughly, and apply painter’s tape along the ceiling perimeter where it meets the walls.
Step 3: Clean the ceiling. Wipe down the entire surface with a dry microfiber cloth or vacuum with a brush attachment to remove dust and cobwebs. For stained areas, clean with a mild TSP substitute solution.
Step 4: Make all repairs. Complete all patching, crack filling, and skim coating before any primer or paint is applied. Allow all compound to dry completely, typically 24 hours per coat, and sand smooth.
Step 5: Apply primer. Use a stain-blocking primer over any water stains, smoke damage, or bare drywall areas. Priming the entire ceiling before painting produces a more uniform finish and better paint adhesion.
Step 6: Apply paint. Roll the ceiling in overlapping W or M patterns, working in sections of approximately 4 by 4 feet, and maintain a wet edge throughout to avoid lap marks. Apply two coats, allowing full drying time between them.
Step 7: Inspect under raking light. Once paint is dry, use a flashlight or work light held at a low angle to reveal any imperfections missed during application. Touch up as needed before removing tape and returning the room to use.
Common Ceiling Refinishing Mistakes to Avoid
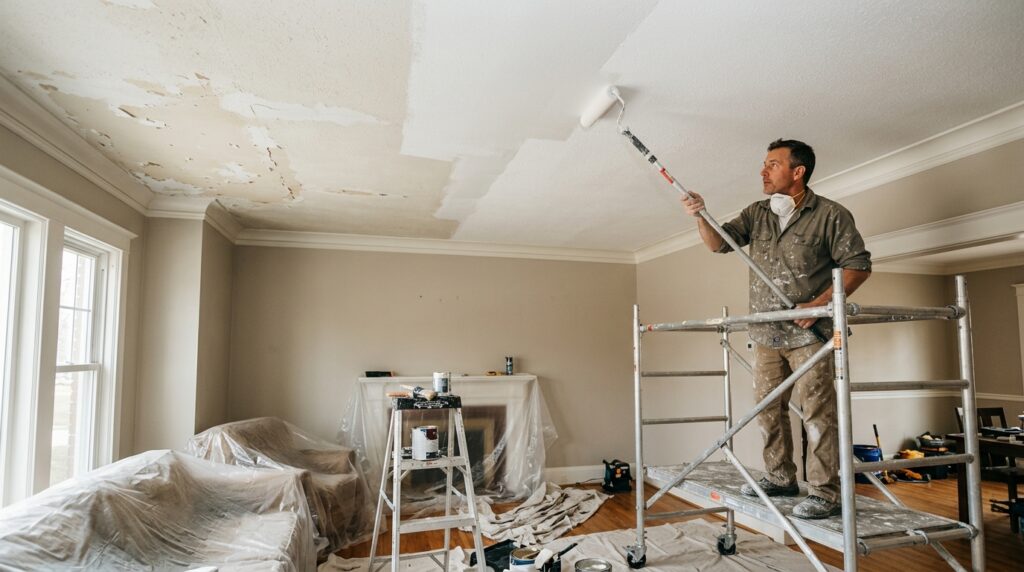
Even experienced DIYers make avoidable mistakes on ceiling projects that require correction after the fact. Being aware of these pitfalls in advance prevents wasted time and materials.
- Skipping primer over stains — Paint alone will not block water or smoke stains. They bleed through standard paint within weeks regardless of how many coats are applied. Always use shellac-based or oil-based stain-blocking primer on any discolored area.
- Not allowing compound to fully dry — Joint compound that is painted over while still wet shrinks and cracks as it finishes drying, requiring the entire repair to be redone.
- Using wall paint on ceilings — Wall paint has a slight sheen that highlights every imperfection on a horizontal surface. Ceiling paint’s flat finish minimizes this problem significantly.
- Overloading the roller — Too much paint on the roller causes drips and spatters. Load the roller moderately and use a tray with a ribbed ramp to distribute paint evenly.
- Ignoring ventilation — Paint and primer fumes accumulate in enclosed spaces during ceiling work. Always ventilate the room with open windows and a fan running throughout the project.
When to Hire a Professional for Ceiling Refinishing
Ceiling refinishing is manageable as a DIY project for homeowners who are comfortable with preparation work and have basic painting skills. However, several situations strongly favor hiring a professional over attempting the work independently.
If the ceiling has widespread water damage with active or recent leaks, the source of the moisture must be repaired first, and the ceiling should be evaluated for mold before refinishing begins.
If popcorn texture from before 1978 is being removed, asbestos testing is required and certified abatement may be necessary, which is never a DIY situation. If the ceiling is higher than 9 feet, working safely and efficiently requires scaffolding that most homeowners neither own nor know how to set up correctly.
Skim coating an entire ceiling to a truly smooth finish is also a skill that takes considerable practice. A first-time skim coating attempt on a large ceiling often results in visible trowel marks and uneven thickness that requires professional correction. For skim coating, hiring a plasterer or drywall finishing contractor produces a significantly better result for most homeowners.
Frequently Asked Questions
How long does ceiling refinishing last?
A properly executed ceiling refinishing job using quality paint and primer typically lasts 10 to 15 years before another coat is needed in normal living conditions. Kitchens and bathrooms with higher humidity may require refinishing every 5 to 7 years due to moisture effects on the paint surface.
Can I paint over a popcorn ceiling instead of removing it?
Yes, painting over an intact popcorn ceiling is possible and avoids the mess of removal. However, rolling paint onto popcorn texture can cause sections of the texture to loosen and fall, particularly if the original texture was applied over flat paint rather than directly to primed drywall. Use a low-nap roller and minimal pressure to reduce this risk.
How do I know if my ceiling has asbestos?
Visual inspection alone cannot determine whether a ceiling contains asbestos. The only reliable method is professional sampling and laboratory testing, which typically costs $25 to $75 per sample. Homes built before 1980 with textured ceilings should always be tested before any removal work begins.
Is ceiling refinishing worth the cost?
Ceiling refinishing consistently delivers strong visual return on investment relative to its cost. A freshly refinished ceiling makes the entire room feel cleaner, brighter, and better maintained. For homeowners preparing to sell, a refinished ceiling in main living areas significantly improves buyer perception without requiring a major financial outlay.
Conclusion
Ceiling refinishing covers a broad range of techniques from simple repainting all the way to full skim coating and texture replacement, and the right approach depends entirely on what your ceiling currently looks like and what result you want to achieve. Simple repainting and minor patching are well within DIY reach for most homeowners. Skim coating, popcorn removal, and larger damage repairs benefit from professional execution.
Whatever the method, the process always follows the same foundation: proper preparation, complete repairs before any coating is applied, and quality materials used correctly from the start. A well-refinished ceiling elevates every room it is part of and is one of the most cost-effective improvements available in residential renovation.
Related Articles
Best Primer for Painting Kitchen Cabinets – Complete Easy Guide for Smooth & Durable Cabinets
How to Measure Windows for Curtains (Step-by-Step Guide)
Complete Guide to Roof Ventilation for Metal Roofs: Types, Benefits, Installation & Maintenance
Roof Coping Explained: What It Is, How It Works, and Why Your Roof Needs It
Standard Shower Curtain Size: Complete Guide to Sizes, Types & Measurements