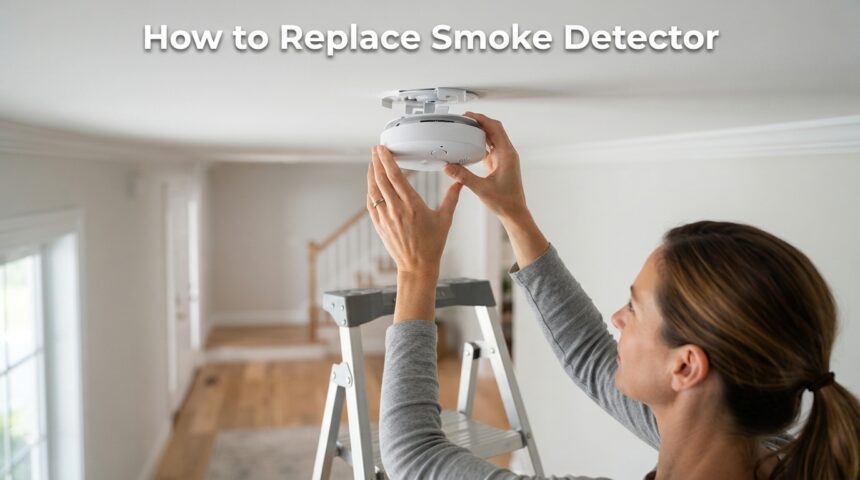
Learning how to replace smoke detector units is a simple home task that usually takes 15 to 30 minutes. First, buy a replacement that matches your old alarm and switch off the power if the unit is hardwired. Next, twist the old alarm off its base, disconnect the battery or wiring, and fit the new mounting plate.
Then connect the new alarm, lock it into place, and restore the power. Finally, press the test button to confirm the alarm sounds loud and clear. This guide covers both battery and hardwired models so you can finish the job safely and correctly.
Why and When to Replace a Smoke Detector
Smoke detectors wear out, and an old one can fail without any warning. The points below help you decide when it is time to act.
The 10-Year Rule
Fire safety experts recommend replacing every smoke alarm after ten years. Inside the sensor, parts slowly wear down, which makes the alarm less sensitive to smoke. Check the manufacture date printed on the back of the unit to learn its age.
Signs Your Detector Needs Replacing
A detector that keeps chirping after you install a fresh battery is usually near the end of its life. Frequent false alarms, yellow or brown plastic, and a silent test button are other clear warnings. Paint, dust, or insect damage around the cover can also block the sensor.
Battery Change or Full Replacement
If the alarm is under ten years old and only chirps once a minute or so, try a new battery first. A healthy alarm stops chirping right after the swap. If the chirp returns or the date has passed, replace the whole unit.
Know Your Smoke Detector Types
Buying the right type makes installation much easier. Alarms differ by power source, sensor, and extra features.
Power Source
Battery-powered alarms work on their own and can go almost anywhere. Hardwired alarms connect to your home’s electrical system and keep a backup battery for power cuts. Sealed ten-year battery models and smart alarms are also sold, and smart ones send alerts to your phone.
Sensor Type
Ionization sensors react faster to quick, flaming fires, while photoelectric sensors catch slow, smoldering fires earlier. Dual-sensor alarms combine both methods in one case. Many safety groups suggest photoelectric or dual-sensor models near bedrooms and hallways.
Smoke-Only or Combination Alarms
A smoke-only alarm detects fire alone, while a combination unit also senses carbon monoxide. Combination alarms save ceiling space and can cost less than buying two devices. The gas sensor often expires sooner than the smoke sensor, so read the label for its replacement date.
| Type | Best For | Key Point |
| Battery-powered | Rentals, quick swaps | No wiring needed |
| Hardwired | Whole-home systems | Needs power off before work |
| Photoelectric | Bedrooms, hallways | Strong on smoldering fires |
| Ionization | General coverage | Strong on fast flames |
| Dual-sensor | Best all-round choice | Covers both fire types |
| Smoke and CO combo | Homes with gas appliances | Check both expiry dates |
Choosing the Right Replacement
Start by matching the new alarm to the old one. For hardwired systems, pick the same brand and model family so the plug and mounting plate fit without changes. If the model is discontinued, an adapter plate or compatible wire harness usually solves the problem. Local codes and lease terms may also require a certain alarm type, so check them before you buy.
Before you pay, confirm these points:
- The power type matches your current setup.
- The alarm carries a UL or similar safety mark.
- Interconnected units come from the same brand.
- The package includes the mounting plate and screws.
Tools and Materials You Will Need
Most replacements need only basic tools that many households already own. Gather everything first so you do not have to climb up and down the ladder repeatedly.
- Step ladder
- Phillips and flathead screwdrivers
- Voltage tester (hardwired units)
- Wire nuts and electrical tape
- New batteries
- Marker or masking tape for labeling wires
- Flashlight or headlamp
- Drill and wall anchors, if the new plate needs fresh holes
Safety Steps Before You Start
Working near the ceiling and near household wiring carries real risks, so take a few minutes to prepare. Place the ladder on a flat, dry floor and ask someone to steady it if possible. For hardwired alarms, switch off the matching circuit breaker, then hold a voltage tester to the wires to confirm there is no power. Let your family know the alarm will be offline, and call a licensed electrician if the wiring looks burned, frayed, or unfamiliar.
How to Replace a Battery-Powered Smoke Detector
Battery models are the easiest to swap because no electrical work is involved. The whole job comes down to three short stages.
Remove the Old Alarm
Twist the detector counterclockwise to release it from the base and lower it carefully. Take out the battery and set it aside for proper disposal. Then unscrew the old mounting plate from the ceiling or wall.
Fit the New Mounting Plate
Hold the new plate where the old one sat and mark the screw holes with a pencil. If the holes do not line up, drill new ones and insert wall anchors. Tighten the screws until the plate feels firm and does not wobble.
Attach and Power the New Alarm
Insert fresh batteries and remove any pull tab that keeps the battery isolated. Line up the alarm with the plate and twist it clockwise until it clicks. Sealed ten-year models activate through a button or pull tab instead, so follow the package directions.
How to Replace a Hardwired Smoke Detector
A hardwired swap follows the same idea but includes a wiring step. With the power confirmed off, the job stays straightforward.
Disconnect the Old Unit
Twist the detector off its base and lower it gently, keeping the wires from straining. Most units release through a plug-in wire harness, so pull the connector apart. If wires are joined with wire nuts, label each one and then unscrew them.
Connect the New Wiring
Plug the new harness into the house wiring, or join the wires by color. Black is the live wire, white is neutral, and red or orange is normally the interconnect wire that links alarms together. Twist each pair under a wire nut and wrap a little electrical tape around it for added grip.
Mount, Power Up, and Check
Fix the new bracket to the electrical box, tuck the wires inside, and twist the alarm onto the bracket. Insert the backup battery, then switch the breaker on. A short beep or a steady green light usually shows the unit is receiving power.
Replacing Interconnected Smoke Alarms
Interconnected alarms are linked by wire or wirelessly so that when one detects smoke, all of them sound together. This gives people in distant rooms an earlier warning. It is best to use one brand across the system, because different brands may not communicate. If only one unit has failed, you can replace just that one as long as the new model is compatible, and you should sound-test the group afterward.
Where to Place the New Smoke Detector
Good placement matters as much as a good alarm. The rules below help you choose the best spots.
Which Rooms Need One
Install an alarm on every level of the home, including the basement. Place one inside each bedroom and another in the hallway outside sleeping areas. This layout gives the earliest warning while people are asleep.
Ceiling and Wall Distances
On a ceiling, keep the alarm at least four inches away from any wall. On a wall, mount it between four and twelve inches below the ceiling line. Smoke rises and gathers near the top of the room, so these gaps let the sensor detect it quickly.
Spots to Avoid
Steam and cooking fumes can trigger false alarms, so stay away from kitchens and bathrooms unless the alarm is rated for them. Keep alarms clear of vents, fans, and windows because moving air pushes smoke away from the sensor. Also avoid corners where air sits still and very hot or cold areas such as unheated garages.
Testing, Maintaining, and Disposing
Installing the alarm is only part of the job. A short routine keeps it ready for years.
Test the New Detector
Press and hold the test button until the alarm sounds, and the sound should be loud and steady. On interconnected systems, every alarm should ring at the same time. Write the installation date on the unit so you know when the ten years end.
Keep It Working Over Time
Test the alarm once a month and change the batteries once a year unless the unit has a sealed battery. Gently vacuum the vents with a soft brush attachment to remove dust. Practice a family escape plan too, since a working alarm is most useful when everyone knows where to go.
Dispose of the Old Unit
Remove batteries and recycle them at a collection point. Ionization alarms contain a very small radioactive source, so check local rules or the maker’s take-back program before throwing one away. Never burn or crush a detector.
Common Problems After Replacement
Most issues after a swap are minor and can be fixed within minutes. The table below lists the usual causes.
| Problem | Likely Cause | Fix |
| Alarm will not turn on | Loose wires or a dead battery | Recheck connections and try a new battery |
| Chirping after install | Battery tab still in place or low power | Remove the tab and reseat the battery |
| False alarms | Dust, steam, or poor placement | Clean the vents or move the unit |
| Will not lock onto base | Plate misaligned | Loosen screws, realign, and retighten |
| Alarms do not sound together | Mismatched brands or wire mix-up | Match brands and check the interconnect wire |
| Breaker trips | Crossed or exposed wires | Turn power off and call an electrician |
Cost and DIY vs. Hiring a Professional
A basic detector usually costs between $10 and $30, while smart and combination models cost more. Hiring an electrician to replace one hardwired unit often runs about $100 to $250, depending on your area.
Battery swaps are a safe DIY job for almost anyone. Hardwired swaps are also fine for confident beginners, but a professional is the better choice when the wiring is old, damaged, or confusing.
| Job | DIY Cost | Professional Cost |
| Battery-powered replacement | About $10 to $30 | Rarely needed |
| Hardwired replacement | About $15 to $50 | About $100 to $250 |
| Smart alarm setup | About $30 to $150 | Varies by installer |
Frequently Asked Questions
Can I replace a hardwired smoke detector with a battery one?
Yes, in many cases you can, but check local codes first because some areas require hardwired alarms in certain rooms. If you switch, cap the unused wires safely with wire nuts inside the box.
Do I need an electrician to replace a hardwired smoke detector?
Not always. If you can turn off the breaker, test the wires, and match colors, the job is manageable, but hire a professional if anything looks damaged.
Are smart smoke detectors worth it?
They can be, especially if you travel or have a large home, because they send alerts to your phone. They cost more, so choose one only if you will use the extra features.
Conclusion
Knowing how to replace smoke detector units gives you a quick way to keep your home safer. Choose a matching alarm, work carefully with the power off, place it in the right spot, and test it right away. With a monthly test and a fresh replacement every ten years, your alarm stays ready when it matters most.
Related Articles
How Do You Install Joist Hangers? A Simple Step-by-Step Guide
How Far Apart Should Floor Joists Be?
What Is a Rim Joist? Complete Guide
How Much Grout Do I Need? A Simple Guide to Getting It Right