Cathedral ceiling support box installation using a Supervent system is a specialized task that sits at the intersection of roofing, HVAC, and fire safety. It is not a project most homeowners encounter every day, but when a flue pipe, chimney liner, or vent stack needs to pass through an angled cathedral ceiling, doing it correctly is absolutely non-negotiable.
The wrong installation creates fire hazards, violates building codes, and can void your insurance coverage in the event of a claim.
The Supervent cathedral ceiling support box is specifically engineered to solve the unique challenge that angled ceilings present. Unlike flat ceilings where a standard support box sits level and square, a cathedral ceiling rises at a pitch that changes the geometry of everything passing through it.
The Supervent system accounts for that pitch while maintaining the required clearances between the flue pipe and any combustible material surrounding it.
What Is a Cathedral Ceiling Support Box and Why Is Supervent Used?
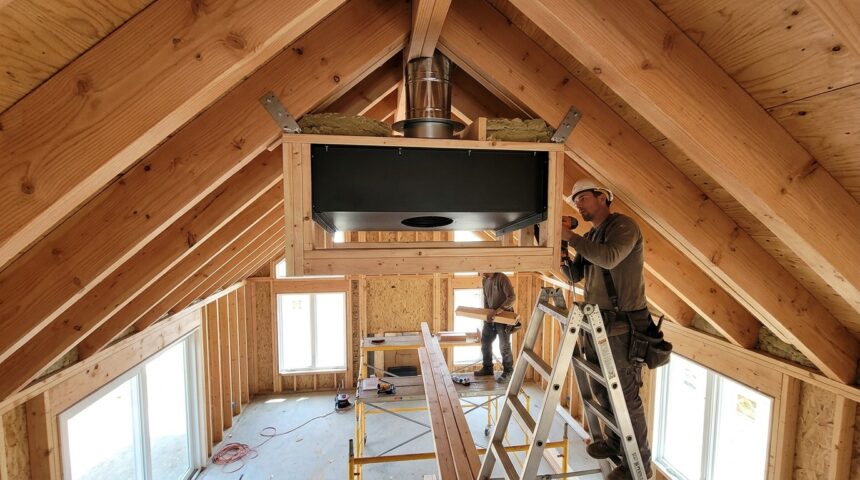
A cathedral ceiling support box is a framed enclosure installed where a double-wall or triple-wall insulated flue pipe passes through an angled ceiling. Its job is to hold the pipe securely in position, maintain the minimum clearance required by fire codes between the hot pipe and surrounding wood framing or insulation, and provide a clean, finished appearance on both sides of the ceiling.
Without this box, a pipe passing through a cathedral ceiling would either make direct contact with combustible framing or leave a gaping, uninsulated hole that creates both fire risk and energy loss.
Supervent is a brand and system produced by Selkirk, one of the most widely recognized manufacturers of residential and commercial chimney and venting products in North America. The Supervent cathedral ceiling support box is designed specifically to work within the Supervent double-wall insulated chimney system and is listed to UL 103 standards, which means it has been independently tested and certified for use with solid fuel, gas, and oil-burning appliances.
When installers and contractors refer to cathedral ceiling support box installation Supervent, they mean the complete process of incorporating this specific listed component into a through-ceiling venting assembly that meets all applicable codes.
Components of the Supervent Cathedral Ceiling Support Box System
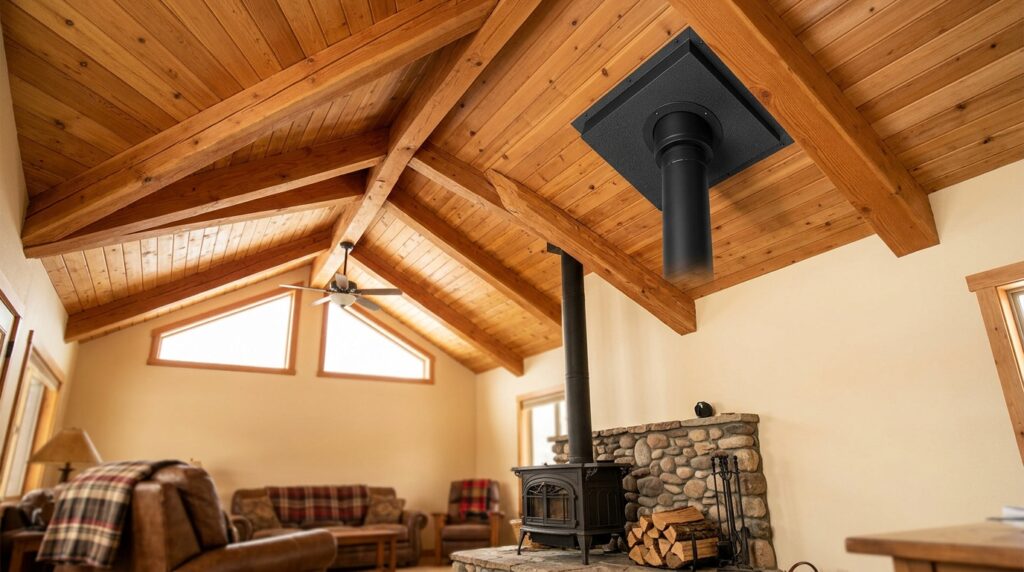
Before beginning installation, understanding what components make up the complete assembly prevents mid-project trips to the supply house and ensures nothing critical is omitted from the finished installation.
| Component | Function | Notes |
| Cathedral Ceiling Support Box | Frames the pipe passage through the angled ceiling | Available in multiple pitch ranges |
| Inner Radiation Shield | Protects framing from radiant heat of the flue pipe | Required clearance component |
| Attic Insulation Shield | Prevents insulation contact with pipe | Installed above the support box |
| Firestop Spacer | Maintains clearance at floor and ceiling penetrations | Required at every level penetration |
| Trim Collar / Finish Ring | Covers gap between box and ceiling finish material | Interior aesthetic finish |
| Pipe Length Sections | Double-wall insulated flue pipe sections | Must be same brand as support box |
| Roof Support Assembly | Supports pipe above roof deck | Separate from ceiling support |
Every component in this list must come from the same listed system.
Mixing components from different manufacturers, even if they appear dimensionally compatible, violates the terms of the UL listing and creates a non-code-compliant installation that inspectors will flag and require removal.
Understanding Pitch Requirements for Cathedral Ceiling Installation
Cathedral ceilings present a pitch variable that flat ceiling installations do not have to address. The Supervent cathedral ceiling support box is available to accommodate different roof and ceiling pitch ranges, and selecting the correct version for your specific pitch is one of the first decisions that must be made correctly.
Measuring Your Ceiling Pitch
Ceiling pitch is expressed as the rise over run, meaning how many inches the ceiling rises vertically for every 12 inches it extends horizontally. A 4/12 pitch rises 4 inches per foot of horizontal run, while a 12/12 pitch is a 45-degree angle.
To measure your cathedral ceiling pitch accurately, hold a level horizontally against the ceiling surface, measure 12 inches along the level from the wall, and then measure straight down from that 12-inch mark to the ceiling surface below it.
That vertical measurement is your pitch number. Getting this measurement right before ordering the support box is essential because the box must align with the ceiling angle to sit flush and frame the pipe opening correctly.
Matching the Box to the Pitch Range
Supervent cathedral ceiling support boxes are manufactured in pitch ranges rather than individual pitch values because a single box designed for a specific range can accommodate any pitch within that window.
Common pitch range groupings include 0/12 to 6/12 for shallower slopes and 7/12 to 12/12 for steeper ones, though the specific ranges available depend on the pipe diameter being used.
Always confirm the pitch range stamped on the box matches your measured ceiling pitch before beginning any cutting or framing work.
Pre-Installation Planning and Code Requirements
Cathedral ceiling support box installation Supervent work must comply with several overlapping code frameworks that apply simultaneously. Understanding these requirements before cutting a single hole prevents costly mistakes that require rework.
Clearance Requirements
The Supervent system, like all UL-listed double-wall insulated flue systems, requires a minimum clearance of 2 inches from the outer wall of the pipe to any combustible material, including wood framing, insulation batts, and ceiling finish material made from wood-based products.
This clearance must be maintained at every point where the pipe is within or passing through the cathedral ceiling assembly.
The support box itself is designed to create and maintain this clearance automatically when installed correctly, which is one of the primary engineering purposes it serves.
Building Permit Requirements
Most jurisdictions require a building permit for any installation involving a new flue pipe passing through a ceiling and roof assembly, even when the work is performed by a licensed contractor. Some jurisdictions also require a separate mechanical permit for the appliance being connected to the vent system.
Pull the required permits before starting work. Installing a chimney or venting system without permits creates disclosure obligations when selling the home and can result in a required removal and reinstallation if discovered during a real estate transaction or insurance inspection.
Step-by-Step Cathedral Ceiling Support Box Installation Supervent Process
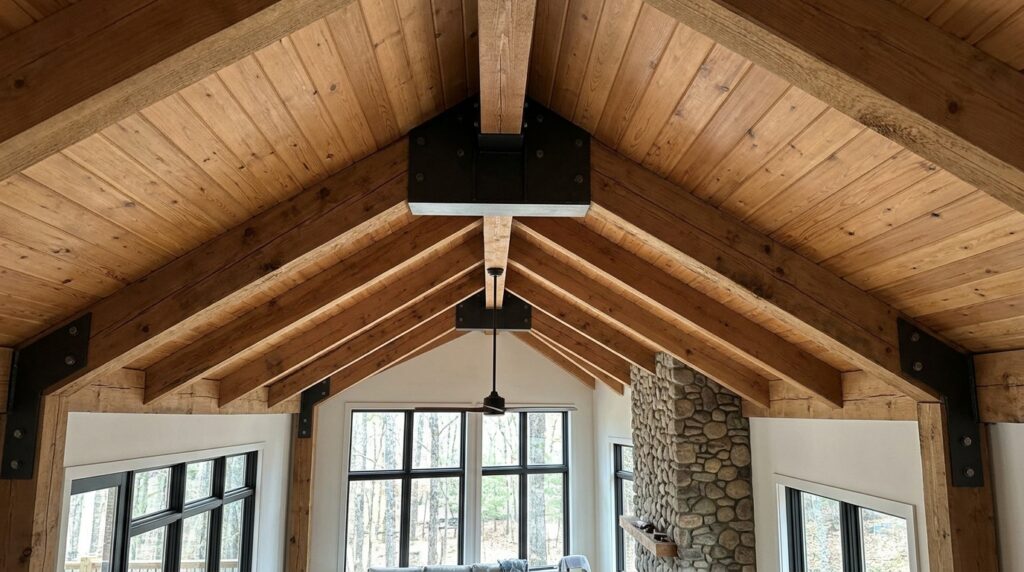
The installation sequence for a Supervent cathedral ceiling support box follows a specific order that ensures structural integrity, code compliance, and a clean finished appearance.
Step 1: Determine pipe centerline location. Starting from the appliance below, use a plumb bob or laser level to project the pipe centerline upward through the cathedral ceiling to establish exactly where the hole needs to be cut. Mark this location on the ceiling finish material clearly before making any cuts.
Step 2: Calculate hole size. The opening through the cathedral ceiling must accommodate the outer diameter of the support box plus the framing that will surround it. Refer to the Supervent installation manual for your pipe diameter to get the exact rough opening dimensions required for the specific support box being used.
Step 3: Cut the ceiling opening. Using a reciprocating saw or jigsaw, cut the rough opening through the ceiling finish material at the marked location. Cut at the angle of the ceiling pitch rather than perpendicular to the floor so the opening aligns cleanly with the box.
Step 4: Frame the rough opening. Install double headers and trimmer framing around the cut opening using dimensional lumber sized to match the existing ceiling framing. This framing carries the load of the support box and the pipe sections above it and must be secured properly to adjacent rafters with structural fasteners.
Step 5: Install the inner radiation shield. The inner radiation shield attaches to the support box before the box is placed into the framed opening. Follow the Supervent installation instructions for the specific attachment method, as this component is critical to maintaining the fire-rated assembly.
Step 6: Set the support box into the framed opening. Lower the support box into the framed opening from above, or place it from below depending on accessibility. The box should sit flush with the ceiling finish material on its lower face and extend into the framing cavity at the correct pitch angle. Secure the box to the framing using the fastener locations provided on the box flanges.
Step 7: Install the attic insulation shield. Above the support box, install the attic insulation shield around the pipe to prevent insulation from contacting the pipe as it continues through the attic space toward the roof. This shield must extend the full required height above the box top.
Step 8: Connect pipe sections through the box. Thread the appropriate Supervent pipe sections up through the support box from below, locking each section according to the Supervent twist-lock or pressure-fit connection method. The pipe joint should not fall within the depth of the support box itself. Position joints either below or well above the box.
Step 9: Install the trim collar. On the interior ceiling surface, attach the trim collar or finish ring around the perimeter of the support box opening to cover any gap between the box edge and the ceiling finish material and to provide a clean finished appearance in the room below.
Step 10: Continue pipe installation to roof. Continue adding pipe sections through the attic, install a roof support assembly at the roof deck penetration, and complete the installation with the appropriate rain cap or storm collar at the roof termination point.
Common Mistakes in Cathedral Ceiling Support Box Installation
Several errors appear repeatedly in cathedral ceiling support box Supervent installations, and each one creates either a safety problem, a code violation, or both.
- Cutting the ceiling opening square instead of at pitch angle — This leaves gaps around the support box that are difficult to seal and finish properly.
- Using undersized framing around the box — Single headers instead of doubled headers lack the structural capacity to support the pipe assembly long-term.
- Mixing pipe brands within the same system — Even visually similar pipe sections from different manufacturers cannot legally be combined in a single UL-listed installation.
- Placing a pipe joint inside the support box — Joints must fall outside the box, either below the ceiling or above it in the attic, never within the box depth.
- Omitting the radiation shield — This component is not optional. Its absence makes the installation non-compliant regardless of clearance measurements.
- Failing to secure the box to framing — An unsecured support box can shift over time as the structure moves seasonally, potentially compromising pipe alignment and clearance.
Cost Estimate for Cathedral Ceiling Support Box Installation Supervent
| Cost Item | Estimated Range |
| Supervent Cathedral Support Box (materials) | $150 – $350 |
| Attic Insulation Shield | $40 – $80 |
| Radiation Shield | Included or $30 – $60 |
| Trim Collar / Finish Ring | $25 – $60 |
| Framing Lumber for Rough Opening | $50 – $150 |
| Professional Labor (ceiling portion only) | $300 – $700 |
| Building Permit | $100 – $400 |
| Total Estimated Range | $665 – $1,800 |
These figures cover the cathedral ceiling support box portion of a venting installation only. The complete flue system from appliance to roof cap will add considerably to the total depending on the height of the run and the number of pipe sections required.
Frequently Asked Questions
Can I use a flat ceiling support box in a cathedral ceiling?
No. A flat ceiling support box is designed to sit level and square, which means it cannot properly align with or seal against an angled cathedral ceiling surface. Using the wrong box creates gaps, compromises required clearances, and produces a non-code-compliant installation that an inspector will require to be removed and replaced.
What pipe diameter does the Supervent cathedral ceiling support box accommodate?
Supervent cathedral ceiling support boxes are available for common residential flue pipe diameters including 6 inch, 7 inch, 8 inch, and larger sizes. Always match the support box to the specific pipe diameter of your Supervent system, and confirm both are the same nominal diameter before ordering materials.
Do I need a professional for cathedral ceiling support box installation?
While an experienced DIYer with solid carpentry skills can manage the framing and component installation, many jurisdictions require licensed contractors for permitted chimney and venting work.
Additionally, the consequences of an incorrectly installed flue system are severe enough that professional installation is strongly recommended for any homeowner who has not done this type of work before.
How do I know if my cathedral ceiling support box installation passes inspection?
An inspector will check that the box is UL-listed and matches the pipe system brand, that required clearances are maintained at all points, that framing is properly doubled around the opening, that the radiation shield and insulation shield are correctly installed, and that the pipe joints do not fall within the box depth. Having the Supervent installation manual on-site during inspection demonstrates that you followed manufacturer instructions, which supports approval.
Conclusion
Cathedral ceiling support box installation using the Supervent system is a precise, code-governed process where every component, clearance measurement, and installation sequence detail matters.
The support box exists specifically to solve the geometric and fire safety challenges that an angled ceiling creates for a passing flue pipe, and the Supervent system provides a UL-listed, manufacturer-engineered solution that meets those challenges when installed correctly. Getting the pitch measurement right before ordering, framing the opening properly, using only matched system components, and pulling the required permits are the four decisions that most determine whether the finished installation is safe, durable, and approved.
When in doubt, engaging a licensed chimney professional for this specific portion of the project is always the right call.
Related Articles
Steel vs Fiberglass Door: Which One Should You Choose?
Window with J-Channel: A Complete Homeowner’s Guide
How Do You Hang Wall Cabinets? A Complete Step-by-Step Guide
How to Measure Windows for Curtains (Step-by-Step Guide)
Best Primer for Painting Kitchen Cabinets – Complete Easy Guide for Smooth & Durable Cabinets