Many homeowners want the durability of metal roofing without the mess and expense of a full tear-off, and installing metal panels directly over existing shingles is one way to get there.
This guide walks through the entire process in plain language, from checking whether your roof qualifies to the final flashing details that keep water out for good.
Can You Install Metal Roofing Over Shingles?
In most cases, yes, metal roofing can be installed over an existing shingle layer as long as local codes allow it and the roof underneath is in solid condition.
The real question is not whether it is possible, but whether your specific roof is a good candidate for this approach.
When This Method Works Best
This approach works best when the existing shingles are flat, securely attached, and free from major curling, cracking, or moisture damage.
It is also a stronger option when there is only one layer of shingles already on the roof, since most codes cap the total number of layers allowed. A solid, dry roof deck underneath the shingles is just as important as the condition of the shingles themselves.
When You Should Avoid It
If the current roof has active leaks, soft or spongy decking, mold, or more than one layer of shingles already in place, covering it with metal is risky rather than practical.
Hidden problems do not disappear once they are covered, and trapping moisture under a new metal layer can quietly make existing damage worse over time. In these situations, a full tear-off is almost always the safer long-term choice.
Why Building Codes Matter
Local building departments often set limits on how many roofing layers a structure can carry, and some regions require a full tear-off regardless of shingle condition. Codes may also dictate specific underlayment types, fastening patterns, or ventilation requirements for an overlay installation.
Checking with a local building office or licensed contractor before starting avoids costly rework or failed inspections later.
Tools and Materials You Will Need
A successful overlay installation depends on having the right tools and materials lined up before work begins. Missing even one item, like the correct fastener type, can compromise the entire roof system.
Essential Tools for the Job
Standard tools for this project include a chalk line, tape measure, metal snips or a panel cutter, a screw gun with the correct driver bit, and a pry bar for removing loose nails or ridge caps. Safety equipment such as roof harnesses, non-slip footwear, and ladder stabilizers is just as important, since metal panels can be slippery and sharp along cut edges.
Many installers also use a seamer tool when working with standing seam panel systems.
Materials Checklist
Beyond the panels themselves, a complete overlay project needs underlayment, furring strips or battens, specialized metal roofing screws, flashing, and ridge cap pieces. The table below outlines the core materials typically required for this type of installation.
| Material | Purpose |
| Synthetic or felt underlayment | Moisture barrier between shingles and metal |
| Furring strips or battens | Create airflow and a flat fastening surface |
| Metal roofing panels | Main roofing material |
| Gasketed metal screws | Secure panels while sealing screw holes |
| Flashing | Seals edges, valleys, and roof penetrations |
| Ridge cap panels | Finishes the roof peak and blocks water entry |
Step-by-Step Process to Install Metal Roofing Over Shingles
Once the roof has passed inspection and materials are ready, the installation itself follows a fairly consistent sequence. Skipping or rushing any step here is where most long-term problems start.
Step 1: Inspect and Prepare the Old Roof
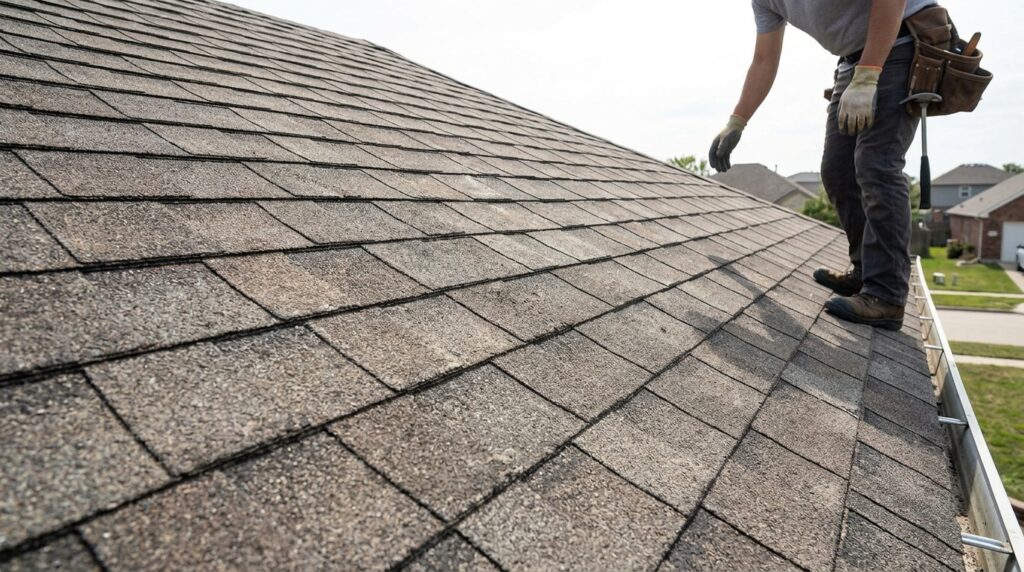
Begin by checking every section of the existing shingles, replacing any that are cracked, curled, or missing so the surface is as flat and secure as possible. Loose nails, broken ridge caps, and debris should be removed completely, especially around chimneys, vents, and valleys where moisture tends to collect.
Any soft spots found while walking the roof should be addressed before moving forward, since this is the only point where deck issues can still be caught.
Step 2: Install Underlayment
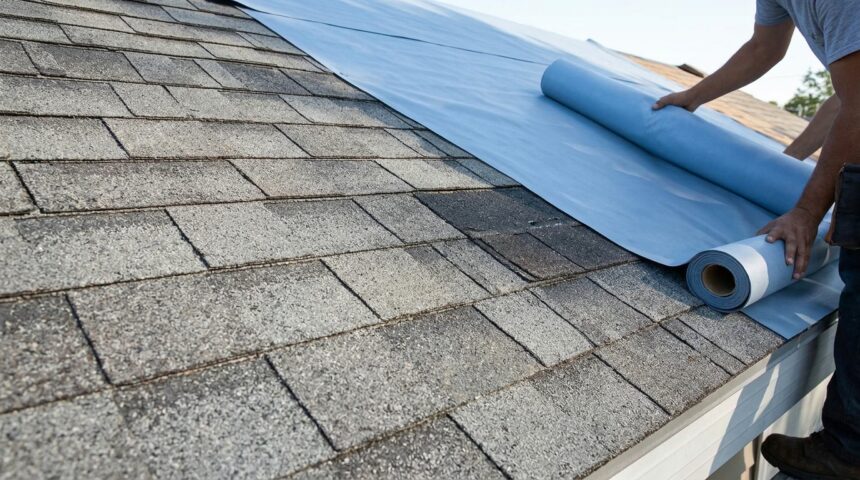
A layer of underlayment goes directly over the prepared shingles to create a moisture barrier between the old roof and the new metal panels.
High-temperature ice and water shield is often used in valleys, eaves, and other vulnerable areas where leaks are most likely to start. This layer also helps smooth out minor surface inconsistencies before the metal goes on.
Step 3: Add Furring Strips for Ventilation
Furring strips, sometimes called battens, are installed in evenly spaced rows across the roof to create a flat, stable surface and a small air gap beneath the panels.
This gap allows airflow underneath the metal, which helps prevent condensation and reduces heat buildup during warmer months. Spacing between strips depends on the specific metal panel system being installed, so manufacturer guidelines should be followed closely.
Step 4: Install the Metal Panels
Panels are measured, cut to size, and fastened starting from one edge of the roof, working systematically across each section to keep seams aligned. Gasketed screws are driven through the panels into the furring strips at manufacturer-specified intervals to create a secure, weather-tight hold.
Overlapping panels correctly at each seam is critical, since improper overlap is one of the most common causes of leaks in metal roofing.
Step 5: Finish With Flashing and Ridge Caps
Flashing is installed around chimneys, skylights, vent pipes, and roof valleys to seal every point where water could otherwise find a way in. Ridge cap panels are added last along the peak of the roof, locking the entire system together and giving the roof its finished appearance. A final walk-through inspection at this stage helps catch any loose fasteners or gaps before the project is considered complete.
Benefits of Choosing This Method
Installing metal over an existing shingle roof offers several practical advantages beyond simply skipping demolition. These benefits are a major reason this method has grown in popularity in recent years.
Lower Cost and Faster Timeline
Skipping tear-off removes a significant portion of labor and disposal costs, since old shingle removal alone can account for a large share of total project expenses. Most overlay projects also finish faster than full replacements, often within a matter of days rather than a week or more. This shorter timeline means less disruption for households during the work.
Extra Insulation and Sound Dampening
Leaving the old shingle layer in place adds an additional barrier between the metal panels and the living space below, which can slightly improve insulation. This extra layer can also help dampen the sound of rain or hail hitting the metal surface compared to a bare deck installation. Over time, this added thermal layer may contribute to small reductions in heating and cooling costs.
Less Landfill Waste
Avoiding tear-off means the old shingles stay out of a landfill, which appeals to homeowners looking for a more environmentally responsible renovation option.
A typical full tear-off can generate several tons of waste material per home, all of which is avoided with an overlay approach. Many metal roofing materials are also recyclable at the end of their own lifespan, adding to the long-term environmental benefit.
Risks to Keep in Mind
While this method has clear advantages, it also comes with trade-offs that should be considered honestly before committing to the project. Ignoring these risks is where most overlay installations run into trouble later.
Hidden Deck Problems
Because the shingles stay in place, there is no opportunity to directly inspect the wood decking underneath for rot or water damage. Any existing structural issues remain hidden until they eventually surface, often as a much costlier repair down the road. This is the single biggest risk homeowners take on with this installation method.
Added Roof Weight
Although metal panels are lighter than many other roofing materials, layering them over existing shingles still adds extra weight to the overall structure. A structural assessment is worth requesting before installation, particularly on older homes or roofs that already carry more than one material layer. Ignoring this step can lead to long-term stress on the roof framing.
Surface Bumps Showing Through
Shingles that have curled, lifted, or worn unevenly can create small bumps that become visible through the metal panels once installed. This is especially noticeable with sleek, flat panel styles where a smooth finish is part of the appeal. Proper furring strip installation helps minimize this issue, but it cannot always eliminate it completely on an uneven base.
Frequently Asked Questions
Do I need underlayment if shingles are already in place?
Yes, a dedicated underlayment layer is still required, since old shingles do not provide the correct moisture barrier that a metal roof system needs.
How many roofing layers does code typically allow?
Most jurisdictions cap roofs at two layers total, so a roof with one existing shingle layer is usually still eligible for a metal overlay.
Is this a good DIY project for homeowners?
This project is generally best left to licensed professionals, since proper fastening, flashing, and ventilation details require specialized roofing experience.
Does installing metal over shingles void any warranties?
It can, depending on the metal panel manufacturer, so installation requirements should always be confirmed before starting to keep warranty coverage intact.
How long does this type of installation usually take?
A typical residential project takes between three and seven days, depending on roof size, complexity, and weather conditions during installation.
Conclusion
Installing metal roofing over shingles can be a practical, cost-saving upgrade when the existing roof is in good condition and local codes allow it.
The process still demands careful inspection, proper underlayment, and correct fastening to perform well for decades. Weighing the benefits against the risks honestly, ideally with a qualified roofing professional, is the best way to decide if this method is right for your home.
Related Articles
Standard Shower Curtain Size: Complete Guide to Sizes, Types & Measurements
Basement Floor Drainage System: Complete Guide
Laundry Room Cabinets: The Complete Guide to Storage, Style, and Smart Organization
Complete Guide to Roof Ventilation for Metal Roofs: Types, Benefits, Installation & Maintenance