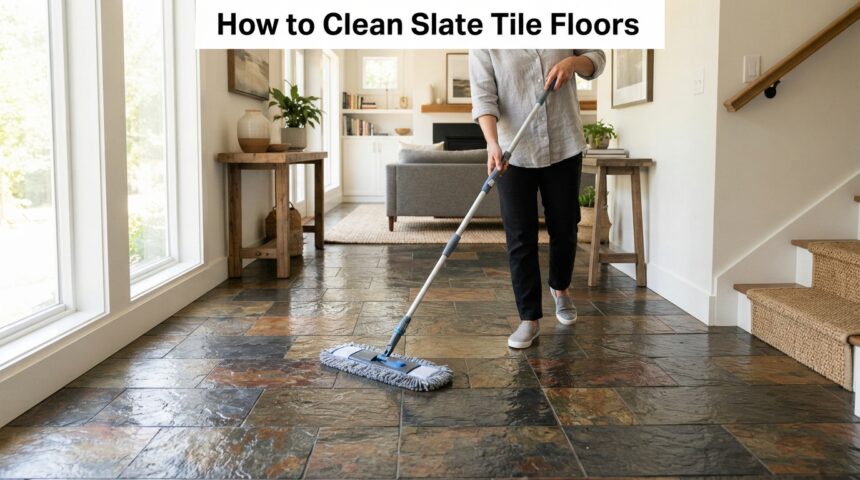
Slate tile floors bring a natural, earthy elegance to any home, but they also demand a cleaning routine that respects their porous, layered structure. Learning how to clean slate tile floors properly means understanding which products are safe, how often to seal the surface, and how to handle spills before they turn into stains.
This guide walks through every stage of slate care in simple, practical language, from basic upkeep to deep cleaning and long-term maintenance, so your floors stay durable and attractive for years to come.
Understanding Slate Tile Flooring
Before jumping into cleaning steps, it helps to know what makes slate unique compared to other tile materials. Its natural texture and mineral composition directly affect how it should be washed, sealed, and protected from damage.
What Makes Slate Different From Other Tile
Unlike ceramic or porcelain, slate is a natural metamorphic stone formed from compressed layers of clay and minerals. This layered structure gives it a distinctive textured surface, but it also makes it more porous and prone to absorbing liquids. Because of this, slate cannot be treated with the same generic cleaning products used on manufactured tile.
Natural Characteristics of Slate
Slate’s surface is often uneven, with a slightly rippled or “cleft” texture that traps dust, grit, and moisture more easily than flat tile. This same texture is what gives slate its rustic charm, but it also means dirt can settle into small grooves. Regular attention to these tiny crevices prevents buildup from becoming a bigger cleaning problem later.
Honed vs Natural Cleft Slate
Honed slate has a smoother, machine-polished finish, while natural cleft slate retains its rugged, split-face texture straight from the quarry. Honed surfaces are easier to wipe clean since dirt has fewer places to hide, whereas cleft slate needs more thorough sweeping and occasional brushing. Knowing which type you have helps you choose the right tools and cleaning frequency.
Why Slate Is Prone to Scratching Staining and Etching
Because slate is a softer natural stone, sharp debris like sand or gravel can scratch its surface if not swept away regularly.
Acidic substances such as vinegar, citrus juice, or harsh chemical cleaners can eat into the stone’s finish, causing dull spots called etching. Understanding these vulnerabilities is the first step toward a cleaning routine that actually protects your investment instead of slowly wearing it down.
Daily and Weekly Maintenance
Routine upkeep is the single most effective way to keep slate floors looking good between deep cleans. A few simple habits, repeated consistently, prevent dirt and grit from ever becoming a serious problem.
Sweeping and Dry Dusting
Sweeping with a soft-bristle broom removes loose dirt and grit before it gets ground into the stone’s surface by foot traffic. This should ideally happen daily in high-traffic areas like entryways and kitchens. A dry microfiber dust mop works well for larger rooms where sweeping every corner isn’t practical.
Vacuuming Tips
When vacuuming slate, always use the brush attachment and avoid the rotating beater bar, which can scratch the textured surface. Vacuuming is particularly useful for cleft slate, where grit tends to settle into the natural grooves. Doing this once or twice a week keeps embedded dust from building up over time.
Handling Spills Immediately
Any spill, whether it’s coffee, wine, or cooking oil, should be blotted immediately with a clean cloth rather than wiped or rubbed. Rubbing can push the liquid deeper into the porous stone, making a future stain harder to remove. Quick action here is one of the simplest ways to protect the sealant and prevent discoloration.
Doormats and Area Rugs
Placing doormats at every entry point significantly reduces the amount of sand, dirt, and small stones tracked onto slate floors. Area rugs in high-traffic zones like hallways or in front of kitchen sinks offer similar protection. These small additions reduce how often deep cleaning or resealing is needed.
Step-by-Step Deep Cleaning Process
Once loose dirt is cleared through regular maintenance, a deeper clean restores the floor’s natural shine and removes any residue that daily sweeping misses. This process should be repeated on a weekly or biweekly basis depending on foot traffic.
Step 1 Pre Sweep or Vacuum
Always start deep cleaning with a thorough sweep or vacuum session to remove loose grit. Skipping this step means dragging dirt around with a wet mop, which can scratch the surface instead of cleaning it. This preparation stage takes just a few minutes but makes a noticeable difference in the final result.
Step 2 Prepare the Cleaning Solution
Mix a pH-neutral stone cleaner with warm water according to the product’s label instructions, or use a few drops of mild dish soap in a bucket of warm water. Avoid making the solution too concentrated, since excess soap residue can leave a cloudy film on the stone. A balanced mixture cleans effectively without leaving behind buildup.
Step 3 Mopping Technique
Dip a microfiber mop into the solution and wring it out well, since slate should be cleaned with a damp mop rather than a soaking wet one. Excess water can seep into grout lines and beneath the sealant, potentially causing long-term damage. Working in small sections allows better control over moisture levels across the floor.
Step 4 Scrubbing Tough Spots
For stubborn marks, a soft-bristle brush dipped in the cleaning solution can be used with gentle circular motions. Applying too much pressure or using a stiff-bristled brush risks scratching the stone, so a light touch is always best. Patience during this step usually removes marks without needing harsher chemicals.
Step 5 Rinsing Thoroughly
After cleaning, rinse the mop with clean water and go over the floor again to remove any leftover soap or cleaner residue. Skipping this rinse can leave a dull, sticky film that attracts dust faster. A second pass with plain water ensures the floor dries clean and streak-free.
Step 6 Drying and Buffing
Dry the floor with a clean, soft towel or allow it to air dry in a well-ventilated room to prevent water spots. For an extra shine, buffing gently with a dry microfiber cloth after the floor dries brings out the stone’s natural color. This final step gives the floor a polished, well-maintained appearance.
Recommended Cleaning Frequency
Light sweeping should happen daily, damp mopping once or twice a week, and a more thorough deep clean roughly once a month depending on how much foot traffic the area receives. Bathrooms and kitchens, which see more moisture and spills, may need slightly more frequent attention. Adjusting this schedule to your household’s specific needs keeps the floor consistently clean without over-washing it.
Removing Common Stains
Even with regular maintenance, certain stains are common on slate floors due to their porous nature. Knowing the right approach for each type prevents unnecessary scrubbing or damage.
Grease and Oil Stains
Grease stains respond well to a paste made from baking soda and a small amount of water, applied directly to the spot and left for a few minutes before gentle scrubbing. This mild abrasive lifts oil without harming the stone’s sealant. Rinsing thoroughly afterward prevents any residue from attracting more dirt.
Food and Drink Spills
Coffee, wine, and juice spills should be blotted immediately, then cleaned with a diluted stone-safe cleaner if any discoloration remains. Letting these spills sit is what typically causes a permanent stain, not the liquid itself. Prompt attention almost always prevents the need for more aggressive stain removal later.
Hard Water Stains
Hard water marks, often seen near sinks or in bathrooms, can usually be softened with a stone-safe cleaner specifically formulated for mineral deposits. Regular wiping of wet areas after use significantly reduces how often these stains appear. Persistent marks may require a professional-grade stone cleaner for full removal.
Mold and Mildew
In damp areas like bathrooms, mold and mildew can develop in grout lines or on the slate itself if moisture lingers too long. A solution designed for natural stone, combined with good ventilation, helps control this growth. Keeping the area dry after each use is the most effective long-term prevention method.
Efflorescence White Mineral Deposits
Efflorescence appears as a white, powdery residue caused by mineral salts rising to the stone’s surface, often after installation or in humid conditions. Dry brushing usually removes it, since wiping with water can temporarily reactivate the salts. If it keeps returning, checking for underlying moisture issues beneath the tile is worthwhile.
Sealing Slate Tile Floors
Sealing is one of the most important parts of maintaining slate, since the stone’s natural porosity makes it vulnerable to stains and moisture without a protective layer. A properly sealed floor is also noticeably easier to clean on a daily basis.
Why Sealing Matters
A good sealant fills the microscopic pores in slate, creating a barrier that keeps liquids from soaking in and causing stains. Without this layer, even routine spills can leave lasting marks. Sealing essentially works hand in hand with regular cleaning to keep the floor protected from within.
Testing If Your Slate Needs Resealing
A simple water droplet test can reveal whether your sealant is still effective. If water beads up on the surface, the seal is intact, but if it soaks in and darkens the stone within a few minutes, it’s time to reseal. Performing this check every few months helps you stay ahead of potential damage.
Step by Step Sealing Process
Begin by thoroughly cleaning and completely drying the floor, since sealant applied over dirt or moisture won’t bond properly. Apply the sealer evenly with a clean applicator pad, following the product’s specific instructions for coverage and drying time. Most sealants require a second coat after the first has cured for full protection.
Choosing the Right Sealer
Penetrating sealers soak into the stone and offer a natural, matte finish, while topical sealers sit on the surface and often add more shine. Penetrating sealers tend to be more breathable and better suited for slate exposed to moisture. Choosing based on your desired look and the floor’s location makes a noticeable difference in long-term performance.
How Often to Reseal
Most slate floors need resealing every one to two years, though high-traffic or frequently wet areas may require more frequent attention. Checking with the water droplet test periodically is more reliable than relying on a fixed schedule alone. Timely resealing is one of the easiest ways to prevent deep staining.
Restoring Shine and Finish
Over time, even well-maintained slate can start to look dull from daily wear. A few targeted techniques can bring back its original luster without needing a full renovation.
Buffing Techniques
Buffing with a dry, soft microfiber cloth after cleaning helps restore a natural shine by smoothing out minor surface residue. This simple step, done regularly, keeps the stone looking cared for between deeper treatments. It requires no special products, just consistent effort.
Using Slate Safe Polish
Occasionally, a polish made specifically for natural stone can enhance shine and add a layer of protection. These products should always be tested in a small area first, since not all slate finishes react the same way. Overusing polish can create a buildup, so moderation is key.
Dealing With Dull or Worn Areas
Dull patches often result from either sealant wear or accumulated cleaning residue rather than actual damage to the stone. Re-cleaning the area thoroughly and checking the sealant condition usually resolves the issue. In cases of genuine wear, professional refinishing may be the better long-term solution.
Common Mistakes to Avoid
Certain habits, even well-intentioned ones, can slowly damage slate floors over time. Recognizing these mistakes early helps protect the stone’s finish and lifespan.
Using Acidic or Abrasive Cleaners
As mentioned earlier, vinegar and similar acidic products break down sealant and etch the stone’s surface with repeated use. Abrasive scrubbing pads cause similar long-term harm through scratching. Sticking strictly to stone-safe products avoids this issue entirely.
Over Wetting the Floor
Using too much water during mopping allows moisture to seep beneath tiles and into grout lines, potentially weakening the adhesive over time. A well-wrung, barely damp mop is always sufficient for slate. This small adjustment protects both the stone and the surface beneath it.
Skipping Sealant Maintenance
Neglecting to reseal on schedule leaves slate vulnerable to staining, even if the daily cleaning routine is otherwise excellent. Sealant maintenance and cleaning routines work together, not separately. Skipping one undermines the effectiveness of the other.
Using Steam Mops
Steam mops introduce both heat and excess moisture, which can degrade sealant and push water into grout lines over time. While they seem convenient, they aren’t recommended for natural stone like slate. A traditional damp mop remains the safer choice.
Ignoring Grout Lines
Grout between slate tiles can trap dirt and moisture just as easily as the stone itself, yet it’s often overlooked during cleaning. Neglected grout lines can also become a source of mold growth. Including grout in every cleaning session keeps the entire floor consistently maintained.
Cleaning Slate in High Moisture Areas
Bathrooms, kitchens, and outdoor spaces present unique challenges for slate maintenance due to consistent exposure to water and humidity. Adjusting your routine for these specific areas helps prevent long-term issues.
Bathrooms and Kitchens
These rooms benefit from more frequent wiping to remove standing water and reduce the risk of mold or mineral buildup. Ensuring good ventilation, such as running an exhaust fan, also helps the floor dry faster after use. Extra attention here pays off in fewer stains and less frequent resealing.
Outdoor Slate Patios or Entryways
Outdoor slate faces additional exposure to rain, dirt, and temperature changes, which can accelerate wear if left unaddressed. Regular sweeping and periodic rinsing with a hose, followed by proper drying, keeps outdoor surfaces in good condition. A weatherproof sealant designed for exterior use is essential in these spaces.
Preventing Mold in Humid Climates
In naturally humid regions, mold prevention requires consistent airflow and prompt drying after any cleaning or spill. Using a dehumidifier in enclosed spaces like bathrooms can make a noticeable difference. Combined with regular cleaning, this reduces the chances of persistent mold problems.
Grout Care for Slate Tile
Grout lines require their own attention separate from the slate tiles themselves, since they’re made of a different, often more porous material. Proper grout care rounds out a complete slate maintenance routine.
Cleaning Grout Lines Safely
A soft brush and a stone-safe cleaner work well for grout, applied with light pressure to avoid pulling grout out of the joints. Baking soda paste can also help lift dirt from grout without harsh chemicals. Regular attention prevents grout from becoming visibly darker than the surrounding tile.
Resealing Grout
Grout benefits from its own sealant, applied separately from the tile sealer, typically on a similar one-to-two-year schedule. This keeps moisture and stains from settling into the more absorbent grout material. Checking both the tile and grout seal together makes the process more efficient.
Preventing Discoloration
Consistent cleaning combined with proper sealing is the best defense against grout discoloration over time. Addressing spills quickly, just as with the slate itself, prevents grout from absorbing stains in the first place. A little consistency here goes a long way toward a uniformly clean appearance.
Seasonal and Long Term Care Tips
Beyond weekly routines, a seasonal approach to slate care ensures nothing gets overlooked throughout the year. This broader view helps maintain the floor’s condition over its entire lifespan.
Seasonal Deep Cleaning Checklist
Each season, it’s worth doing a more thorough inspection that includes checking sealant condition, cleaning grout lines, and addressing any small stains before they set in. Adjusting cleaning frequency for seasonal changes, like more foot traffic in winter, also helps. This periodic check prevents small issues from becoming bigger projects.
Protecting Slate During Renovations or Furniture Moving
Heavy furniture or renovation equipment can scratch or chip slate if moved carelessly across the floor. Using furniture pads and protective coverings during any major household project prevents accidental damage. A little preparation beforehand saves significant repair effort later.
Signs It Is Time to Call a Professional
Deep, persistent stains, visible chips, or sealant that no longer holds after multiple reapplications are signs that professional help may be needed. A stone restoration specialist has access to equipment and products beyond typical household options. Recognizing these signs early prevents further deterioration.
DIY vs Professional Cleaning
Deciding between doing the work yourself and hiring a professional depends on the floor’s condition, size, and how much time you’re willing to invest. Both approaches have their place depending on the situation.
When DIY Cleaning Is Enough
For routine maintenance and minor stains, the steps outlined in this guide are typically all that’s needed to keep slate in good condition. Most households can manage sweeping, mopping, and occasional sealing without outside help. DIY care is generally sufficient as long as it’s done consistently.
When to Hire a Professional Stone Cleaning Service
Larger floors, deeply set stains, or sealant that has significantly worn down are better handled by professionals with specialized equipment. This is especially true for older slate installations that haven’t been maintained regularly. A professional assessment can also catch underlying issues before they worsen.
Cost Considerations
Professional stone cleaning and resealing services typically cost more upfront than DIY care but can extend the floor’s lifespan significantly. Weighing this cost against the time and effort of frequent DIY deep cleaning helps determine the better long-term option. For most homes, a mix of regular DIY care and occasional professional service works best.
Frequently Asked Questions
Can I use vinegar on slate tile?
No, vinegar is acidic and will gradually damage the sealant and etch the stone’s surface, so it should always be avoided on slate floors.
How often should slate floors be sealed?
Most slate floors need resealing every one to two years, though the water droplet test is a more reliable way to check timing.
Is steam cleaning safe for slate?
Steam mops are not recommended, since the combination of heat and moisture can weaken sealant and push water into grout lines over time.
Why does my slate floor look dull after cleaning?
Dullness usually comes from leftover soap residue or worn sealant rather than damage to the stone itself, and a thorough rinse often solves it.
Can I use a regular mop on slate?
soft microfiber mop is best, since regular cotton or sponge mops can hold too much water and leave streaks or residue behind.
Conclusion
Knowing how to clean slate tile floors properly comes down to a few consistent habits: gentle sweeping, pH-neutral cleaning solutions, prompt attention to spills, and regular sealant checks.
Compared to generic tile-cleaning advice found elsewhere, this guide focuses specifically on slate’s natural porosity and texture, which is often overlooked in broader flooring guides. Following these steps consistently keeps slate floors durable, stain-resistant, and naturally beautiful for years.
Related Articles
How to Lock a Garage Door: Complete Step-by-Step Guide
Why Does My Basement Smell Musty? Causes, Fixes & Prevention Guide
How Long Does Epoxy Floor Last? A Complete Lifespan Guide
Metal Roof Ridge Vent: Complete Guide 2026
Cracks in Garage Floor: Causes, Types & Complete Repair Guide