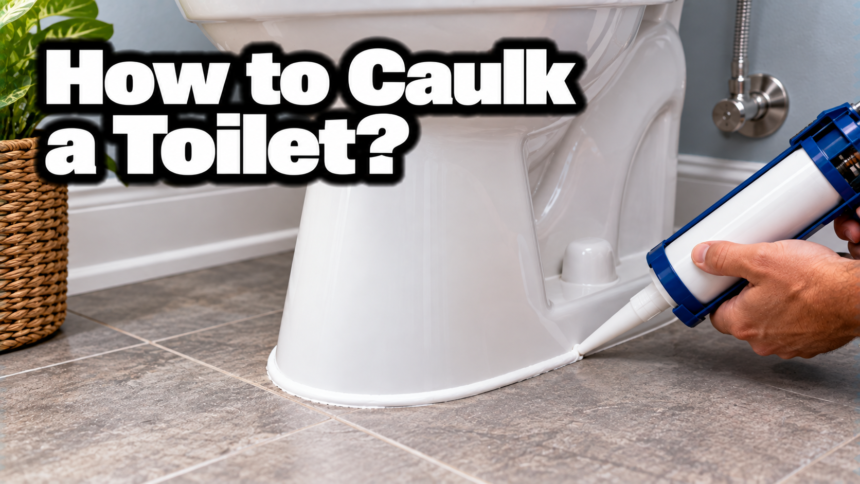
Caulking a toilet takes about 20 minutes and one tube of silicone, and it does three useful things: it stops water from seeping under the base, it keeps the toilet from rocking, and it gives the floor a clean, finished edge. The short version is simple.
Clean and dry the joint, tape both sides, lay a thin bead of 100% silicone where the toilet meets the floor, smooth it, and leave a small opening at the back. Then wait a full day before you use it. Here is the whole job, done the way that passes a plumbing inspection and still lets you catch a leak early.
Why caulk around a toilet?
Caulk seals the gap where the base meets the floor and locks the toilet in place. That gap is a water trap. Every time you mop, splash in the shower, or the bowl overflows a little, water runs under the base and sits there in the dark. Over months it can rot a wood subfloor, loosen tile, and grow mold you never see.
There is a code reason too. The International Plumbing Code, in section 405.5, says any fixture that sits on the floor has to be sealed to it. Most local codes follow this, so a bead of caulk around the base is not just for looks. It is usually needed to pass inspection.
Hidden water is the part that costs money. A leak under the base does not show up on the surface, so it keeps going until the damage is done. By then you are looking at a new subfloor and fresh tile, not a two-dollar tube of caulk. A home inspector will also flag an uncaulked toilet, so sealing it now saves a headache at resale.
Caulk also stops the toilet from rocking, and that matters more than it sounds. A toilet that shifts even slightly grinds on the wax ring underneath, and a cracked wax ring is what turns into a real leak. A firm bead of silicone holds the base steady between the two floor bolts. It also seals out the trapped water and odor that build up in an open gap, which is a real win for a bathroom that never quite smells clean. For a fuller look at why sealing matters, Oatey covers the reasoning here.
What you need?
You can do this with a short list of cheap tools, and most of them are probably already in the house.
- 100% silicone caulk, or a silicone caulk labeled for kitchen and bath, in white or clear (one tube is plenty)
- A caulk gun
- A utility knife and a plastic putty knife or scraper for the old caulk
- Painter’s tape
- Rubbing alcohol or a bathroom cleaner, plus a few rags
- Paper towels and a small cup of water
- Disposable gloves
A caulk-finishing tool gives a slightly neater line, but a wet gloved finger works just as well. The rubbing alcohol matters more than it looks: it cuts the soap film and grease that stop new silicone from sticking.
Do you need to remove the toilet first?
No, not for a normal reseal. If you are just caulking around the base for the first time or replacing an old, cracked bead, you caulk it in place and never touch the bolts. The job stays on the outside.
You only pull the toilet if the problem is deeper: the wax ring is leaking, the toilet still rocks after the bolts are snug, or the floor under it feels soft. In those cases caulk is not the fix on its own, and you replace the wax ring while the toilet is off. If the toilet is solid and dry, skip all that and just caulk.
Should you leave a gap at the back?
Yes. Seal the front and both sides, and leave a gap of about 1 to 2 inches at the very back, where nobody sees it. The reason comes down to how toilets fail. The wax ring under the toilet is the part that gives out first, and when it leaks, the water needs somewhere to go so you can spot it.
If you seal the base all the way around, a slow wax-ring leak stays trapped under the toilet and quietly ruins the floor for months before you notice. The rear gap gives that water a way out onto the floor, where you will see it in a day or two. The front and sides still get their bead, so you keep both the finished look and the seal the code asks for. This one small gap is the difference between catching a leak fast and pulling up rotten floorboards a year later.
Tip: Leave a 1 to 2 inch gap at the back of the toilet. If the wax ring ever leaks, water shows on the floor instead of hiding under the base.
How much caulk and how to prep the room?
One 10-ounce tube is more than enough for a single toilet, with plenty left over. A standard base needs only a thin bead around three sides, so you will use a fraction of the tube. Buy one tube and keep the rest capped for the next reseal.
Before you start, clear the floor around the toilet and lay down a couple of old towels or a sheet of newspaper to catch drips. Have your paper towels and cup of water within reach, because once the bead is down you want to smooth it before it skins over. Good light helps too, so turn on the bright light or bring in a lamp.
How to caulk a toilet? step by step
The whole job is six steps. Spend your time on the cleaning and the taping, and the bead almost lays itself.
- Remove the old caulk. If there is old caulk or grout around the base, slice it away with a utility knife and lift it out with a plastic scraper. Get every last bit. New silicone will not bond to old silicone, dirt, or soap scum, so this step decides whether the job lasts.
- Clean and dry the joint. Wipe the base and the floor line with rubbing alcohol or a bathroom cleaner, then dry it fully with a rag. Silicone needs a clean, dry surface to grab. Any moisture left in the joint weakens the bond and the caulk peels later.
- Tape both sides of the gap. Run painter’s tape on the floor and up the base of the toilet, leaving a narrow channel where the bead will sit. The tape is what gives you a straight, sharp edge instead of a smeared mess. Stop the tape short at the back so you can leave the rear gap open.
- Cut the tube and load the gun. Cut the tip at a 45 degree angle, with a small opening about the width of the gap. A smaller hole means more control and far less cleanup. Drop the tube into the gun and squeeze the trigger until caulk reaches the tip.
- Lay the bead. Hold the gun at a low angle and push it along the joint, moving at a steady pace so the caulk fills the gap in one smooth pass. Go around the front and both sides, and stop at the rear gap on each side. Do not overfill; a thin bead is stronger and cleaner than a fat one.
- Smooth it and pull the tape. Wet a gloved finger or a finishing tool and drag it once along the bead to press it in and shape it. Then peel the tape away slowly, before the caulk skins over, so the edges stay crisp. Wipe the extra off your finger onto a paper towel as you go.
Which caulk should you use?
Use 100% silicone, or a silicone caulk made for kitchens and baths. It flexes with the tiny movements of the toilet and floor, and it shrugs off constant moisture. Look for a tube that says waterproof and mold or mildew resistant. A silicone made for wet rooms is built for exactly this joint.
Skip plain acrylic latex caulk here. It is easier to smooth and you can paint it, but it shrinks, cracks, and lets water through over time in a wet spot like a toilet base. Silicone costs a dollar or two more and holds for years. For color, white blends with most toilets and floors, while clear disappears on tile with a busy pattern.
| Caulk type | Handles water | Flexes | Good for a toilet? |
| 100% silicone | Excellent | Excellent | Yes |
| Silicone kitchen & bath | Excellent | Very good | Yes |
| Acrylic latex | Poor over time | Fair | No |
How to get a smooth, clean bead?
A neat bead comes from four small habits, not from a steady hand. Cut a small hole in the tip so only a little caulk comes out at a time. Tape both edges so the line is decided by the tape, not your finger. Lay the whole side in one pass instead of stopping and starting. Then smooth it once with a wet finger, since water keeps the silicone from dragging and pulling.
Pull the tape while the caulk is still wet. If you wait until it skins over, the dried edge lifts with the tape and tears the line you just made. One firm, slow pull along each side leaves a factory-straight edge.
How long does toilet caulk take to dry?
Wait a full 24 hours before you use the toilet or wash the floor next to it. Silicone feels dry to the touch in 30 to 60 minutes, but that surface skin is not a full cure. Underneath, it is still setting up. Flushing, splashing, or wiping too soon can break the seal before it hardens.
If the bathroom is cold or damp, give it a few extra hours. Silicone cures with the moisture in the air, but a cold room slows the whole process down, so a chilly winter bathroom may want closer to 36 hours. Running the fan or cracking a window helps it set and keeps the vinegar-like smell down while it does. Do not put a fan or heater right on the bead to rush it, since forcing it can leave the inside soft.
Mistakes that ruin the job
A few small errors cause most failed caulk jobs. Avoid these and the bead will outlast the toilet.
- Caulking over a dirty or wet base. New silicone peels within weeks if the surface was not clean and dry.
- Sealing all the way around. This traps a wax-ring leak under the toilet where you cannot see it until the floor is damaged.
- Laying too thick a bead. A fat line looks messy and takes much longer to cure.
- Using acrylic latex. It cracks and leaks in a wet spot, so it is a redo waiting to happen.
- Using the toilet too soon. Any movement before the silicone cures breaks the seal you just made.
When to re-caulk?
Check the bead about once a year. Re-caulk when it cracks, pulls away from the floor or base, turns dark with mildew, or the toilet starts to rock again. In most homes that works out to every few years. When it is time, cut out the old bead completely and start clean, since fresh silicone will not stick over the old layer.
Conclusion
Caulking a toilet is a quick, cheap job that protects your floor and keeps the toilet steady. Clean and dry the base, tape both sides, run a thin bead of 100% silicone around the front and sides, and leave a small gap at the back so a leak can show itself. Give it 24 hours to cure before you use it. Done right, one tube and 20 minutes buys you years of a dry, solid base.
Frequently asked questions
Do you have to caulk around a toilet?
Yes. Most plumbing codes, including International Plumbing Code section 405.5, require any floor-set fixture to be sealed to the floor. It also keeps water out from under the base and stops the toilet from rocking.
Should you caulk all the way around the toilet?
No. Seal the front and sides, but leave a 1 to 2 inch gap at the back. That gap lets a leaking wax ring show water on the floor instead of hiding it under the base.
What kind of caulk is best for a toilet?
100% silicone or a silicone kitchen and bath caulk. It is waterproof, flexes with the fixture, and resists mold. Avoid acrylic latex, which cracks and leaks in wet spots.
How long before I can use the toilet after caulking?
Wait 24 hours for the silicone to fully cure. It feels dry within an hour, but using it too soon can break the seal before it sets underneath.
Can I caulk a toilet without removing it?
Yes. For a standard reseal you caulk around the base in place. You only need to pull the toilet if the wax ring is leaking or the floor under it is damaged.
Related Articles
What Is the Purpose of a Pergola? Uses and Benefits