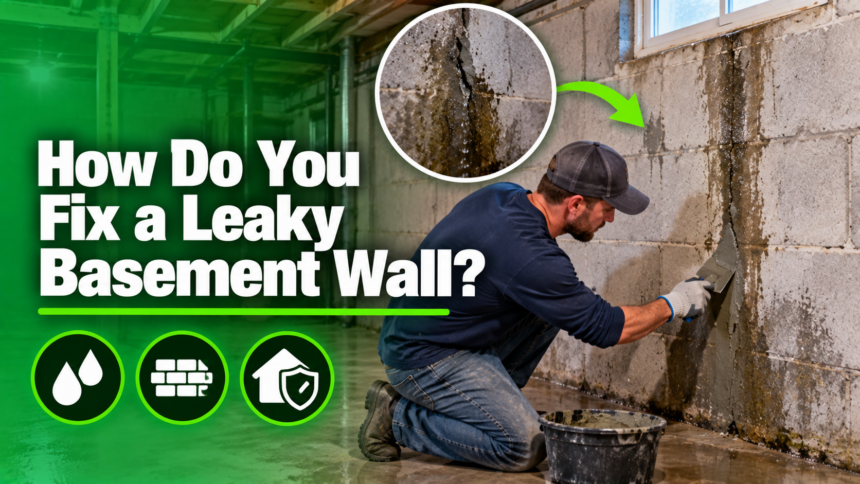
If you are wondering how do you fix a leaky basement wall, the honest answer is that it usually takes a mix of exterior drainage correction, crack sealing, and interior waterproofing rather than one single fix.
Water almost always finds its way in because of pressure building up outside the wall, so the repair has to address where that pressure and moisture are coming from, not just the spot where it shows up inside. Small hairline cracks can often be sealed with hydraulic cement or epoxy injection, while larger seepage problems may need a French drain and sump pump system.
Severe cases caused by constant groundwater pressure sometimes require professional exterior excavation. This guide walks through every stage of the process in plain language, from spotting the first signs of trouble to keeping your basement dry for good.
Understanding Why Basement Walls Leak
Before any repair work begins, it helps to know why the wall is leaking in the first place, because the cause decides which fix will actually last. Most basement leaks trace back to water pressure, poor drainage, or damage in the concrete itself.
Hydrostatic Pressure Explained Simply
When rain or melting snow soaks into the soil around your home, that water has nowhere to go but down and inward. It pushes against the basement wall from the outside, and this constant push is called hydrostatic pressure. Over time it forces moisture through even the smallest pores or cracks in the concrete.
Poor Exterior Drainage and Grading
If the ground around your foundation slopes toward the house instead of away from it, rainwater collects right next to the wall instead of running off.
This is one of the most common and most overlooked reasons basements leak, and it is also one of the easiest problems to correct without hiring a specialist.
Cracks in the Foundation Wall
Concrete naturally shrinks and shifts as it cures and as the soil around it settles, which can create small cracks. These cracks are not always visible from the outside, but they act like open doors for water once pressure builds up against the wall.
Porous Concrete or Concrete Block Walls
Concrete is not completely solid at a microscopic level; it contains tiny air pockets that can absorb and transmit moisture. Block walls are especially prone to this because water can travel through the hollow cores and seep out through mortar joints.
Failed Waterproofing Membranes
Many homes are built with an exterior waterproofing coating, but this layer does not last forever. As it ages, cracks, or separates from the wall, it stops blocking moisture the way it was designed to, and leaks reappear even in a previously dry basement.
Window Wells Without Proper Drainage
A window well that fills with rainwater and has no way to drain will eventually push that water straight into the basement through the surrounding wall or window frame. This is a common but easily fixable culprit for isolated leak spots.
High Water Table Issues
In some locations, the natural water table sits close to the surface, meaning groundwater is present most of the year regardless of recent rainfall. Homes in these areas often need a permanent interior or exterior drainage system rather than a one-time patch.
Clogged or Damaged Gutters and Downspouts
Gutters that are blocked with leaves or downspouts that empty right next to the foundation send large amounts of water directly toward the basement wall every time it rains, undoing any other repair you make.
Signs You Have a Leaky Basement Wall
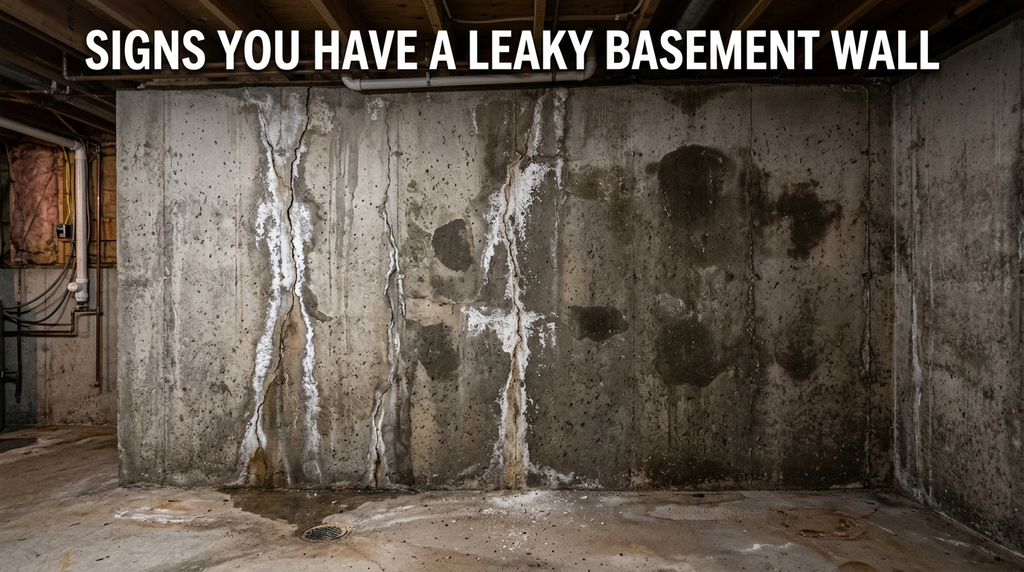
Not every leak announces itself with a visible puddle, so it helps to recognize the smaller warning signs early. Catching these clues sooner means a cheaper and simpler repair later.
Visible Water Seepage or Puddles
The clearest sign is water actually appearing on the floor or running down the wall, usually noticeable after heavy rain or snowmelt. Even a small damp patch near the base of the wall is worth investigating right away.
Damp or Musty Smell
A persistent musty odor in the basement, even without visible water, often means moisture is present somewhere in the walls or floor. This smell is usually caused by mold or mildew feeding on trapped dampness.
White Chalky Residue
A white, powdery buildup on the wall, known as efflorescence, forms when water travels through concrete and leaves mineral deposits behind as it evaporates. It is a strong indicator that moisture is passing through the wall regularly.
Peeling Paint or Bubbling on Walls
Paint that bubbles, flakes, or peels away from a basement wall is a sign that moisture is trapped underneath it and pushing the paint away from the surface. This usually gets worse over time if left untreated.
Mold or Mildew Growth
Dark spots or fuzzy patches on walls, baseboards, or stored items are a direct result of ongoing dampness. Mold growth is also a health concern, so it should never be ignored even if the leak itself seems minor.
Cracks That Are Actively Wet
A crack that stays damp to the touch or shows a faint water line is different from a dry, cosmetic crack. Active moisture in a crack means it needs to be addressed before it widens or lets in more water.
Diagnosing the Source of the Leak
Once you notice signs of moisture, the next step is figuring out exactly where the water is coming from before you start any repair. Guessing at the source wastes time and money on fixes that will not solve the real problem.
The Duct Tape Test for Condensation vs Seepage
Tape a small square of aluminum foil or plastic tightly to the wall and leave it for a day or two. If moisture collects on the outer surface, the problem is humidity in the air; if it collects underneath against the wall, water is seeping through the concrete itself.
Tracing Water Paths During or After Rain
During or right after a rainstorm, walk through the basement and look closely at where water first appears. Following the path back to its entry point, whether that is a crack, a joint, or a window well, tells you exactly what needs to be repaired.
Checking for Cracks, Joints, and Window Wells
Inspect the full length of every wall, paying close attention to the joint where the wall meets the floor, since this is a common leak point. Also check every window well and any spot where pipes or wires pass through the foundation.
When to Call a Professional Inspector
If you cannot locate the source, if water enters from multiple spots, or if you notice bowing or large structural cracks, it is time to bring in a foundation specialist. Structural issues go beyond basic waterproofing and need an engineer’s assessment.
Tools and Materials Checklist
Having the right supplies ready before starting saves time and prevents mid-project trips to the hardware store. The table below breaks down what is needed for each part of the repair.
| Repair Task | Tools and Materials Needed |
| Sealing small cracks | Hydraulic cement, wire brush, chisel, safety goggles |
| Sealing larger or active leaks | Epoxy or polyurethane injection kit, caulking gun |
| Interior waterproof coating | Masonry waterproof sealant or paint, roller, wire brush |
| Interior drainage system | Drain tile, gravel, sump pump, PVC piping, concrete saw |
| Exterior drainage fixes | Shovel, soil or topsoil for grading, gutter extensions |
| General safety gear | Gloves, dust mask, safety goggles, knee pads |
Step-by-Step Fixes
With the source identified and materials ready, the actual repair process can begin. These steps move from the simplest, least expensive fixes to more involved solutions for persistent problems.
Fixing Gutters and Downspouts
Clean out any leaves or debris from the gutters and make sure downspouts extend at least six feet away from the foundation. This single step often reduces the amount of water reaching the wall more than any other change you can make for free.
Regrading Soil Around the Foundation
Add soil along the base of the house so the ground slopes downward and away from the wall, aiming for about a six-inch drop over the first ten feet. This keeps rainwater moving away from the foundation instead of pooling against it.
Sealing Small Cracks With Hydraulic Cement or Epoxy
Clean the crack with a wire brush, widen it slightly with a chisel if needed, then pack it with hydraulic cement, which expands and hardens even in the presence of water. For hairline cracks, an epoxy or polyurethane injection kit can be used instead to fill the crack from the inside out.
Sealing Larger or Active Leaks
For wider or actively leaking cracks, low-pressure polyurethane injection works well because the material is flexible and expands to fill the entire depth of the crack. This method is more reliable than surface patching alone for structural-width cracks.
Applying an Interior Waterproof Coating
Once cracks are sealed and the wall is clean and dry, apply a masonry waterproofing sealant across the entire wall surface using a roller. This coating helps block minor seepage through porous concrete but should be treated as an added layer of protection rather than the main fix.
Installing an Interior French Drain and Sump Pump
For basements with ongoing water problems, a channel can be cut along the base of the wall, filled with gravel and a perforated drain pipe, and connected to a sump pump that removes collected water. This system catches water before it reaches the living space, even if it still enters through the wall.
DIY Versus Hiring a Professional
Deciding whether to handle the repair yourself or call in help depends on the size of the problem and your comfort level with the work involved. The comparison below outlines when each option makes sense.
| Situation | Best Approach |
| Small hairline cracks, minor dampness | DIY with hydraulic cement or epoxy |
| Poor grading or clogged gutters | DIY, low cost and low skill needed |
| Frequent seepage across a large wall area | Interior drain and sump pump, DIY possible with time |
| Bowing walls or large structural cracks | Professional foundation engineer required |
| High water table or constant groundwater pressure | Professional exterior waterproofing recommended |
DIY repairs for cracks and drainage generally cost far less and can often be completed in a single weekend, while professional exterior waterproofing is a larger investment but tends to offer the most lasting protection for homes with ongoing structural water pressure.
Preventing Future Leaks
Fixing the current leak is only half the job, since basement walls can develop new problems if maintenance is neglected afterward. A few regular habits go a long way toward keeping the space dry year-round.
Seasonal Maintenance Checklist
Check gutters and downspouts every spring and fall, inspect the foundation for new cracks twice a year, and test the sump pump before the rainy season begins. Staying ahead of small issues prevents them from turning into major repairs.
Landscaping Tips to Keep Water Away
Keep plants and mulch beds a few inches below the top of the foundation, and avoid heavy watering directly next to the house. Choosing plants that do not require frequent watering near the foundation also helps reduce soil saturation.
Sump Pump Maintenance and Battery Backup
Test the sump pump by pouring water into the pit and confirming it activates and drains properly. Installing a battery backup ensures the pump still works during a power outage, which is often when storms cause the heaviest water buildup.
Common Mistakes to Avoid
Even well-intentioned repairs can fail if a few common errors are made along the way. Being aware of these mistakes helps you avoid wasting time and money.
Only Painting Over Leaks Without Fixing the Source
Waterproof paint can hide a leak temporarily, but if the underlying crack or drainage issue is not addressed, water pressure will eventually find a new way through. Paint should always be the last step, not the only one.
Ignoring Exterior Drainage
Many homeowners jump straight to interior fixes without correcting grading or gutter issues outside. Since most water problems start outside the wall, skipping this step means the interior repair has to work much harder than it should.
Using the Wrong Sealant for the Crack Type
Rigid hydraulic cement works well for stable cracks but can crack again if the foundation continues to shift slightly. Flexible epoxy or polyurethane is often the better choice for cracks that may expand or contract with temperature changes.
Frequently Asked Questions
Can I fix a leaky basement wall permanently myself?
Minor cracks and drainage issues can often be permanently resolved with DIY methods like hydraulic cement and improved grading. However, leaks caused by high water tables or structural damage usually need professional exterior waterproofing for a lasting fix.
How much does it cost to waterproof a basement wall?
DIY crack sealing and drainage corrections can cost as little as the price of materials, often under a hundred dollars. Professional exterior waterproofing with excavation is significantly more expensive and varies widely based on the size of the foundation and local labor rates.
Is a leaking basement wall dangerous to the foundation?
Occasional minor seepage is usually not a structural threat, but ongoing water intrusion can weaken concrete over time and contribute to cracking or shifting. Persistent leaks paired with bowing walls should always be evaluated by a professional.
Conclusion
So, how do you fix a leaky basement wall in practice? Start outside by correcting grading and gutter drainage, since this alone solves many minor leaks.
Seal any cracks with the appropriate hydraulic cement or epoxy product, add an interior waterproof coating for extra protection, and install a drainage system with a sump pump if seepage continues across a larger area.
Related Articles
How to Test for Asbestos in Popcorn Ceiling: Complete Homeowner Guide
Commercial Garage Door Installation: A Complete Guide for Business Owners
What is TPO Roofing? Complete Guide to Benefits, Cost & Installation
How to Maintain a Roof in Harsh Weather Conditions: A Complete Homeowner’s Guide