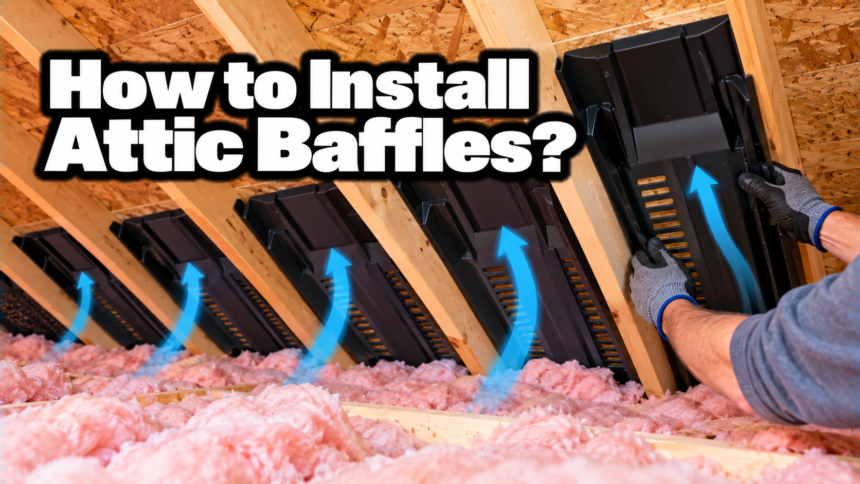
Attic baffles are rigid channels that clip between your rafters so air from the soffit vents can travel up the underside of the roof instead of getting choked off by insulation. Installing them is simple work.
You fit one baffle into each rafter bay that sits above a soffit vent, press it flat against the roof sheathing, staple it in place, seal the bottom edge, and keep at least a one-inch air gap open from the vent all the way up. A small attic takes an afternoon. You need a staple gun, a box of baffles, and a bit of patience crawling around the eaves.
Here is the whole job, from what to buy to the checks that keep the air moving.
What are attic baffles, and why bother?
A baffle is a thin panel, usually plastic, foam, or cardboard, that holds an open channel between your insulation and your roof deck. Without one, loose or batt insulation slumps into the narrow gap at the eaves and plugs the soffit vents. Once those vents are blocked, fresh air stops entering the attic. Heat builds up in summer, moisture builds up in winter, and both shorten the life of your roof.
Baffles fix that by giving the air a protected path. Cool air comes in low through the soffit vents, runs up behind the baffle along the roof sheathing, and leaves high through a ridge or gable vent. That steady flow keeps the roof deck dry and the attic closer to the outdoor temperature. It also lets you pile insulation right out to the edge of the attic floor without smothering the vents, a point ENERGY STAR’s rafter vent guide makes clear. In short, a baffle is what makes attic insulation and attic ventilation work together instead of fighting each other.
Signs your attic needs baffles
The clearest sign is insulation packed tight against the eaves with no visible gap above it. Crawl to the edge of the attic floor and look where the roof meets the outer wall. If you can see daylight or feel a draft from the soffit vents, air is still moving. If the vents are buried under insulation, they are doing nothing.
Other clues show up inside and outside the house. Frost or damp patches on the underside of the roof sheathing in winter point to trapped moisture. Ice dams along the eaves after snow, a hot upstairs in summer, or a musty smell in the attic all suggest air is not flowing the way it should. Any of these is a good reason to add baffles. Catching the problem early matters, because trapped moisture rots sheathing and mats down insulation, and wet insulation loses much of its R-value.
Tools and materials you will need
Gather everything before you go up, because the eaves are a tight, awkward place to work and you will not want to climb back down for a forgotten tool.
- Baffles, one for each rafter bay that has a soffit vent below it
- A heavy-duty staple gun and half-inch staples
- A headlamp or a clip-on work light
- An N95 mask, safety glasses, gloves, and long sleeves or coveralls
- A can of low-expansion spray foam for sealing
- A sturdy ladder and a couple of pieces of plywood to kneel on
- A utility knife, in case you need to trim a baffle to fit
Baffles come in standard four-foot lengths and two common widths, 14.5 inches and 22.5 inches, to match rafters set 16 or 24 inches apart. Measure your rafter spacing first so you buy the right size. If you have blown-in insulation, pick up a few strips of rigid foam board too. You will use them to build a small dam at the eaves, which is covered further down.
Which baffles should you buy?
All three common materials do the same job, but they hold up differently over time. This is where a lot of homeowners overspend or under-buy, so it helps to match the material to your attic.
| Material | Best for | Watch out for |
| Plastic | Humid or wet climates; lasts longest | Costs a bit more per piece |
| Foam | Adds a little insulating value at the eave | Can be brittle in the cold |
| Cardboard | Dry attics and tight budgets | Sags or softens if it gets damp |
The main trade-off is moisture resistance against cost. If your attic runs humid or you live in a wet climate, spend a little more on plastic or foam. In a dry, well-ventilated attic, cardboard is fine and cheap. Whatever you choose, the baffle must be rigid enough to keep its shape once insulation presses against it, because a channel that collapses under blown fill is no better than no baffle at all.
How many baffles do you need?
You need one baffle in every rafter bay that sits directly above a soffit vent. If your soffit venting runs continuously along the eave, that means a baffle in nearly every bay. If your vents are spaced out, only the bays above an actual vent opening strictly need one, though many installers add baffles to every bay for even airflow.
Count your rafter bays along both long sides of the house and buy a few extra. It is common to crack or misjudge one, and having spares beats stopping halfway through the job. Baffles are cheap, usually about 1 to 2 dollars each, so a typical single-story house runs 40 to 80 dollars in materials. The bigger cost is your time in a hot, cramped attic, which is why it pays to buy enough on the first trip.
Step-by-step: installing attic baffles
Now the actual install. Work one bay at a time and do not rush the eaves, since that is where mistakes hide.
- Get into the attic safely. Lay a plywood plank across the joists so you are never standing on the ceiling drywall, which will not hold your weight. Put your light where it shines on the eaves, and spread a tarp below the hatch to catch falling insulation.
- Clear the eaves. Pull the insulation back from the outer edge of the attic floor so you can see the top plate and the soffit vent opening. On blown insulation, scoop it toward the center. On batts, just fold them back. You want a clear view of the gap where the roof meets the wall.
- Position the first baffle. Slide the baffle up into the rafter bay so its bottom edge lines up over the soffit vent and the top points up the roof slope. The vent side faces down toward the soffit so incoming air feeds straight into the channel.
- Press it against the sheathing. Push the baffle flat against the underside of the roof deck. This is what creates and protects the air channel. Keep at least a one-inch gap open between the baffle and the sheathing along its whole length, since that gap is the path the air actually travels.
- Staple it in place. Fasten the side flanges to the rafters, or the back to the roof sheathing, with your staple gun. Put a staple every 6 to 8 inches so the baffle cannot sag or pop loose later. Check that the channel stays open and did not crimp when you fastened it.
- Seal the bottom edge. Run a bead of low-expansion spray foam where the baffle meets the top plate. This stops attic air from leaking down into the wall and forces all the incoming air up through the channel where you want it. It is a small step that makes the whole system work better.
- Repeat down the eave. Move to the next bay and do the same, keeping each baffle lined up with its vent. Butt the ends together if you are stacking baffles up a long slope, so the channel stays continuous.
- Push the insulation back. Once the baffles are set, slide your insulation back to the edge of the attic floor. With the baffles holding the channel open, you can insulate right out to the top plate without blocking a thing.
Quick tip: keep the channel open. A stapled baffle that got pinched or crushed looks installed but blocks the very airflow you are trying to protect. Run your hand up each channel before you move on.
How much air gap do you actually need?
Keep a minimum of one inch of open space between the insulation and the roof sheathing at the eaves and at the vent. That one-inch clearance is written into the residential building code (IRC section R806) because a smaller gap chokes the airflow and lets the roof deck trap moisture. Most baffles are shaped to hold roughly that much space on their own, but it is worth eyeballing each one after you staple it.
The baffle opening should also be at least as big as the vent feeding it. A wide soffit vent behind a pinched baffle is a bottleneck, so match them up. The baffle also needs to reach past the top of your insulation, so the channel stays clear once the attic is filled back in.
Do baffles go in before or after insulation?
Baffles go in first, before you add or top up insulation. They set the boundary that keeps the eaves clear, so putting them in ahead of time means you can then push insulation right up to the edge without a second thought. On a retrofit where insulation is already there, just pull it back from the eaves, fit the baffles, and slide it into place again.
If you have blown-in insulation, add one more piece. Cut a strip of rigid foam board and stand it up as a small dam at the outer edge of the top plate, right in front of the baffle’s bottom. Loose fill blows around easily, and that little wall stops it from spilling into the soffit and clogging the vent you just opened up.
Getting the airflow right
A baffle is only half of a system. The point of all this is balanced ventilation, meaning air in at the bottom and air out at the top. The code asks for about 1 square foot of vent area for every 150 square feet of attic floor, split fairly evenly between low intake vents and high exhaust vents. In colder climates that ratio can drop to 1 in 300 when the vents are balanced top to bottom and the ceiling has a vapor barrier. If your intake and exhaust are lopsided, the baffles alone will not fix a stuffy attic, a detail the Insulation Institute’s baffle best practices stress just as much as the install itself.
Watch out for a few common slip-ups. Do not leave gaps between stacked baffles, do not staple so hard that you crush the channel, and do not skip a bay just because it is hard to reach. Every blocked vent is a dead spot where moisture can collect, and one missed bay can undo the work of all the others.
Conclusion
Installing attic baffles comes down to one clear goal: keep an open, one-inch air channel running from each soffit vent up the roof so insulation never blocks the flow. Fit a baffle in every bay above a vent, staple it tight to the sheathing, seal the bottom to the top plate, then insulate right up to the edge. Do that around the whole eave, keep your intake and exhaust balanced, and you will have a drier roof deck, a cooler attic, and insulation that finally does its job.
Frequently asked questions
Do I need a baffle in every rafter bay?
You need one in every bay that sits above a soffit vent. If your soffit venting is continuous, that is nearly every bay. Where vents are spaced out, only the bays over a vent strictly need one, though many people baffle every bay for even airflow.
Can I install attic baffles myself?
Yes. It is a common DIY job that needs only a staple gun, baffles, and basic safety gear. The tricky part is working in the tight, low space at the eaves, so take your time and kneel on a plank, never on the drywall.
What size air gap should be behind the baffle?
Keep at least one inch of open space between the insulation and the roof sheathing, which is the code minimum. Most baffles hold about that much on their own, but check each one after stapling so nothing pinches the channel shut.
Should I use foam, plastic, or cardboard baffles?
All three work if installed right. Plastic and foam resist moisture better and last longer, while cardboard is cheaper but can sag or soften if it gets damp. For a humid attic, plastic or foam is the safer pick.
What happens if I skip baffles?
Insulation slides into the eaves and blocks the soffit vents, cutting off fresh air. That traps heat in summer and moisture in winter, which can rot the roof deck, ruin insulation, and lead to mold or ice dams.
Related Articles
How to Caulk a Toilet the Right Way?
Are Solar Attic Fans Worth It? A Straight Cost and Savings Look