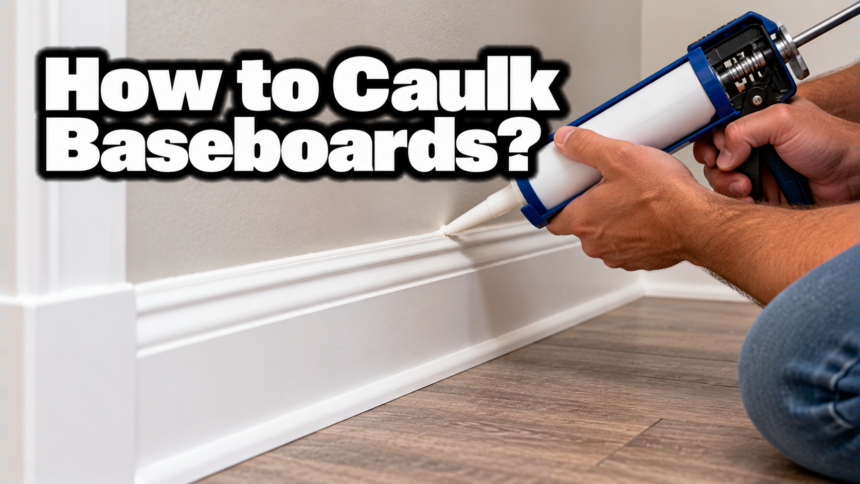
To caulk baseboards, clean the seam, cut the tube nozzle at a 45-degree angle, run a thin bead of paintable latex caulk along the top gap where the baseboard meets the wall, and smooth it with a wet finger before it skins over. Let it dry, then paint.
That single line where trim meets wall is what makes a room look either finished or half-done, and caulk is what closes it. Here is the full method, including which gaps to fill and which to leave alone so the seam disappears and the paint sits clean on top.
What you need before you start?
Gather a few things first and the job goes fast. You need a caulking gun, a tube of paintable caulk, a utility knife, a bowl of water, and a stack of clean rags. Kneepads or a foam pad save your knees, since you spend the whole job low to the ground. A vacuum and an old paintbrush help you clean the seam before you start.
The caulk you pick matters more than any tool. For painted baseboards in a normal room, use a paintable acrylic latex caulk. Many are labeled latex plus silicone. It flexes a little as the house moves, cleans up with water, and takes paint well once dry. A product like DAP Alex Plus is ready to paint in about 30 minutes. Save 100 percent silicone for bathrooms and other wet spots, since it seals against water but will not hold paint.
| Caulk type | Best for | Paintable? | Cleanup |
| Acrylic latex (plus silicone) | Painted baseboards and trim, most rooms | Yes | Water |
| 100% silicone | Bathrooms, tubs, wet areas | No | Solvent |
| Siliconized acrylic | Trim near mild moisture | Usually | Water |
Which gaps to caulk, and which to skip?
Caulk the top gap, the seam between the top edge of the baseboard and the wall. That is the line people notice, and closing it gives the clean, built-in look you are after.
Leave the bottom gap alone in most cases. The joint between the baseboard and a hardwood or tile floor moves as the floor expands and contracts through the seasons. Caulk there tends to crack and pull away within a year, so it makes more work than it saves. If the floor is carpet, there is nothing solid to caulk against anyway.
There is one exception. If the bottom gap is wide or uneven and it bothers you, shoe molding or quarter round is the better fix. It is a thin strip of trim that covers the gap and moves with the floor, no caulk needed. A painted baseboard against tile in a kitchen is the one spot where a thin bead along the bottom is fine.
Step 1: Clean and dry the seam
Caulk sticks to clean surfaces and peels off dusty ones, so this step decides how long the job lasts. Vacuum the seam and the floor along the baseboard. Run an old paintbrush into the corners to loosen dust the vacuum misses. Wipe away grease or grime with a damp rag, then let it dry.
If there is old, cracked caulk in the seam, pull it out first. A utility knife or a putty knife lifts it out in strips. Fresh caulk laid over old, loose caulk will not hold. Make sure the seam is completely dry before you start, because caulk will not bond to a wet surface.
Step 2: Fill nail holes and dents first
Handle any holes before you reach for the caulk. Sink any nails that stand proud with a hammer and a nail set so the head sits just below the surface. Fill nail holes and small dents with wood filler, let it dry, then sand it smooth. Caulk is meant for the thin seam where two surfaces meet, not for filling holes in the face of the trim. Used as filler, it leaves a lumpy patch that shows through the paint.
Step 3: Cut the nozzle small
Cut the tip at a 45-degree angle, and cut it small. Start about a quarter inch down from the very end, which gives you a thin, controllable bead. You can always widen the hole for a bigger gap, but you cannot shrink it, so start conservative. A hole that is too big dumps far more caulk than the seam needs and turns the whole job messy.
Most tubes have a foil seal inside the nozzle. Poke through it with the long wire on the caulk gun or a nail so the caulk can flow. Then drop the tube into the gun and squeeze the trigger a few times until caulk reaches the tip.
Step 4: Lay a thin, steady bead
Start in a corner and hold the nozzle at about 45 degrees, with the cut tip resting in the seam. Squeeze the trigger with steady pressure and pull the gun toward you at an even pace. You want one continuous bead, not a line of stops and starts.
Work in short runs, about three to four feet at a time, so you can smooth each run before it starts to skin over. When you reach the end of a run, release the trigger or press the release lever on the gun to stop the flow, which keeps caulk from oozing out.
Keep the bead thin. A little caulk fills a normal seam. If the gap is wider than about a quarter inch, push a foam backer rod into it first, then caulk over the rod. That fills a deep gap without wasting tube after tube, and it gives the caulk a solid backing to grip.
Thin beats thick every time. A slim bead is easy to smooth and hides in the seam. A fat bead squeezes out onto the trim and is a chore to clean up.
Step 5: Smooth the bead before it skins
This is the step that separates a clean job from a messy one. Dip a finger in the bowl of water and run it along the bead in one smooth pass, pressing the caulk into the seam. The wet finger shapes the bead into a clean, slightly hollow line and keeps the caulk from dragging.
Go from the corner toward the middle of the wall. Wipe the extra caulk off your finger onto a rag between passes, and re-wet your finger often. One firm pass beats five nervous ones, since repeated wiping pulls caulk back out of the seam and leaves it thin.
If you would rather not use your finger, a caulk finishing tool does the same job and gives a consistent line. A damp rag folded over a fingertip works too. Whatever you use, keep it wet so it glides instead of grabbing.
Step 6: Wipe up and check your work
Right after smoothing, wipe any caulk that strayed onto the wall or the face of the baseboard with a damp rag. Latex caulk wipes away easily while wet and is a real pain to remove once it dries, so do it now, not later.
Then step back and look down the wall at a low angle. Raking light shows any spots you missed or places where the bead went thin. Touch those up with a little more caulk and smooth again while the rest is still fresh.
Step 7: Let it dry, then paint
Give the caulk time to dry before you paint. Many paintable caulks are ready in about 30 minutes, but the real cure time depends on the caulk, the humidity, and how thick the bead is, so check the tube. A thick bead in a damp room can take longer than the label says.
Once it is dry, paint over the seam to blend it into the trim and the wall. Painted caulk melts into the wall and gives that smooth, built-in finish. Skip the paint and even a neat bead still reads as a visible line running along the top of your trim.
How long it takes and how much caulk you need?
A single average room, with baseboards running around all four walls, takes most people one to two hours, plus drying time before paint. The caulking itself is fast. The cleaning and the careful smoothing are where the minutes go, and both are worth it.
One standard 10-ounce tube covers roughly 50 to 60 feet of thin baseboard seam, so a normal room usually needs one tube, maybe two for a large space or a wide gap. Buy an extra so you do not stop mid-wall for a store run. Store the leftover with a nail pushed into the nozzle to keep the caulk from drying out in the tube.
Do you need painter’s tape?
Tape is optional. A steady hand and a wet finger give a clean line without it, and for most rooms that is plenty. Skipping the tape also saves you the time of laying it and pulling it.
Tape earns its place in two spots: when the wall texture is rough and the caulk wants to smear, or when you want a razor-sharp edge. Run a strip of painter’s tape on the wall just above the seam and another on the baseboard just below it, leaving the seam open between them. Lay the bead, smooth it, then peel the tape away while the caulk is still wet. Pulling wet tape leaves a crisp edge. Pulling dry tape tears the bead you just shaped.
How to handle corners?
Inside corners, where two walls meet and turn inward, take caulk well. Run the bead into the corner from both directions and press it in with a wet fingertip so the two lines meet cleanly in the crease.
Outside corners, where the trim wraps around and points out toward you, are a different story. If the miter joint there has opened up a little, wood filler usually holds better than caulk. Fill the gap, let it dry, sand it flat, then paint. Caulk on a sharp outside corner tends to crack as the trim shifts with the seasons.
Caulking baseboards in a bathroom
Bathrooms and laundry rooms call for a different caulk. Where the baseboard can get splashed or sit in steam, use a 100 percent silicone or a mold-resistant caulk instead of plain latex. It keeps water out of the wall and resists the mildew that likes to grow on a damp seam.
The trade-off is that pure silicone will not take paint, so pick a color that matches your trim, usually white or clear. Apply and smooth it the same way, with a wet finger or a finishing tool, and give it the full cure time listed on the tube before the room gets wet again.
Common mistakes to avoid
A few habits ruin an otherwise good job. Using too much caulk is the big one, since a fat bead is hard to smooth and pushes out onto the trim. Thin is easier to control and simply looks better.
Skipping the cleaning step is another, because caulk will not grip dust. Cutting the nozzle too big floods the seam and wastes half the tube. Smoothing too late, after the caulk has started to skin, drags and tears the bead instead of shaping it. And painting before the caulk is dry traps moisture and leaves a rubbery, cracked line. Slow down on the few parts that matter and the rest of the job is easy.
Conclusion
Caulking baseboards comes down to a clean seam, a thin bead of paintable latex caulk along the top gap, and a wet finger to smooth it before it skins over. Leave the bottom gap to the floor alone unless you add shoe molding, let the caulk dry fully, then paint. Do those few things with a little patience and the line where your trim meets the wall will look sharp, sealed, and built right in.
Frequently asked questions
Should you caulk the bottom of baseboards?
Usually no. The joint between the baseboard and a wood or tile floor moves with the seasons, so caulk there often cracks and pulls away. Use shoe molding for a wide bottom gap instead. A painted baseboard against kitchen tile is the main exception.
What kind of caulk is best for baseboards?
Use a paintable acrylic latex caulk, often labeled latex plus silicone, for painted trim in normal rooms. It flexes, cleans up with water, and takes paint. Save 100 percent silicone for bathrooms, since it seals against water but will not hold paint.
How long does caulk take to dry before painting?
Many paintable caulks are ready to paint in about 30 minutes, but it depends on the product, the thickness of the bead, and the humidity. A thick bead or a damp room takes longer, so check the time printed on the tube.
Do you caulk baseboards before or after painting?
Caulk first, then paint over it. Painting the caulk blends the seam into the wall and trim for a smooth, built-in look. If the trim is already painted, caulk the top seam and repaint just that line to hide it.
Can you caulk baseboards without a caulk gun?
Yes. Squeeze tubes of caulk work for small jobs and touch-ups without a gun. For a full room, a gun gives you steadier pressure and a more even bead, which makes the smoothing step easier and cleaner.
Related Articles
How Much Does It Cost to Build a Pavilion?
Are Toilet Seats Universal? Complete Guide
Standard Shower Curtain Size: Complete Guide to Sizes, Types & Measurements