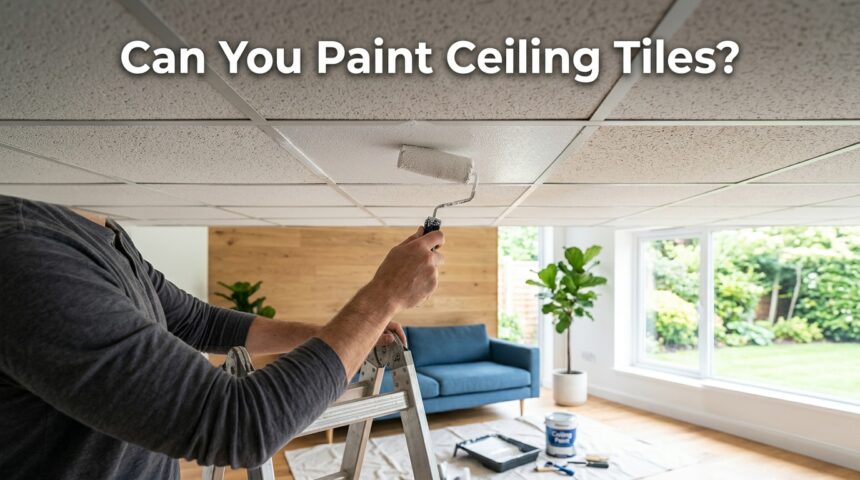
Yes, you can paint ceiling tiles, and it is one of the easiest ways to refresh a dull or stained ceiling without spending money on full replacement. Most mineral fiber, gypsum, and drop ceiling tiles accept paint well when the surface is cleaned and primed properly.
The key is choosing the right paint type, applying thin and even coats, and avoiding oil-based products that add unnecessary weight. Acoustic or perforated tiles need extra care since heavy paint can clog their sound-absorbing holes. With the correct tools and a little patience, painting ceiling tiles can completely transform the look of a room in a single weekend.
Types of Ceiling Tiles and Their Paintability
Not every ceiling tile behaves the same way once paint is applied, so it helps to know what material you are working with before you start. Some tiles absorb paint evenly, while others require special handling to avoid damage or sagging.
Mineral Fiber Tiles
Mineral fiber tiles are among the most common types found in office buildings and drop ceilings. They accept latex paint very well because their surface is slightly porous but sturdy enough to handle a roller or sprayer. A light primer coat beforehand gives the best long-term finish on this material.
Gypsum Tiles
Gypsum tiles are dense, smooth, and behave much like drywall when painted. They rarely warp from moisture in the paint, which makes them one of the safest options for beginners. A single coat of quality latex paint usually gives full, even coverage.
Acoustic or Perforated Tiles
These tiles contain tiny holes designed to absorb sound, and painting them requires a lighter touch. Heavy paint layers can seal these holes and reduce the room’s acoustic quality. Spraying thin coats instead of rolling helps preserve their sound-dampening function.
Foam or Polystyrene Tiles
Foam tiles are lightweight but sensitive to certain chemicals found in oil-based paints, which can cause warping or melting. Water-based latex paint applied gently is the safer route for this material. Testing a small hidden section first is strongly recommended.
Metal or Tin Ceiling Tiles
Metal tiles need a rust-inhibiting primer before any topcoat is applied, especially in humid rooms. Once primed, they hold paint extremely well and often look brand new with a single coat. This type is the most durable among all ceiling tile materials.
Benefits of Painting Ceiling Tiles

Painting ceiling tiles offers a practical middle ground between doing nothing and replacing an entire ceiling. It saves money, reduces waste, and gives you creative control over the room’s final appearance.
Replacing an entire drop ceiling can be expensive and time-consuming, while painting the existing tiles achieves a similar visual refresh at a fraction of the cost. It also allows homeowners to cover minor water stains, dust discoloration, or yellowing that naturally happens over the years.
Choosing a new color or finish gives a room a completely different mood without touching the walls or flooring. Because you are reusing existing material instead of discarding tiles, this approach is also considered more environmentally friendly than a full replacement project.
Things to Consider Before Painting
Before picking up a paintbrush, a few practical checks can save you from bigger problems later. Skipping this stage is one of the most common reasons painted ceilings fail early.
First, inspect the tiles for visible water damage or mold growth, since paint will not fix an underlying leak and can actually trap moisture inside the tile. Second, think about whether the room depends on sound absorption, such as a home office or studio, because painting acoustic tiles can dull their performance.
Third, check the tile’s fire rating information if it is printed on the back, since certain coatings may affect fire resistance in commercial spaces. Finally, consider the tile’s age; extremely brittle or crumbling tiles may not survive the painting process and are better replaced instead.
Tools and Materials Needed
Having the right supplies ready before you begin makes the entire painting process smoother and helps avoid mid-project trips to the store.
| Item | Purpose |
| Latex or acrylic paint | Main topcoat, lightweight and flexible |
| Stain-blocking primer | Prevents old stains from bleeding through |
| Paint sprayer | Even coverage, ideal for textured tiles |
| Roller with foam cover | Good for smooth, flat tile surfaces |
| Drop cloths | Protects floors and furniture from drips |
| Ladder | Safe access to ceiling height |
| Painter’s tape | Clean edges around grid lines or walls |
| Dust mask and gloves | Basic safety while sanding or spraying |
Step-by-Step Guide to Painting Ceiling Tiles
Following a clear sequence keeps the project organized and reduces the chance of uneven results. Each step builds on the previous one, so it is best not to skip ahead.
Step 1: Remove the Tiles If Possible
Taking tiles down from the grid and laying them flat on a covered table makes painting far more controlled than working overhead. This also prevents drips from falling on furniture or flooring below. If removal is not possible, cover the surrounding area thoroughly instead.
Step 2: Clean and Dust the Surface
Wipe each tile with a dry cloth or soft brush to remove dust, cobwebs, and loose debris before any paint touches the surface. A vacuum with a brush attachment works well for textured or perforated tiles. Skipping this step often leads to a patchy, uneven finish.
Step 3: Repair Stains or Damage
Small cracks or water rings should be treated with a stain-blocking primer spot application before the full coat goes on. This prevents old marks from showing through the new paint over time. Badly damaged tiles are usually better replaced than repaired at this stage.
Step 4: Apply Primer
A thin, even layer of primer seals the tile surface and helps the topcoat adhere evenly across the entire tile. Allow it to dry fully according to the product’s instructions before moving forward. This step is especially important for tiles with visible discoloration.
Step 5: Apply the Paint
Use light, even strokes with a sprayer or roller, working in one direction to avoid heavy buildup in any single spot. Two thin coats generally look better and last longer than one thick coat. Overloading the tile with paint is the most common cause of sagging.
Step 6: Allow Proper Drying Time
Let each coat dry completely, usually between one and four hours depending on humidity, before applying a second coat or reinstalling. Rushing this stage can smear the finish or trap moisture inside the tile. Good airflow in the room speeds up drying naturally.
Step 7: Reinstall the Tiles
Once fully dry and cured, place the tiles back into the ceiling grid carefully to avoid chipping the fresh paint on the edges. Handle them by the edges rather than the painted face during this process. Step back and check for any missed spots under good lighting.
Common Mistakes to Avoid
Even a simple painting project can go wrong if a few well-known pitfalls are ignored. Being aware of these in advance helps the final result look professional rather than patchy.
Applying too much paint at once is the single biggest issue, since porous tiles absorb liquid and can warp or sag under the extra weight. Skipping the primer step often leads to old stains bleeding through the new color within weeks. Oil-based paints are heavier and slower to dry, making them a poor match for lightweight ceiling materials.
Painting in a room without proper ventilation can trap fumes and slow the drying process significantly. Lastly, painting over perforated acoustic tiles without a light touch can seal the holes and noticeably reduce sound absorption in the room.
Spray Painting vs Roller Painting
Choosing between a sprayer and a roller depends largely on the tile’s texture and how much control you want over paint thickness. Both methods can produce great results when matched to the right tile type.
A paint sprayer distributes a fine, even mist that works especially well on textured, perforated, or acoustic tiles where a roller would clog the small holes. It also covers large areas faster, which is useful when painting many tiles at once.
A roller, on the other hand, gives more control on flat, smooth tiles like gypsum or mineral fiber boards and is easier for beginners to manage without overspray. For most drop ceiling projects, a sprayer produces a more even finish, while a roller remains the practical choice for smaller, flat-surface jobs.
Maintenance After Painting
Once the ceiling tiles are painted and reinstalled, a small amount of ongoing care keeps them looking fresh for years. Regular maintenance is simple and does not require special products.
Dust the tiles occasionally with a soft, dry cloth or a vacuum brush attachment to prevent buildup that can dull the painted finish. Avoid harsh chemical cleaners, as they can strip or discolor the paint layer over time.
Most painted ceiling tiles hold their color well for several years before a touch-up is needed, especially in low-moisture rooms. Watching for new water stains early allows you to address leaks before they damage the fresh paint job.
Alternatives to Painting
Painting is not always the only solution, and in some cases another approach may suit the ceiling better. It helps to know these options before committing to a full paint project.
Replacing severely damaged or sagging tiles individually is often more practical than trying to paint over structural problems. Ceiling tile overlays or covers can be installed directly on top of old tiles for a quick visual update without removing anything.
For rooms with textured popcorn ceilings rather than tile grids, popcorn ceiling removal is a separate process worth researching on its own. Each of these alternatives works best when the existing tiles are too worn for paint to fix effectively.
Frequently Asked Questions
Can you paint acoustic ceiling tiles without ruining sound absorption?
Yes, but only with thin, light coats applied using a sprayer to avoid sealing the small perforations that absorb sound.
How many coats of paint do ceiling tiles need?
Most tiles look best with two thin coats, allowing full drying time between each application for even coverage.
Can you paint foam ceiling tiles?
Yes, using water-based latex paint applied gently, since oil-based products can warp or damage foam material.
Does painting affect fire safety ratings?
In commercial buildings, certain coatings can affect fire ratings, so checking manufacturer guidelines before painting is recommended.
How long does a painted ceiling tile last?
A properly primed and painted tile typically holds its finish for several years before any touch-up becomes necessary.
Conclusion
So, can you paint ceiling tiles? Yes, and with the right preparation, tools, and technique, it is a straightforward way to refresh any room without the cost of full replacement. Cleaning, priming, and applying thin coats are the steps that matter most for a lasting finish.
Compared to other guides on this topic, this article covers tile-specific handling, spray versus roller comparison, and maintenance in one place, giving readers a complete and practical resource rather than a generic overview.
Related Articles
Do You Need Gutters with a Metal Roof?
How to Install a Snow Bar on a Metal Roof?
Do Ceiling Tiles Have Asbestos? Full Safety Guide
How Do You Fix a Leaky Basement Wall? Complete Step-by-Step Guide
Why Does My Basement Smell Musty? Causes, Fixes & Prevention Guide