A smelly sink disposal is one of the most common kitchen problems, and it usually happens because leftover food particles get stuck inside the unit and start to rot over time.
Learning how to clean a smelly sink disposal does not require any special tools or professional help in most cases, since simple kitchen ingredients like baking soda, vinegar, salt, and citrus peels can fix the issue within minutes.
The smell often comes from grease, bacteria, or food debris hiding in places you cannot see, such as under the rubber splash guard. In this guide, you will learn exactly why the odor happens, which home remedies work best, how to prevent the smell from coming back, and when the problem might need a professional plumber instead of a DIY fix.
Why Does Your Sink Disposal Smell?
Before fixing the smell, it helps to understand where it actually comes from, since different causes need slightly different solutions. Most odors form when leftover waste sits inside the disposal for too long and begins to decompose.
Trapped Food Particles and Grease
Small bits of food, especially fibrous or oily leftovers, often get stuck along the walls of the disposal chamber instead of washing away completely.
Over a few days, this trapped waste starts to break down and release a sour or rotten smell. Grease is a particular problem because it hardens on the blades and grinding chamber, trapping odor-causing bacteria inside it.
Mold and Bacteria Growth
Because the disposal stays damp almost all the time, it creates a perfect environment for mold spores and bacteria to multiply quickly. These microorganisms feed on leftover organic matter and produce a musty or sulfur-like smell that gets stronger the longer it is left untreated. This is one of the main reasons a disposal can smell bad even right after it has been run with water.
The Hidden Splash Guard Problem
The rubber splash guard sitting inside the drain opening is often the biggest hidden culprit behind persistent odors.
Food particles frequently get lodged in the folds of this rubber flap, where they are never touched by the regular grinding or flushing process. Many homeowners clean the visible parts of the disposal but forget this area completely, which is why the smell keeps returning.
Safety Precautions Before You Start Cleaning
Cleaning a garbage disposal is simple, but it involves working near sharp blades, so a few safety steps are necessary first. Taking two minutes to prepare properly will keep the entire cleaning process accident-free.
Turn Off the Power Completely
Always switch off the disposal using the wall switch, and if possible, unplug the unit from under the sink or turn off the breaker connected to it.
This step is non-negotiable, since accidentally activating the disposal while your hand or a tool is inside can cause serious injury. Double-check that the switch is off before placing anything into the drain opening.
Gather the Right Tools and Supplies
Having everything ready beforehand makes the cleaning process faster and safer, since you will not need to search for items mid-task. A basic cleaning kit for this job includes the following:
- Rubber gloves to protect your hands
- A flashlight to see inside the disposal
- An old toothbrush for scrubbing tight spaces
- Baking soda, white vinegar, ice cubes, rock salt, and citrus peels
- Tongs or pliers to remove any visible debris
Effective Home Remedies to Clean a Smelly Sink Disposal
Several natural methods work extremely well for people wondering how to clean a smelly sink disposal without buying chemical products. Each method targets a different part of the problem, from mechanical buildup to bacterial odor.
Ice and Salt Scrub Method
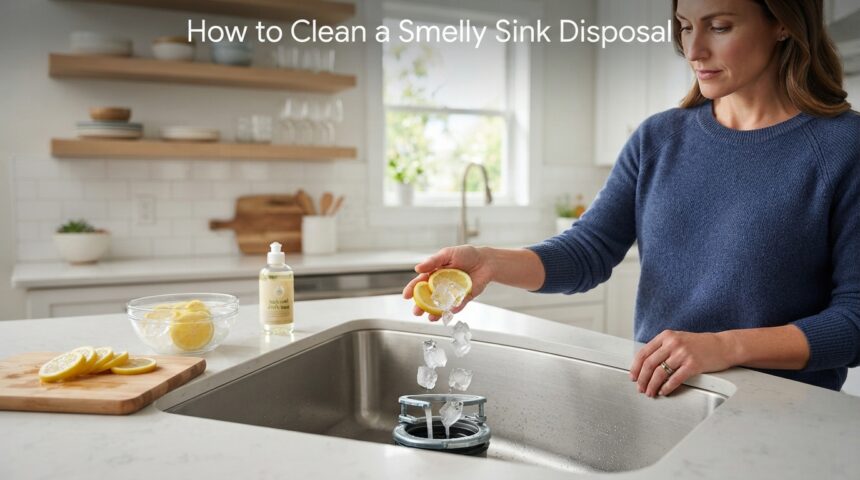
Pour about two cups of ice cubes along with one cup of rock salt into the disposal, then run cold water while switching the unit on for thirty to sixty seconds.
The ice acts like a natural abrasive that knocks loose grime and grease off the blades, while the salt helps scrape away any remaining residue. This method is best used as a first step before applying other cleaning solutions.
Baking Soda and Vinegar Method
Pour half a cup of baking soda into the drain, followed slowly by one cup of white vinegar, and let the mixture fizz undisturbed for ten to fifteen minutes.
This chemical reaction breaks down grease buildup and neutralizes the bacteria responsible for bad smells. Once the fizzing stops, flush the disposal with hot water to wash away the loosened debris completely.
Citrus Peel Freshening Method
Grinding citrus peels such as lemon, lime, or orange while running cold water is one of the easiest ways to leave the disposal smelling fresh instantly.
The natural oils released from the peels cut through leftover grease while masking any lingering odor with a clean scent. This step works best as a finishing touch after the deeper cleaning methods above.
Dish Soap and Hot Water Flush
Running hot water mixed with a few drops of dish soap through the disposal helps dissolve any remaining oily film coating the interior walls.
This flush should be done for about one to two minutes to ensure the water reaches every part of the grinding chamber. It is a good habit to repeat this step after cooking greasy meals, not just during a deep clean.
Deep Cleaning the Rubber Splash Guard
Since the splash guard is often the real source of a stubborn smell, it deserves separate attention beyond the main disposal chamber.
Carefully lift the rubber flap using gloved fingers and shine a flashlight underneath it to check for trapped food buildup. Scrub both the top and bottom surfaces with an old toothbrush and a small amount of dish soap, then rinse thoroughly with warm water before letting it dry.
Store-Bought Cleaners vs Natural Methods
While natural remedies solve most odor problems, some situations call for a stronger, store-bought solution. Understanding when to use each option prevents unnecessary chemical exposure or pipe damage.
When to Use Chemical Cleaners
If the smell persists even after trying baking soda, vinegar, and citrus methods multiple times, an enzyme-based disposal cleaner may be needed to break down deeper buildup.
These cleaners are designed specifically for disposal units and are generally safer for pipes than harsh household chemicals. They work well as an occasional deep-cleaning boost rather than a everyday solution.
What to Avoid Using
Bleach and other harsh chemical drain cleaners should never be poured into a garbage disposal, since they can corrode the metal components and damage rubber seals over time.
These products may also react poorly with standing water inside the pipes, creating fumes that are unsafe to inhale in an enclosed kitchen space. Sticking to enzyme-based or natural solutions is a much safer long-term approach.
How to Prevent Future Odors
Once the smell is gone, maintaining a simple routine will stop it from returning and keep the disposal running efficiently. The table below summarizes good habits versus common mistakes that lead to bad smells.
| Good Habit | Common Mistake to Avoid |
| Run cold water for 15-20 seconds after each use | Turning off water immediately after grinding |
| Grind citrus peels weekly for freshness | Letting greasy food sit inside overnight |
| Clean the splash guard once a week | Ignoring the rubber flap during cleaning |
| Use the disposal regularly, even for small scraps | Leaving the unit unused for long periods |
| Flush with baking soda and vinegar monthly | Pouring cooking oil or grease down the drain |
Daily Habits That Make a Difference
Running cold water before, during, and after using the disposal helps flush waste through the pipes instead of allowing it to settle inside the chamber. Cold water is preferred over hot water during grinding because it keeps any grease solid, allowing it to be chopped up and washed away more effectively.
Foods You Should Never Put Down the Disposal
Certain foods cause more odor and mechanical strain than others, so avoiding them protects both the smell and the lifespan of the unit. Eggshells, coffee grounds, fibrous vegetables like celery, and starchy foods like pasta or rice should be thrown in the trash instead of the sink.
When to Call a Professional Plumber
If the smell continues even after thorough cleaning, or if it is accompanied by unusual grinding noises, leaks, or slow drainage, the issue may go beyond surface-level buildup.
A professional can check for deeper problems such as a cracked seal, a clogged P-trap, or motor issues that home remedies cannot fix. It is better to address these signs early rather than risk permanent damage to the plumbing system.
Frequently Asked Questions
Can I use bleach in my sink disposal?
Bleach is not recommended because it can damage rubber seals and metal parts over repeated use. Enzyme-based cleaners or the baking soda and vinegar method are much safer alternatives that still eliminate odors effectively.
How often should I clean my garbage disposal?
A light cleaning with cold water and citrus peels should be done weekly, while a deeper clean using baking soda and vinegar works well once a month. Households that cook frequently with oily or meaty foods may need to clean slightly more often.
Is it normal for a brand-new disposal to smell?
A small odor when a disposal is first installed is usually normal and often disappears after a few uses. However, if the smell continues or worsens quickly, it is worth checking for installation issues or manufacturing debris left inside.
Can vinegar damage my garbage disposal?
Vinegar is mild and safe for regular use in a disposal, as it does not corrode metal or rubber parts the way bleach can. It is actually one of the most recommended natural cleaning agents for this exact purpose.
Conclusion
Knowing how to clean a smelly sink disposal comes down to understanding where the odor originates and using the right combination of simple, natural remedies to remove it.
Most kitchens already have everything needed, including baking soda, vinegar, ice, salt, and citrus peels, to solve the problem without spending money on professional services. By building a short weekly and monthly cleaning routine, the smell can be avoided altogether, keeping the kitchen fresh and the disposal working efficiently for years to come.
Related Articles
How to Clean Slate Tile Floors: Complete Care & Maintenance Guide
What Size Trowel for 12×24 Floor Tile?
Do Gutter Guards Cause Ice Dams? The Truth Homeowners Need to Know
How to Measure a Ceiling Fan: The Complete Size Guide for Every Room