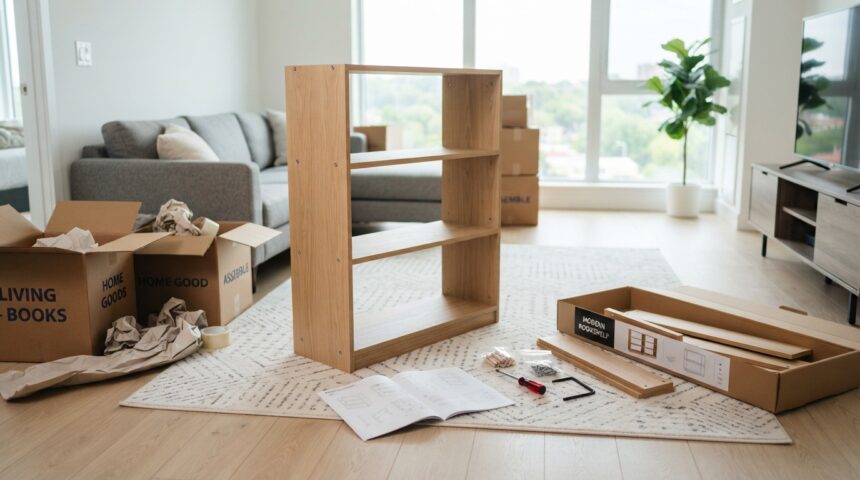
Moving into a new home is exciting, but the real work often begins once the boxes are inside and the furniture needs to be put back together. Knowing how to assemble furniture after a move properly can save you hours of frustration, prevent damaged parts, and help your new space feel livable much faster.
This guide breaks the entire process into simple, easy-to-follow steps, from preparing your workspace to handling common assembly mistakes. Whether you are dealing with a bed frame, wardrobe, or bookshelf, the same core principles apply.
By the end of this article, you will have a clear, practical roadmap for getting every piece of furniture assembled correctly and safely.
Why Post-Move Assembly Feels Overwhelming
After a long move, energy levels are usually low, and unpacking dozens of boxes on top of assembling furniture adds extra pressure.
Parts often get mixed between boxes, and instructions may be misplaced during transit. This combination makes the task feel bigger than it actually is, even though the assembly itself is usually straightforward once organized properly.
What This Guide Covers
This guide walks through every stage of furniture assembly after relocating, including preparation, sorting hardware, step-by-step building instructions, and troubleshooting.
It also includes furniture-specific advice so you are not left guessing when working with different item types. The goal is to make the entire process simple and stress-free.
Who This Guide Is For
This article is written for renters, homeowners, and first-time movers who need clear instructions without technical jargon. It is equally useful for someone assembling a single bookshelf or an entire apartment’s worth of furniture. No prior assembly experience is required to follow along.
Before You Start: Preparation
Preparation is the single most important step in furniture assembly, as it prevents most common problems before they happen. Taking a few extra minutes here saves significant time later.
Unpacking Strategy
Instead of opening every box at once, unpack room by room so furniture parts do not get mixed together. This method keeps related pieces together and reduces the chances of losing small components during the unpacking rush.
Locating Hardware Bags and Manuals
Hardware bags are often taped to furniture panels or packed separately, so check both before assuming anything is missing. If a manual is lost, most manufacturers offer free digital copies on their official websites, searchable by model number.
Setting Up a Clean Workspace
Choose an open, flat area with good lighting before starting assembly. A cluttered space increases the risk of losing screws or scratching furniture panels, so clearing the floor first makes the entire process smoother.
Essential Tools Checklist
Having the right tools ready avoids unnecessary interruptions once assembly begins.
| Tool | Purpose |
| Screwdriver set | Tightening screws of various sizes |
| Allen key/hex wrench | Common in flat-pack furniture |
| Rubber mallet | Gently tapping dowels or joints into place |
| Level | Checking shelves and frames are even |
| Pliers | Handling stubborn nuts or bolts |
Safety Basics
Wear gloves when handling sharp edges or metal brackets, and always lift heavy panels using your legs rather than your back. Keeping the floor clear of loose parts also reduces the risk of tripping while assembling larger pieces.
Sorting and Organizing Parts
Before assembly begins, all parts should be grouped and checked against the included parts list. This step prevents confusion once building starts.
Grouping Panels, Screws, Bolts, and Dowels
Separate large panels from small hardware immediately after unboxing. Keeping categories distinct makes it easier to identify which pieces belong to which section of the furniture.
Using Trays or Labeled Bags
Small screws and bolts are easy to lose, so place them in labeled containers or muffin trays. This simple system prevents wasted time searching the floor for a single missing screw later in the process.
Cross-Checking Against the Parts List
Lay out every component and compare it to the manual’s parts list before starting. Doing this early identifies missing or extra pieces immediately, rather than midway through assembly when it is harder to fix.
Handling Missing or Damaged Pieces
If a part is missing or damaged, contact the manufacturer directly using the model number found in the manual. Most companies ship replacement parts free of charge, especially if the issue is reported shortly after delivery.
Reading and Understanding Instructions
Instructions are designed to prevent errors, so reading them fully before starting saves time overall.
Manual vs. No Manual
If the printed manual is missing, search the manufacturer’s website using the furniture’s model number to find a downloadable version. Many manuals are also available as video tutorials, which can be easier to follow visually.
Understanding Diagrams and Symbols
Furniture manuals rely heavily on diagrams rather than text, so take time to study each image before acting. Arrows typically indicate direction, while numbered circles usually represent specific hardware pieces.
Why Step Order Matters
Skipping ahead often leads to panels being attached in the wrong order, making later steps difficult or impossible. Following the sequence exactly as listed ensures each connection point remains accessible throughout assembly.
General Assembly Process
Once preparation is complete, the actual building process follows a fairly consistent pattern across most furniture types.
Building the Base or Frame First
Start with the largest structural pieces, as these form the foundation for everything else. A stable base makes attaching smaller components significantly easier later on.
Attaching Side Panels
Once the frame is stable, attach side panels using the specified screws or dowels. Align edges carefully before tightening, since misaligned panels can cause long-term structural issues.
Adding Shelves, Drawers, or Doors
These components are usually added after the main frame is secure. Adding them earlier can make the furniture unstable and harder to maneuver during assembly.
Hand-Tightening vs. Final Tightening
Hand-tighten all screws first so adjustments can still be made if something is slightly misaligned. Only fully tighten every connection once the entire structure has been checked for accuracy.
Checking Alignment Before Locking Down
Before final tightening, confirm that all panels are square and level. This step prevents wobbling and ensures the furniture remains stable for years of everyday use.
Furniture-Specific Guides
Different furniture types require slightly different approaches, even though the general principles remain the same.
Beds and Bed Frames
Bed frames typically require assembling the headboard, footboard, and side rails before adding support slats. Confirm all bolts are tightened evenly to avoid squeaking or shifting over time.
Wardrobes and Closets
Wardrobes often involve heavier panels, so having a second person help hold pieces steady is recommended. Doors and shelves should be added only after the main frame is fully secured.
Bookshelves and Cabinets
These pieces usually rely on dowels and cam locks rather than visible screws. Tap dowels gently with a rubber mallet to avoid cracking the wood panels.
Desks and Tables
Legs are typically attached to the underside of the tabletop using pre-drilled holes. Ensure the surface is protected with a soft cloth to avoid scratches during assembly.
Sofas and Modular Seating
Modular sofas often connect using metal brackets or clips between sections. Confirm each section locks securely before placing cushions back onto the frame.
TV Stands and Entertainment Units
These units often include cable management holes, so plan cord routing before final assembly. Attaching back panels last makes it easier to access internal wiring space if needed.
Common Mistakes to Avoid
Avoiding a few key mistakes can make the entire process significantly smoother.
Overtightening Screws Too Early
Fully tightening screws before all panels are aligned can make adjustments difficult or damage the wood. Always leave room for minor corrections until the structure is confirmed stable.
Skipping Steps or Assembling Out of Order
Rushing through instructions often leads to backtracking, which wastes more time than following the correct order from the start. Each step typically depends on the one before it.
Forcing Mismatched Parts
If a piece does not fit smoothly, stop and recheck the instructions rather than forcing it. Forcing parts together often causes cracks or stripped screw holes.
Ignoring Weight or Stability Warnings
Manufacturer warnings about maximum weight or wall-anchoring exist for safety reasons. Ignoring them can lead to furniture tipping, especially with tall or top-heavy pieces.
Troubleshooting
Even careful assembly can run into small issues, but most are easy to resolve.
Wobbly or Uneven Furniture Fixes
Check that all screws are tightened evenly and that the floor beneath the furniture is level. Adjustable furniture feet can also help correct minor unevenness.
Handling Stripped Screws
If a screw hole becomes stripped, inserting a wooden toothpick with wood glue before reinserting the screw often restores grip. Allow the glue to dry fully before applying weight.
Missing Parts and Manufacturer Support
Most furniture brands have dedicated support pages for ordering replacement hardware. Provide the model number and part description for the fastest response.
Reassembling Pre-Built Furniture
If furniture was moved fully assembled and needs minor reattachment, focus only on the specific joints that came loose rather than disassembling the entire piece unnecessarily.
Tips for Faster, Easier Assembly
A few practical habits can speed up the entire process significantly.
Assembling With a Partner vs. Solo
Having a second person hold panels steady reduces assembly time considerably, especially for larger furniture. Solo assembly is still possible but requires more patience and careful positioning.
Using a Power Drill Safely
A power drill speeds up screw insertion, but should be used on a low torque setting to avoid overtightening or stripping holes. Manual tightening for the final turn is often safer.
Time-Saving Tricks From Professionals
Professional assemblers often organize hardware by step number rather than type, matching the manual’s sequence. This reduces the time spent searching for the correct screw at each stage.
Post-Assembly Checklist
Once assembly is complete, a few final checks ensure everything is safe and stable.
Stability Test
Gently push or shake the furniture to confirm there is no excessive movement. Any wobbling should be addressed immediately before regular use begins.
Wall-Anchoring Heavy Furniture
Tall furniture such as wardrobes or bookshelves should be anchored to the wall, especially in homes with children. Anchor kits are often included or available separately from the manufacturer.
Cleaning Up Packaging and Leftover Hardware
Dispose of packaging responsibly and store any leftover hardware in a labeled bag near the furniture. Extra screws are often included intentionally as spares.
When to Call a Professional
Some assembly situations are better handled by trained professionals rather than attempting DIY solutions.
Signs Assembly Is Too Complex for DIY
If instructions are unclear, parts are damaged, or the furniture involves complex mechanisms, professional help may save time and prevent damage. Heavy or oversized furniture especially benefits from expert handling.
Cost vs. Benefit of Hiring an Assembly Service
While hiring help adds cost, it can be worthwhile for large volumes of furniture after a move. Weighing time saved against service fees helps determine whether professional assembly is the right choice.
FAQs
Do I need special tools to assemble furniture after a move?
Most flat-pack furniture only requires basic tools like a screwdriver and Allen key, both usually included in the box.
What should I do if I lose the assembly instructions?
Search the manufacturer’s website using the model number, as most brands offer free downloadable manuals.
How long does furniture assembly usually take after a move?
Simple items like bookshelves take under an hour, while larger pieces like wardrobes may take two to three hours.
Conclusion
Assembling furniture after a move does not need to be stressful when approached with proper preparation and a clear step-by-step process.
Organizing parts, following instructions carefully, and avoiding common mistakes make the entire experience faster and safer. With this guide, you now have a complete roadmap for how to assemble furniture after a move confidently and correctly.
Related Articles
Can you lay Hardwood Floors Over Tile? Complete Guide
How to Regrout Tile Floor: A Complete Step-by-Step Guide
How Long Does It Take to Install a Garage Door?
How Do You Wash Bathroom Rugs? A Complete Step-by-Step Guide