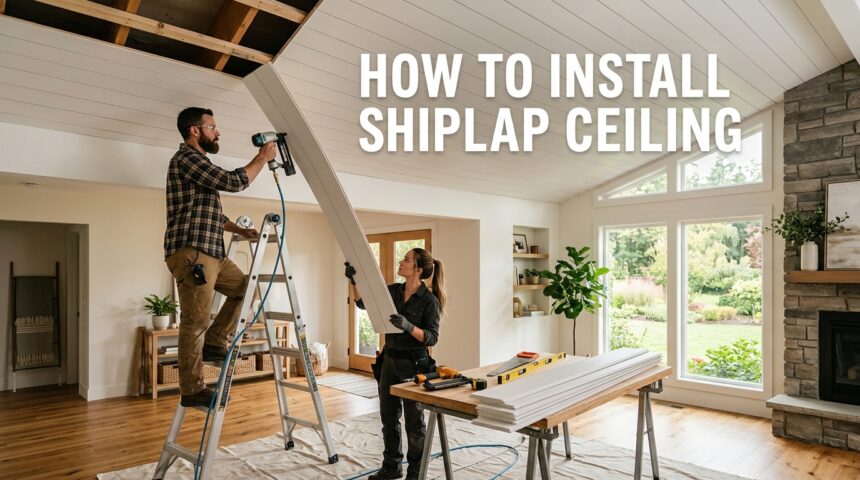
Learning how to install shiplap ceiling boards is one of the simplest ways to turn a plain, flat ceiling into a warm and textured design feature. This guide walks you through every stage of the process, from choosing the right material to nailing the final board and finishing the surface.
It is written for homeowners who have never handled a nail gun as well as for people who already have some DIY experience. By the end of this article, you will understand the full workflow needed to plan, cut, install, and finish a shiplap ceiling without hiring a contractor.
Understanding Shiplap Basics
Before picking up any tools, it helps to understand what shiplap actually is and how it differs from similar wall and ceiling treatments. This section explains the material types and why shiplap has become a favourite ceiling upgrade among homeowners and interior decorators.
Shiplap vs Tongue-and-Groove vs Board-and-Batten
Shiplap boards have a rabbet cut along their edges so each board overlaps the next, creating a small shadow line between rows.
Tongue-and-groove boards instead lock together with a protruding tongue that slots into a groove, giving a flatter, tighter finish. Board-and-batten uses flat panels with narrow strips covering the seams, producing a more vertical, structured look that suits walls more than ceilings.
Types of Shiplap Materials
Real wood shiplap gives the most authentic texture and grain but is heavier and reacts to humidity, so it needs acclimation before fitting.
MDF and faux-wood PVC options are lighter, pre-finished, and resist moisture, making them a practical choice for kitchens or bathrooms. Choosing between these materials usually comes down to budget, ceiling weight limits, and how much natural texture you want visible.
Choosing Thickness and Width for Ceilings
Ceiling shiplap is typically thinner and narrower than wall shiplap because it needs to be lightweight enough to hold overhead without sagging over time.
A common choice is boards around half an inch to three-quarters of an inch thick and five to six inches wide, since narrower boards are easier to fit around light fixtures and vents. Wider boards cover more area per row and mean fewer seams, but they also show any waviness in the ceiling more clearly.
Planning Your Project
Good planning prevents wasted material and uneven rows later in the project. This section covers measuring, direction, and budgeting decisions that should be finalised before any board is cut.
Measuring the Ceiling and Calculating Boards Needed
Start by multiplying the length and width of the room to get the total square footage of the ceiling.
Divide that number by the coverage area of a single board, then add ten to fifteen percent extra to account for cuts, mistakes, and pattern staggering. Keeping a written cut list saves time once you are working overhead and cannot easily recheck measurements.
Deciding Board Direction
Running boards perpendicular to the ceiling joists is the standard approach because it gives you a nailing point across the full width of the room.
In narrow rooms, running boards along the shorter dimension can make the space feel visually wider, while running them lengthwise in a hallway can stretch the perceived length. If your joists run in a direction that conflicts with your preferred visual layout, furring strips can be added to solve the problem, which is covered later in this guide.
Budgeting and Timeline
A shiplap ceiling is generally one of the more affordable ceiling upgrades since it mainly requires boards, nails, and basic finishing supplies rather than specialised labour.
Doing the work yourself over a weekend can save a significant amount compared to hiring a professional installer, though larger or vaulted ceilings may need two people and extra time. Setting aside a full day for installation and a separate day for finishing keeps the project realistic without rushing the details.
Tools and Materials Checklist
Having every tool ready before you start prevents interruptions once boards are cut and staged. The table below summarises what most shiplap ceiling projects require.
| Category | Items Needed |
| Measuring & Marking | Tape measure, stud finder, chalk line, pencil, level |
| Cutting | Miter saw or circular saw, jigsaw for fixture cutouts |
| Fastening | Brad nailer or nail gun, finish nails, construction adhesive |
| Finishing | Wood filler, caulk, sandpaper, primer, paint or stain |
| Safety | Safety glasses, ear protection, dust mask, step ladder |
Essential Tools List
A stud finder and chalk line are arguably the two most important tools because they determine where every board gets nailed. A brad nailer speeds up installation dramatically compared to hand-nailing and reduces the risk of splitting the boards.
A miter saw is useful for clean, repeatable cuts, especially when boards need to be trimmed to fit tightly against walls.
Materials List
Beyond the shiplap boards themselves, you will need finish nails long enough to reach through the board and into the joist securely.
Construction adhesive is optional but recommended for extra holding strength, particularly on ceilings where gravity works against the fasteners. Caulk and wood filler are needed afterward to hide nail holes and seams before painting.
Pre-Installation Preparation
Preparation steps protect the boards from warping and make the actual installation smoother. This section explains acclimation, joist marking, and fixture handling before cutting begins.
Acclimating the Wood
Real wood shiplap should sit inside the room where it will be installed for at least two to three days before fitting.
This allows the boards to adjust to the room’s humidity and temperature, reducing the chance of gaps or warping appearing weeks after installation. Faux wood or PVC shiplap does not usually require this step since it is less sensitive to moisture changes.
Locating and Marking Ceiling Joists
Use a stud finder to locate the first joist, then measure at the standard sixteen or twenty-four inch spacing to find the rest across the ceiling.
Mark each joist location at both ends of the room and connect the marks using a chalk line so you have a continuous guide to nail into. Nailing only into drywall without hitting a joist will not hold the weight of the boards over time.
Handling Fixtures and Obstacles
Turn off power at the breaker before removing any light fixtures, ceiling fans, or vent covers that sit in the installation area. Mark the position of each fixture opening on your layout plan so you know exactly where boards will need cutouts later.
Leaving fixtures in place but working carefully around them is possible too, though removing them usually gives a cleaner, faster result.
Step-by-Step Installation Process
This is the core part of learning how to install shiplap ceiling boards correctly, covering the first row through to the final cut piece.
Snapping Guidelines and Cutting the First Board
Once joists are marked, snap a straight guideline along the starting wall to keep the first row perfectly aligned. Measure the ceiling width and cut your first board to length, leaving a small expansion gap of about one eighth of an inch at each wall.
This first board sets the direction for every row that follows, so double-check it with a level before fastening.
Installing the First Row
Position the first board tightly against the starting wall with the open edge of the rabbet facing outward so the next board can slide into it.
Nail through the board into each joist it crosses, blind-nailing through the angled edge where possible and adding a face nail near the ends for extra grip. A bead of construction adhesive along the back of the board adds holding strength if the ceiling surface is uneven.
Adding Subsequent Rows
Fit each new board’s rabbeted edge into the previous row and tap gently with a rubber mallet or a wood block to seat it without denting the surface.
Stagger the seams between rows so that joints do not line up directly above one another, which keeps the finished ceiling looking intentional rather than patchy. Continue this pattern row by row, checking every few boards with a level to catch any drift early.
Cutting Around Fixtures and Finishing the Last Row
When a board reaches a light fixture, vent, or beam, hold it in place, mark the cutout location, and use a jigsaw to cut the opening before nailing it up.
The final row against the opposite wall often needs to be ripped to a narrower width, and because the blind-nailing angle will not work there, face-nailing is usually required instead. Trim or molding can then be added along the ceiling edges to cover any rough cuts where the boards meet the wall.
Finishing Touches
Finishing work is what turns a functional installation into a polished, professional-looking ceiling.
Filling, Caulking, and Painting
Fill every visible nail hole with wood filler, let it dry, then sand it smooth so it disappears once painted. Run a thin bead of caulk along any seams where boards meet trim or walls for a cleaner transition. Finish with a coat of primer followed by paint or stain, using a foam roller for an even, brush-mark-free result overhead.
Common Mistakes to Avoid
Even a straightforward project like this has a few pitfalls that repeatedly trip up first-time installers.
| Mistake | Why It Matters |
| Skipping acclimation | Causes gaps or warping after installation |
| Not finding joists | Boards loosen and sag under their own weight |
| Ignoring expansion gaps | Boards can buckle as humidity changes |
| Poor seam staggering | Makes the pattern look uneven and repetitive |
| Rushing the finishing steps | Leaves visible nail holes and rough seams |
Maintenance and Care
A finished shiplap ceiling needs very little upkeep, but a few habits keep it looking fresh for years. Dust it occasionally with a soft microfiber duster or a vacuum brush attachment to prevent buildup in the seams.
In kitchens or bathrooms, wipe away moisture promptly and keep an eye on any boards near steam sources, since sustained humidity can eventually affect real wood over time.
Frequently Asked Questions
Can I install shiplap over a popcorn ceiling?
Yes, shiplap can usually be nailed directly over popcorn texture as long as you nail into the joists rather than relying on the texture coat, which has no holding strength on its own.
How long does installation take?
A standard-sized room typically takes one to two days for a confident DIYer, including layout, cutting, and nailing, with finishing work often done on a separate day.
Do I need special tools?
A brad nailer, stud finder, and a saw for cutting boards are the main tools required; nothing overly specialised is needed beyond standard home improvement equipment.
Can I do this project alone?
Ceiling work is easier and safer with a second person to hold boards in place overhead, though a single person can manage smaller rooms using temporary supports.
Is a shiplap ceiling suitable for every room?
It works well in most living spaces, bedrooms, and kitchens, but bathrooms or areas with heavy steam exposure benefit from moisture-resistant materials like PVC shiplap rather than real wood.
Conclusion
Installing a shiplap ceiling is a manageable weekend project once you understand the planning, layout, and nailing sequence covered in this guide.
Careful joist marking, proper acclimation, and staggered seams make the biggest difference between an amateur result and a clean, lasting finish. With the right tools and a bit of patience, this project can transform a plain ceiling into a standout feature of the room.
Related Articles
How Long Does It Take to Do a Bathroom Renovation? Timelines, Phases & What to Expect
White Oak Cabinets: A Complete Guide 2026
Bathroom Vanity Cabinet Sizes: Complete Guide 2026