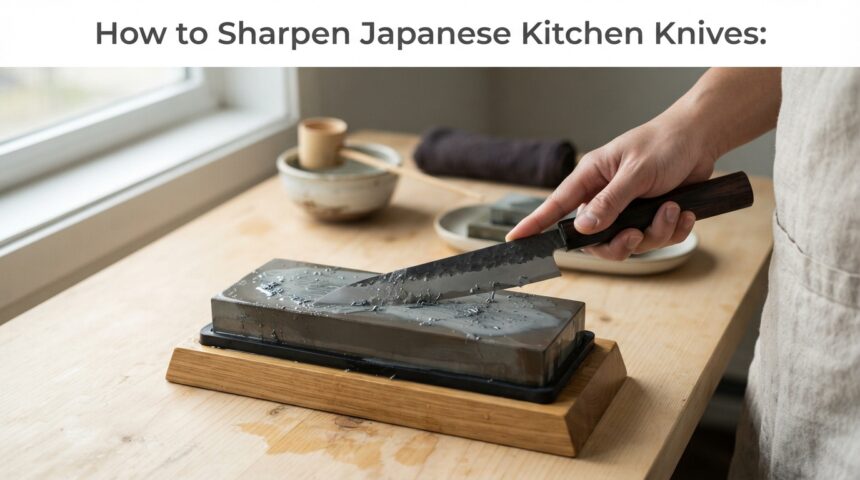
Japanese kitchen knives are sharpened by hand on a whetstone, not with pull-through or electric sharpeners. Start with a medium stone of about 1000 grit and hold the blade at roughly 10 to 15 degrees.
Push the edge across the wet stone with light pressure until a thin burr forms on the opposite side. Repeat on the other side, then polish on a 3000 to 6000 grit stone. Remove the burr with a strop or very light strokes. Rinse and dry the blade fully so it stays sharp and rust-free.
Understanding Japanese Kitchen Knives
Japanese blades are thinner and harder than most Western knives. Knowing what you own tells you how to sharpen it.
Common Types of Japanese Knives
The gyuto is the all-round chef’s knife, while the santoku and petty handle general and small tasks. The nakiri and usuba are made for vegetables. The yanagiba and deba are traditional fish knives used by sushi chefs.
Single-Bevel vs. Double-Bevel Blades
Double-bevel knives are ground on both sides, like most kitchen knives. Single-bevel knives, such as the yanagiba, are ground on one side only, with a flat back. This difference changes how you sharpen, so identify your blade before you begin.
Steel Types and Hardness
Carbon steels like Shirogami and Aogami take a very fine edge but rust easily. Stainless and powder steels, such as VG-10 and SG2, resist corrosion and hold their edge longer. Harder steel, often 60 HRC or more, sharpens beautifully but can chip under heavy pressure.
When Your Knife Needs Sharpening
A knife should be sharpened when its cutting performance drops, not on a fixed calendar. Learning to spot this early saves time and steel.
Signs of a Dull Knife
A dull blade slips off tomato skin, crushes herbs, or needs extra force to cut onions. You may also see light reflecting off the edge, which shows it has rounded over. Try the paper test: a sharp knife slices a hanging sheet cleanly without snagging.
Sharpening vs. Honing
Sharpening removes metal to create a brand-new edge. Honing only realigns a slightly bent edge and removes no steel. Japanese knives are best maintained with a fine stone or leather strop, since steel rods can chip hard blades.
How Often to Sharpen
Home cooks who use their knives daily usually need a full sharpening every two to four months. Light stropping between sessions extends that interval. Professional kitchens may sharpen weekly, depending on workload.
Tools and Materials You Need
A small, well-chosen kit is enough to sharpen Japanese knives properly. Quality matters more than quantity.
Choosing Your Whetstones
Soaking stones must sit in water for 5 to 10 minutes, while splash-and-go stones only need a quick wetting. Synthetic stones are consistent and beginner-friendly. Natural stones are costly and better suited to advanced users.
Understanding Grit Numbers
Grit describes how coarse a stone is: lower numbers cut faster, higher numbers polish. A combination stone, such as 1000/6000, is an ideal starting point for beginners.
| Grit Range | Purpose | When to Use |
| 200-400 | Repair | Chips, broken tips |
| 800-2000 | Sharpening | Regular dull edges |
| 3000-8000 | Polishing | Final refinement |
Helpful Extras and Tools to Avoid
A non-slip stone holder, a flattening stone, and a leather strop make the job safer and more accurate. A permanent marker and an angle guide help beginners track progress. Avoid pull-through sharpeners and electric grinders, because they remove too much steel and can chip the edge.
Preparing to Sharpen
Good preparation prevents most sharpening errors. A stable setup lets you focus on holding a steady angle.
Setting Up Your Workspace
Place the stone on a holder or damp towel at a comfortable height, with a bowl of water nearby. Wipe the knife clean of oil and food residue first. Keep a towel close so your hands stay dry and secure.
Flattening Your Stone
Stones wear into a shallow dip with use, which ruins your angle. Rub the stone on a flattening plate until the surface is even. Check it occasionally by drawing pencil lines across it and removing them evenly.
Finding the Right Angle
Most Japanese knives work well at 10 to 15 degrees per side. A simple guide is to stack two coins under the spine near the heel for about 15 degrees. Color the edge with a marker; if the ink disappears evenly, your angle is correct.
How to Sharpen Japanese Kitchen Knives with Double Bevels
This is the core method for gyuto, santoku, nakiri, and petty knives. Follow the order below without skipping steps.
Sharpening the First Side
Place the heel of the blade on the stone at your chosen angle. Push the edge forward and slightly across the stone toward the tip, using light pressure and steady speed. Work small sections of the blade at a time so the whole edge is covered.
Raising and Feeling the Burr
Continue until a fine, rough lip appears along the entire opposite edge. Drag your fingernail across the edge, not along it, to feel it. No burr means the edge is not yet fully ground.
Sharpening the Second Side
Flip the knife and repeat the same motion with equal strokes. The burr will move to the first side once this edge is complete. Keep the stone wet, because the slurry helps it cut.
Polishing, Deburring, and Testing
Move to a 3000 to 6000 grit stone and use lighter strokes to refine the edge. Remove the burr with feather-light alternating strokes or a strop. Finish by slicing paper or a tomato to confirm sharpness.
Sharpening Single-Bevel Knives
Yanagiba, deba, and usuba knives need a different approach because only one side carries the bevel.
Working the Bevel Side
Rest the full bevel flat on the stone and raise the spine slightly until the surface lies flush. Sharpen with even strokes until a burr forms on the flat back. Keep the bevel width consistent from heel to tip.
Treating the Back (Ura)
The back has a slight hollow and should touch the stone only along its edge. Lay it flat and take a few gentle strokes to remove the burr. Never grind the back heavily, as this ruins the hollow.
Repairing Damaged Knives
Chips and rounded tips need more metal removal than routine sharpening. The coarse stone does this work.
Fixing Chips and Rounded Edges
Use a 200 to 400 grit stone to grind the edge back until the chip disappears. Take your time and keep the angle steady. Then progress through medium and fine stones to restore sharpness.
Knowing When to Call a Professional
Deep chips, bent blades, and broken tips on expensive knives are better handled by a skilled sharpener. Professional work costs less than replacing a ruined knife. It is also wise for vintage or handmade blades.
Common Mistakes and Troubleshooting
Most sharpening problems trace back to a few habits. The table shows the cause and remedy for each.
| Problem | Likely Cause | Solution |
| Knife stays dull | Angle too high or no burr | Lower the angle and raise a burr |
| Edge feels scratchy | Skipped grits | Return to the fine stone |
| Edge dulls quickly | Weak burr left on | Strop thoroughly |
| Chipping | Excess pressure | Use lighter strokes |
| Uneven edge | Dished stone | Flatten the stone |
Aftercare and Maintenance
A sharp edge lasts far longer when the knife is cared for properly after each use.
Cleaning and Drying
Wash the blade by hand with mild soap and dry it immediately. Carbon steel rusts within hours if left damp, so a light coat of camellia oil helps. Never use a dishwasher.
Storage and Cutting Surfaces
Store knives in a wooden saya, a magnetic strip, or a knife block with care to protect the edge. Cut on wood or soft rubber boards, and avoid glass, marble, or ceramic. These habits reduce chipping and keep the edge sharp longer.
Caring for Your Whetstones
Rinse stones after use and let them dry fully in the air. Store them away from freezing temperatures and flatten them regularly. Well-kept stones last for years.
Frequently Asked Questions
Can I use a pull-through sharpener on Japanese knives?
It is not recommended. These tools grind aggressively and can chip hard Japanese steel, so a whetstone is the safer choice for lasting results.
What grit should a beginner start with?
A 1000 grit stone is the best starting point. Add a 3000 to 6000 grit stone later for a finer, smoother finish.
How long does sharpening take?
A beginner usually needs 15 to 30 minutes per knife. With practice this drops to under 15 minutes.
Is professional sharpening better?
For routine care, home sharpening is quick and inexpensive. Professionals are ideal for major repairs or rare knives.
Conclusion
Learning how to sharpen Japanese kitchen knives comes down to the right stone, a steady angle, light pressure, and patient burr control. Start with one inexpensive knife, practice the strokes, and your skill will improve quickly. With regular care, your knives will stay precise and enjoyable to use for many years.
Related Articles
Dual Ceiling Fan Guide: Everything You Need to Know Before Buying
How to Clean Linoleum Floors: The Complete Step-by-Step Guide
Why Does My Toilet Keep Running?
How to Clean a Smelly Sink Disposal: A Complete Step-by-Step Guide