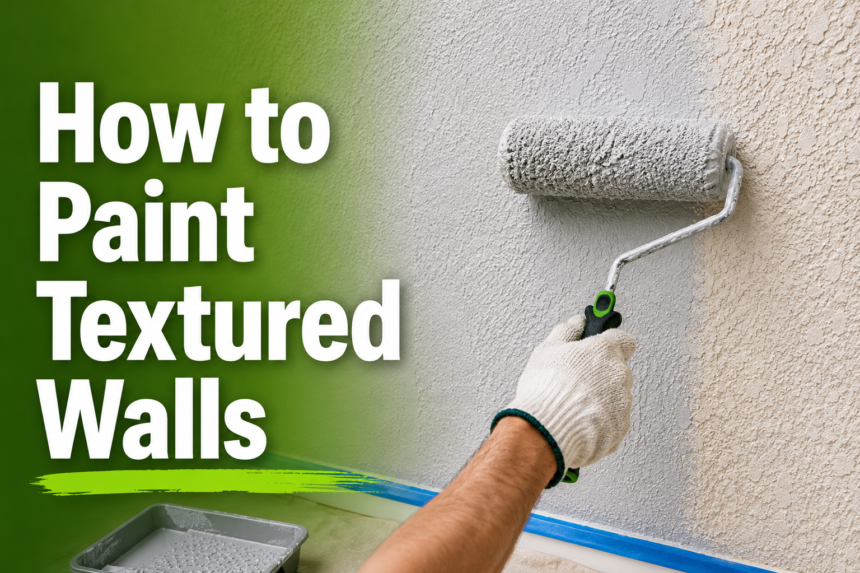
Textured walls are surfaces that have been finished with a raised or patterned coating instead of a flat, smooth plane. Instead of simply rolling drywall mud on evenly, a contractor applies it in a way that creates ridges, bumps, swirls, or stippled patterns. This is done for a few practical reasons: texture hides small imperfections in the drywall, adds visual interest to a room, and in older homes, was often just the standard style of the era. If you’ve ever run your hand across a wall and felt little peaks and valleys instead of a smooth surface, you’re dealing with a textured wall.
Why Painting Technique Matters for Textured Surfaces
Learning how to paint textured walls properly is different from painting a flat wall, and the difference matters more than most people expect. A flat wall forgives a lot of small technique errors because the surface is uniform. A textured wall is not forgiving in the same way. The grooves and recesses in the texture can trap paint unevenly, leaving some spots glossy and thick while others stay thin or even uncovered. Use the wrong roller, apply too much pressure, or rush between coats, and you’ll end up with a blotchy, unprofessional-looking finish. The right approach, on the other hand, gives you a rich, even coat that actually enhances the texture rather than fighting it.
Who This Guide Is For
This guide is written for homeowners tackling a weekend painting project, renters looking to refresh a space before moving out, and DIY enthusiasts who want professional-level results without hiring a contractor. Whether you’re dealing with a popcorn ceiling left over from the 1980s or a modern knockdown finish, the steps below will walk you through everything from surface prep to the final coat.
Understanding Wall Textures
Before you pick up a roller, it helps to know exactly what kind of texture you’re working with, since this affects almost every decision that follows.
Common Types of Wall Texture
| Texture Type | Appearance | Typical Location |
|---|---|---|
| Popcorn/Acoustic | Bumpy, cottage-cheese-like pattern | Ceilings, especially in homes built before the 1990s |
| Knockdown | Mottled, flattened stucco-like pattern | Walls and ceilings in newer builds |
| Orange Peel | Fine, subtle bumps resembling citrus skin | Walls in many contemporary homes |
| Sand Swirl | Circular, hand-troweled swirl pattern with a gritty feel | Older homes, decorative accent walls |
| Skip Trowel | Random, thin patches of texture with smooth gaps between | Southwestern and Mediterranean-style homes |
| Venetian Plaster | Polished, marble-like layered finish | High-end interiors, accent walls |
How Texture Type Affects Your Painting Approach
Heavier textures like popcorn or skip trowel demand thicker roller naps and more paint volume to fully saturate every crevice. Lighter textures like orange peel are more forgiving and can be handled with standard equipment. Delicate finishes like Venetian plaster often require specialty paints or glazes rather than standard wall paint, since a heavy roller can damage the polished layers.
Identifying Your Wall’s Texture Before Starting
If you’re unsure what texture you’re dealing with, run your palm across the surface and look at it under raking light (light coming in at a low angle, such as from a lamp placed close to the wall). This will exaggerate the pattern and make it much easier to classify. When in doubt, take a close-up photo and compare it to reference images, or ask at a local paint or hardware store.
Pre-Painting Preparation
Preparation is where most textured wall painting projects succeed or fail. Skipping this stage is the single biggest cause of disappointing results.
Assessing Wall Condition
Walk the room and inspect the walls closely for cracks, holes, water stains, or areas where the texture itself is crumbling or loose. Mark any problem spots with painter’s tape so you don’t forget about them once you start prepping.
Cleaning the Surface Properly
Dust and grease sit inside the grooves of textured walls far more than they do on flat ones, and paint won’t adhere well over grime. Use a dry microfiber duster or a vacuum with a brush attachment to remove loose dust first, then follow up with a damp sponge and a mild degreasing solution for kitchens, bathrooms, or areas with handprints and smudges. Let the wall dry completely before moving forward.
Repairing Damage and Patching
Fill cracks and holes with a lightweight spackle or joint compound. For textured surfaces, you may need to reapply matching texture over the patch once it’s dry, using a texture spray can (available at most hardware stores) to blend it in before painting. Sand lightly if needed, but avoid sanding down surrounding texture.
Sanding Considerations for Textured Surfaces
Unlike flat walls, textured walls generally don’t need full sanding. In fact, aggressive sanding can knock down or damage the texture pattern. Limit sanding to patched areas only, using a fine-grit sanding sponge that follows the contour of the wall.
Protecting Floors, Furniture, and Trim
Lay drop cloths across the floor and move furniture to the center of the room or out entirely. Use painter’s tape along baseboards, window frames, and ceiling lines. Textured walls tend to spatter more paint during rolling than flat walls, so extend your drop cloth coverage a bit further than you normally would.
Removing Switch Plates and Outlet Covers
Unscrew and remove all switch plates, outlet covers, and any wall-mounted fixtures before you begin. This small step saves a lot of time later and avoids awkward cutting-in around hardware.
Choosing the Right Materials
Best Paint Types for Textured Walls
Flat and eggshell finishes are generally the best choices for textured walls because they diffuse light evenly and don’t draw attention to the bumps and grooves the way a glossy sheen would. Satin can work in high-traffic or moisture-prone rooms like kitchens and bathrooms, but semi-gloss and high-gloss paints tend to highlight every imperfection in the texture and are best avoided on heavily textured surfaces.
Primer Selection and Why It’s Essential
Primer is not optional when learning how to paint textured walls correctly. It seals patched areas, evens out porosity differences across the surface, and helps the topcoat bond properly so you get consistent color and sheen. Use a stain-blocking primer if you’re covering water stains or smoke damage, and a bonding primer if you’re painting over glossy or previously oil-based paint.
Roller Nap Guide by Texture Depth
| Texture Depth | Recommended Nap Length | Examples |
|---|---|---|
| Light texture | ½” – ¾” | Orange peel, light skip trowel |
| Medium texture | ¾” – 1″ | Knockdown, sand swirl |
| Heavy texture | 1″ – 1¼” | Popcorn, deep skip trowel |
Brushes for Cutting In
A high-quality angled sash brush, typically 2 to 2.5 inches wide, gives you the control needed to cut in along ceiling lines, corners, and trim without slopping paint onto adjacent surfaces.
Paint Sprayers vs. Rollers: Pros and Cons
Paint sprayers can deliver a faster, more even coat over large, heavily textured areas like popcorn ceilings, since they push paint into every crevice without the flattening effect a roller can cause. However, sprayers require more masking and cleanup, and they use more paint overall due to overspray. Rollers are slower but offer more control, less mess, and no need for extensive masking, making them the better choice for most home DIY projects.
Additional Tools and Supplies Checklist
- Extension pole for ceilings and tall walls
- Paint tray with a textured-surface grid liner
- Painter’s tape (both standard and delicate-surface versions)
- Drop cloths
- Sanding sponge (fine grit)
- Spackle or joint compound
- Texture-matching spray (if patching)
- Primer suited to your wall condition
- Clean rags and a bucket of water
Step-by-Step Painting Process
Setting Up Your Workspace
Ensure good ventilation by opening windows or running a fan, and set up adequate lighting so you can spot missed areas as you go. Stir your paint thoroughly before starting, and keep a damp rag nearby for quick cleanup of drips.
Cutting In Edges and Corners
Start by cutting in around the edges of the wall, including corners, ceiling lines, and trim, using your angled brush. Work in small sections about two feet at a time so the cut-in paint stays wet and blends smoothly with the rolled paint that follows.
Rolling Techniques for Even Coverage
Load your roller evenly, then apply paint using a “W” or “M” pattern across a roughly three-by-three-foot section. This distributes paint without over-concentrating it in one spot. Once the “W” is laid down, go back and fill in the gaps with light, even strokes, working the roller in multiple directions to push paint into the texture’s crevices.
Working in Sections to Avoid Lap Marks
Always keep a wet edge by moving from one section directly into the next before the previous section dries. This prevents visible lap marks, which are especially noticeable on textured surfaces where paint thickness varies.
Applying Multiple Coats Correctly
Two coats are almost always necessary on textured walls, since a single coat rarely reaches every recess evenly. Apply the first coat as a base layer, then apply the second once it’s fully dry to fill in any thin spots and even out the overall color and sheen.
Drying Time Between Coats
Most latex wall paints need at least four hours to dry to the touch and are ready for a second coat within that window, though checking your specific product’s label is the safest approach. Textured walls can sometimes hold moisture in the grooves slightly longer than flat walls, so if you’re unsure, waiting a bit longer is safer than rushing.
Special Techniques by Texture Type
Painting Popcorn Ceilings and Walls
Use a thick nap roller (1″ to 1¼”) and don’t be afraid to use a generous amount of paint. Light pressure is key here, since pressing too hard can knock loose pieces of the popcorn texture off the surface entirely.
Painting Knockdown Texture
A medium nap roller works well here. Roll in multiple directions to ensure paint reaches both the raised and recessed portions of the pattern evenly.
Painting Light Orange Peel Texture
This subtle texture is the most forgiving to paint. A standard ½” to ¾” nap roller applied with normal technique will usually produce excellent results without much extra effort.
Painting Heavily Textured or 3D Surfaces
For very deep textures, consider a combination approach: use a sprayer or thick roller for the first coat to fully saturate the grooves, then follow with a standard roller for the second coat to even out the surface color.
Common Mistakes to Avoid
Understanding how to paint textured walls also means knowing what not to do. The most frequent mistakes include:
- Using the wrong roller nap – A nap that’s too thin won’t reach into deep grooves, leaving unpainted gaps.
- Over-rolling and flattening texture – Excessive back-and-forth rolling with too much pressure can smash down delicate texture over time.
- Skipping primer – This leads to blotchy color absorption and poor paint adhesion, especially over patched areas.
- Uneven paint buildup in grooves – Applying too much paint in one direction without cross-rolling leaves some recesses under-coated.
- Rushing between coats – Applying a second coat before the first is dry can cause peeling, streaking, or a cloudy finish.
Tips for a Professional-Looking Finish
Maintaining a Wet Edge
Keep your painting pace consistent and avoid long breaks mid-wall, since a dried edge will show as a visible seam once the paint cures.
Lighting Checks During Painting
Periodically step back and view the wall from an angle under bright light. This helps you catch thin spots or missed patches before the paint dries and becomes harder to touch up seamlessly.
Touch-Up Techniques
Keep leftover paint labeled and stored for future touch-ups. When touching up a textured wall, use a small piece of the same roller nap rather than a brush, since brush strokes tend to look different from rolled texture once dry.
When to Hire a Professional
If your walls have extensive texture damage, asbestos-containing popcorn ceilings (common in homes built before 1980), or delicate finishes like Venetian plaster, it’s worth consulting a professional rather than risking damage or health hazards from a DIY approach.
Maintenance and Longevity
Cleaning Painted Textured Walls
Dust textured walls periodically with a soft brush attachment on a vacuum, and spot-clean with a damp cloth and mild soap when needed. Avoid abrasive scrubbing, which can wear down paint sitting on raised texture points faster than on flat areas.
How Long Paint Lasts on Textured Surfaces
With proper prep and application, painted textured walls typically last seven to ten years before needing a refresh, though high-traffic areas or rooms with heavy sun exposure may need attention sooner.
Repainting Schedule Recommendations
Bathrooms and kitchens, which see more humidity and grease exposure, often benefit from repainting every five to seven years, while bedrooms and living rooms can often go longer between coats.
Frequently Asked Questions
Can You Paint Over Textured Wallpaper? Yes, in most cases, as long as the wallpaper is firmly adhered and not peeling. Clean the surface, prime with a bonding primer, and paint as you would any other textured surface.
How Much Paint Do You Need for Textured Walls? Textured walls typically require 20-40% more paint than flat walls of the same size because the surface area is greater once you account for the peaks and grooves. Always buy a bit extra to avoid running short mid-project.
Can You Smooth Texture Before Painting? Yes, though it’s labor-intensive. Skim-coating with joint compound and sanding it smooth is the standard method, but this is a separate project from painting itself and should be completed and fully dried before any paint is applied.
Does Textured Paint Need a Different Primer? Not necessarily a different type, but it does need a primer suited to the wall’s condition, such as a stain-blocking or bonding primer, applied generously enough to reach into the texture’s recesses.
Conclusion
Recap of Key Steps
Successfully learning how to paint textured walls comes down to a handful of core principles: properly clean and repair the surface, choose the right roller nap for your texture depth, prime before painting, and apply at least two even coats using consistent technique. Each of these steps plays a role in avoiding the blotchy, uneven look that often results from rushing the process.
Final Tips for Success
Take your time, work in manageable sections, and don’t be afraid to apply a bit more paint than you think you need, since textured surfaces absorb more product than flat walls. With the right prep and patience, you can achieve a smooth, professional-looking finish that enhances your wall’s texture instead of fighting against it.
Related Articles
How Wide Is Steel Roofing? Complete Panel Width Guide
Window with J-Channel: A Complete Homeowner’s Guide