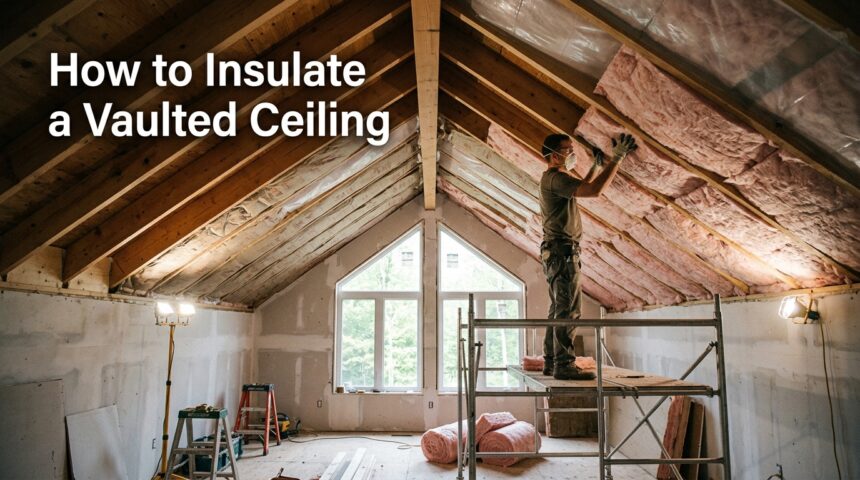
Knowing how to insulate a vaulted ceiling is different from insulating a regular flat attic, because vaulted ceilings usually have far less room between the roof deck and the interior ceiling surface.
This limited cavity space means every inch of insulation has to work harder, and getting airflow or vapor control wrong can lead to moisture buildup inside the roof structure.
In this guide, you will learn the exact methods, materials, and steps professionals use to insulate a vaulted ceiling correctly, along with the mistakes that cause the most damage over time. By the end, you will understand which approach fits your home, climate, and budget.
Why Vaulted Ceiling Insulation Matters
A poorly insulated vaulted ceiling does not just make a room uncomfortable, it actively wastes energy and can silently damage your roof structure.
Heat naturally rises, and in a home with a cathedral-style ceiling, that heat has a much shorter path to escape outside compared to a standard attic space.
Energy Loss Through Roofs
Roofs are one of the largest surfaces exposed to outdoor temperature swings, and a vaulted ceiling puts your living space directly against that surface with little buffer.
Without proper insulation, your heating and cooling systems work overtime trying to compensate for constant heat transfer through the roof. This directly increases monthly utility bills and puts extra strain on HVAC equipment.
Comfort Issues in the Home
Rooms with vaulted ceilings are notorious for uneven temperatures, feeling stuffy and hot near the peak in summer while staying cold near the floor in winter.
This stacking effect happens because warm air rises and gets trapped near an under-insulated ceiling. Proper insulation evens out these temperature layers and makes the room genuinely comfortable year-round.
Understanding Your Vaulted Ceiling Structure
Before choosing an insulation method, you need to understand what you are actually working with inside the roof assembly. Vaulted ceilings vary in rafter depth, and that depth largely determines which insulation approach is realistic for your home.
Rafter Depth and Cavity Space
The rafters in a vaulted ceiling form the only cavity available for insulation, and this space is often shallower than a typical attic floor joist bay.
Standard rafters might only be two-by-six or two-by-eight lumber, which limits how much insulation thickness you can fit without additional framing work. Knowing your exact rafter depth early on will save you from choosing a material that simply will not achieve the R-value your climate requires.
Roof Deck, Sheathing, and Underlayment Basics
Directly above the rafters sits the roof deck, usually plywood or OSB sheathing, followed by underlayment and the final roofing material like shingles or metal panels.
This layered structure matters because certain insulation methods, like exterior rigid foam, are applied above the sheathing rather than inside the rafter cavity. Understanding this layering helps you visualize where moisture barriers, air gaps, and insulation layers need to sit.
The Big Decision: Vented vs. Unvented Roof Assembly
Every vaulted ceiling insulation project starts with one major decision that shapes everything else: will the roof assembly be vented or unvented? This choice affects material selection, moisture control, and long-term performance.
What Is a Vented (Cold Roof) Assembly
A vented assembly keeps a continuous air channel between the top of the insulation and the underside of the roof deck, allowing outside air to flow from the soffits up to a ridge vent.
This moving air carries away any moisture that might accumulate and keeps the roof deck closer to outdoor temperature, which helps prevent ice dams. It is a traditional, well-understood method that works reliably when there is enough rafter depth to fit both insulation and a clear air gap.
Pros and Cons of Each Method
Both approaches can perform well when installed correctly, but they suit different situations. The table below compares the two methods across the factors homeowners care about most.
| Factor | Vented Assembly | Unvented Assembly |
| Airflow requirement | Needs soffit-to-ridge venting | No venting needed |
| Best insulation type | Batt, blown-in, or mineral wool | Closed-cell spray foam |
| Rafter depth needed | Deeper cavity for gap plus insulation | Can work with shallower cavities |
| Moisture control method | Continuous ventilation | Air-impermeable seal |
| Typical cost | Generally lower | Generally higher |
| DIY friendliness | More accessible for homeowners | Usually requires professionals |
Which Climates Suit Which Method
In climates with cold, snowy winters, vented assemblies are often favored because the airflow helps prevent ice dams by keeping the roof surface cold and uniform.
In humid or mixed climates, or in renovations with limited rafter depth, unvented hot roof assemblies are frequently the more practical and effective choice. Local building codes and typical regional practices should always be checked, since some areas have specific requirements based on climate zone.
Insulation Material Options
Choosing the right material is just as important as choosing vented versus unvented, since each option has different performance characteristics, costs, and installation requirements.
Fiberglass Batts
Fiberglass batts are precut panels that fit between standard rafter spacing and are one of the most widely available, affordable insulation options.
They work well in vented assemblies but must be installed without compression to maintain their rated R-value. Batts do allow some air movement through gaps if not installed carefully, so precise fitting matters.
Mineral Rock Wool
Mineral wool batts offer similar installation methods to fiberglass but with better fire resistance and slightly improved sound dampening.
They also tend to hold their shape well over time and resist moisture better than standard fiberglass. This makes mineral wool a strong choice for homeowners willing to pay a bit more for added durability.
Material Comparison Table
| Material | Approximate R-Value per Inch | Vapor Barrier Needed | Typical Use |
| Fiberglass batt | R-3.0 to R-3.8 | Yes, separately | Vented assemblies |
| Mineral wool batt | R-3.0 to R-4.0 | Yes, separately | Vented assemblies |
| Blown-in cellulose | R-3.2 to R-3.8 | Yes, separately | Vented assemblies |
| Open-cell spray foam | R-3.5 to R-3.8 | Often yes | Hybrid or unvented |
| Closed-cell spray foam | R-6.0 to R-7.0 | No, built-in | Unvented assemblies |
| Rigid foam board | R-4.0 to R-6.5 | Depends on type | Exterior retrofit |
Method 1: Vented Insulation Step-by-Step
The vented method is the traditional route for insulating a vaulted ceiling and remains popular for its lower cost and simpler long-term maintenance. Here is how a typical vented installation comes together from start to finish.
Installing Baffles and Rafter Vents
The first physical step is stapling rigid baffles, sometimes called rafter vents, against the underside of the roof deck within each rafter bay.
These baffles create a fixed, unobstructed channel that keeps insulation from shifting upward and blocking airflow. Getting this step right is essential, because without a reliable channel the entire vented system loses its effectiveness.
Maintaining Soffit-to-Ridge Airflow
Air needs a clear, unbroken path from the soffit vents at the base of the roof all the way to a ridge vent at the top.
Any blockage along this path, whether from insulation, debris, or a poorly installed baffle, can create dead air pockets where moisture accumulates. Checking that soffit vents are actually open and unobstructed from the exterior is a step many homeowners overlook.
Filling Cavities With Batt or Blown-In Insulation
Once the air channel is secured, the remaining rafter cavity depth is filled with the chosen insulation material, whether that is batt, mineral wool, or blown-in cellulose.
The insulation should fill the space snugly without compressing against the baffle, since compression reduces the material’s effective R-value. This is the step where most of the actual thermal performance of the vented system is achieved.
Method 2: Unvented Insulation Step-by-Step
The unvented, or hot roof, method skips ventilation entirely and relies on air-impermeable insulation to control moisture directly. This approach has become increasingly common in renovations and additions where rafter depth is limited.
Air Sealing the Roof Deck
Before any insulation goes in, the underside of the roof deck and all rafter bays should be thoroughly air sealed to eliminate any hidden gaps.
This includes sealing around any roof penetrations like vent stacks, skylight frames, or chimney chases that pass through the assembly. A tight air seal at this stage prevents warm, moist air from finding hidden paths into the cavity later.
Rigid Foam Above the Roof Deck
As an alternative or supplement, rigid foam board can be installed above the existing roof deck during a re-roofing project, adding insulation value without touching the interior ceiling at all.
This exterior approach is particularly useful when homeowners want to avoid disturbing finished interior surfaces. It requires coordinating with roofing work, since the new roofing material is installed over the rigid foam layer.
Method 3: Hybrid Insulation Approach
Some homeowners and contractors choose a hybrid method that combines the strengths of spray foam and traditional batt or blown-in insulation, especially when balancing cost against performance.
Combining Spray Foam and Batt Insulation
In a hybrid approach, a thinner layer of closed-cell spray foam is applied directly against the roof deck to create the critical air and vapor seal, and the remaining cavity depth is filled with more affordable batt or blown-in material.
This reduces the total amount of expensive spray foam needed while still achieving the moisture control benefits of an unvented assembly. The batt or blown-in layer adds bulk R-value without the higher per-inch cost of full-depth spray foam.
When This Method Makes the Most Sense
Hybrid systems are particularly useful in renovation projects where budget is a concern but rafter depth still allows for a meaningful thickness of secondary insulation.
It also suits situations where a contractor wants the reliability of a sealed roof deck without the full cost of filling the entire cavity with spray foam. Many building professionals consider this a practical middle ground between the two primary methods.
Cost vs. Performance Balance
While a full closed-cell spray foam cavity offers the highest R-value per inch, the hybrid method can achieve nearly comparable real-world performance at a noticeably lower overall material cost.
The key tradeoff is slightly more complex installation, since two different materials and two separate installation steps are involved. For many homeowners, this balance of cost and performance makes the hybrid approach an attractive compromise.
Air Sealing Before You Insulate
Regardless of which insulation method you choose, air sealing the structure before adding insulation is one of the most important and most frequently overlooked steps in the entire process.
Common Leak Points
Wiring penetrations, recessed light fixtures, skylight frames, and chimney chases are among the most common places where warm interior air escapes into the roof cavity.
Even small gaps around these points can allow enough air movement to undermine the effectiveness of otherwise well-installed insulation. Identifying these leak points before insulating saves significant rework later.
Tools and Materials for Air Sealing
Canned spray foam, caulk, and foil tape are the most commonly used materials for sealing small gaps and penetrations before insulation goes in.
For larger gaps or irregular openings, rigid foam board cut to fit and sealed at the edges provides a more durable solution. Having these materials on hand before starting the insulation work keeps the project moving efficiently.
DIY vs. Hiring a Professional
Deciding whether to tackle this project yourself or bring in a professional depends heavily on the method chosen and your comfort level with the technical details involved.
What a Confident DIYer Can Handle
Installing baffles, fitting batt insulation, and applying basic air sealing materials like caulk and canned foam are all tasks a reasonably handy homeowner can manage with some research and care.
Vented systems using batt or mineral wool insulation are generally the most DIY-accessible option available. Taking time to measure rafter depth accurately and avoid compressing insulation are the main skills needed for success.r.
Common Mistakes to Avoid
Even well-intentioned insulation projects can fail if a few critical mistakes are made during planning or installation.
Mixing Vented and Unvented Methods
Combining vented and unvented approaches within the same continuous roof plane creates confusing airflow patterns that can trap moisture in unpredictable ways.
Each roof plane should commit to one consistent strategy from eave to ridge rather than switching methods partway through. This consistency is one of the most important rules in building science guidance for vaulted ceilings.
Skipping Air Sealing
As mentioned earlier, skipping air sealing before insulating is a frequent shortcut that undermines the performance of even high-quality insulation materials. Air leaks allow moist air to bypass the insulation entirely and reach the cold roof deck directly. This mistake is easy to avoid simply by budgeting the extra time for sealing before the main insulation work begins.
Compressing Batt Insulation
Squeezing batt insulation into a cavity that is too shallow for its rated thickness reduces its effective R-value significantly, sometimes by a substantial margin.
Choosing the correct thickness of batt for the actual available cavity depth, rather than forcing a thicker product to fit, preserves the material’s intended performance. When cavity depth is limited, switching to a higher R-value per inch material is a better solution than compression.
Cost Considerations
Budget is often the deciding factor in which insulation method and material a homeowner ultimately chooses, so understanding the general cost landscape helps set realistic expectations.
Rough Cost Ranges by Method
Vented systems using batt or blown-in insulation are typically the most budget-friendly option due to lower material costs and simpler installation labor.
Unvented systems using closed-cell spray foam tend to cost noticeably more per square foot due to both material price and specialized application labor. Hybrid systems generally fall somewhere in between, offering a middle-cost option with strong performance.
Maintenance and Long-Term Care
Once insulation is installed, a small amount of ongoing attention helps ensure the assembly continues performing well for decades.
Signs Your Insulation Is Failing
Persistent drafts near the ceiling, visible moisture stains on drywall, or the formation of ice dams along the roof edge in winter are all warning signs that the insulation or air sealing may have failed somewhere in the assembly.
Musty odors in rooms with vaulted ceilings can also indicate hidden moisture buildup within the roof structure. Catching these signs early prevents small issues from becoming major structural repairs.
When to Inspect or Upgrade
Periodic visual inspections, especially after severe weather events, help catch early signs of insulation or moisture problems before they worsen.
If a home is undergoing a re-roofing project regardless, that is often an ideal opportunity to add or upgrade exterior rigid foam insulation with minimal additional disruption. Planning insulation upgrades around other necessary roof work can also reduce overall project costs.
Conclusion
Learning how to insulate a vaulted ceiling comes down to understanding your rafter depth, choosing between a vented or unvented assembly, and selecting materials that match your climate and budget.
Whether you choose the traditional vented method, a fully sealed unvented spray foam system, or a hybrid combination of both, the core principles remain the same.
FAQ
Can I insulate a vaulted ceiling without removing drywall?
In some cases, blown-in insulation can be added through small access holes without full drywall removal, though this depends on the existing cavity condition and access points available.
What is the best insulation for a low-slope vaulted ceiling?
Closed-cell spray foam is often preferred for low-slope vaulted ceilings because it delivers high R-value in limited cavity depth while also sealing air and moisture in a single application.
How do I know if my current insulation is causing mold?
Musty odors, visible dark staining on drywall near the ceiling, or peeling paint are common indicators that moisture is trapped within the roof assembly and should be inspected promptly.
Related Articles
How to Maintain Home Plumbing Systems Complete guide 2026
Are Nail Pops in Ceiling Dangerous? Full Guide With Causes & Fixes
Window with J-Channel: A Complete Homeowner’s Guide