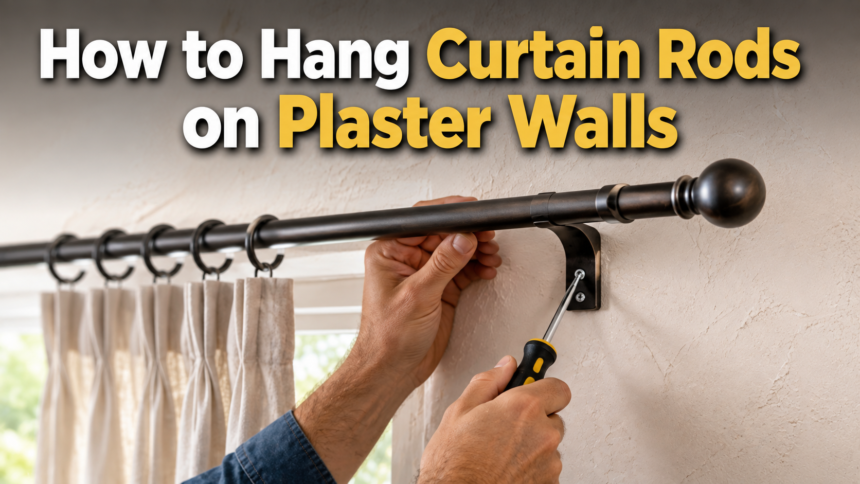
Plaster walls are common in older homes, and while they look beautiful and add character, they also demand a more careful approach than modern drywall. A rushed or careless installation can easily lead to cracked plaster, crumbling holes, or brackets that pull out of the wall within weeks. That is why understanding the material you are working with is the first step toward a clean, professional result.
This guide is written for homeowners, renters, and DIY enthusiasts who want a reliable, long-lasting curtain rod installation without hiring a professional. You do not need advanced carpentry skills to get this right; you simply need the correct tools, the right anchors, and a patient, methodical approach. The sections below break the process into easy stages, so you can follow along step by step without feeling overwhelmed.
Understanding Plaster Walls
Plaster walls behave very differently from drywall, and knowing why will help you avoid the most common mistakes people make when drilling into them.
What Plaster Walls Are Made Of
Traditional plaster walls consist of several thin coats of plaster applied over a base of wooden or metal lath strips, while more modern versions use a plaster skim coat over a plasterboard base. This layered construction gives the wall its smooth, hard finish, but it also means there is often a hollow or uneven space behind the surface. Because of this, anchors need to grip both the plaster layer and the material behind it to hold weight properly.
Why Plaster Is Different From Drywall?
Plaster is significantly harder and more brittle than drywall, which means it resists dents but cracks easily under sudden pressure or fast drilling. Drywall, by contrast, is softer and more forgiving, allowing screws to bite in without much preparation. This difference is exactly why standard drywall anchors often fail or cause damage when used on plaster.
How to Identify If Your Wall Is Plaster or Drywall?
You can usually tell plaster apart from drywall by tapping on the wall; plaster sounds solid and dense, while drywall sounds hollow and lighter.
Plaster walls also tend to feel colder to the touch and are commonly found in homes built before the 1950s. If you are still unsure, a small test hole in an inconspicuous corner will reveal the layered structure typical of plaster.
Common Problems When Drilling Into Plaster
The most frequent issues include cracking around the drill point, crumbling plaster that weakens the anchor’s grip, and brackets that loosen over time due to poor anchor choice.
Drilling too fast or applying too much pressure are the two biggest causes of these problems. Understanding this upfront helps you approach the next steps with the right mindset and technique.
Tools & Materials Checklist
Having the correct tools ready before you start saves time and reduces the risk of mistakes once you begin drilling.
Essential Tools
A cordless drill with adjustable speed settings, a masonry drill bit sized to your anchor, a stud finder, a spirit level, a pencil, and a tape measure form the core toolkit for this job.
A step ladder is also necessary if your rod will be mounted high above a window. Keeping all these tools within reach before you begin prevents unnecessary interruptions mid-task.
Types of Anchors and When to Use Each
Choosing the right anchor is arguably the most important decision in this entire process, since the wrong anchor is the leading cause of failed installations.
| Anchor Type | Best For | Weight Capacity | Notes |
| Plastic anchors | Light curtains, sheers | Low to moderate | Easy to install, suitable for small holes |
| Self-drilling anchors | Light to medium curtains | Moderate | No pilot hole needed on softer plaster |
| Toggle bolts | Medium to heavy curtains | High | Spreads inside the wall cavity for strong grip |
| Molly bolts | Heavy drapes, long rods | High | Expands against the back of the plaster for extra hold |
Plastic Anchors
Plastic anchors work well for lightweight curtains such as sheers or small café panels, since they are simple to install and require only a small pilot hole.
They are not designed for heavy fabric or long rods, so using them beyond their capacity often leads to the anchor pulling loose. For everyday light window treatments, though, they remain a convenient and affordable option.
Toggle Bolts
Toggle bolts are ideal when you are hanging heavier curtains or long rods that need extra support, because their wings open up behind the plaster and lath to distribute weight over a wider area.
Installing them requires a slightly larger hole, but the added stability is well worth it. These are especially recommended when no wall stud is available near your bracket location.
Molly Bolts
Molly bolts function similarly to toggle bolts but use a metal sleeve that expands against the back of the plaster when tightened. They are particularly useful for heavy drapes or double curtain rod setups that carry significant weight.
Because they grip the wall firmly, molly bolts also work well in older plaster that has become slightly brittle over time.
Self-Drilling Anchors
Self-drilling anchors are designed to be twisted directly into the wall without a separate pilot hole, which makes them convenient for quick, lighter installations.
They perform best on plaster that is in good condition without cracks or crumbling. However, they are not recommended for very hard, old lime plaster, where a pre-drilled hole is usually safer.
Curtain Rod Hardware Basics
Every curtain rod set typically includes brackets, mounting screws, and the rod itself, along with finials or end caps depending on the style you choose.
Checking that your bracket screws match the anchors you plan to use prevents last-minute trips back to the hardware store. It is also worth confirming that your chosen rod length suits the width of your window before you begin marking the wall.
Safety Gear
Wearing safety glasses while drilling protects your eyes from plaster dust and small debris, and a simple dust mask keeps you from inhaling fine particles. These small precautions make the process safer and more comfortable, especially if you are working on an older wall that tends to crumble more easily.
Pre-Installation Planning
Careful planning before you touch the drill prevents crooked rods, mismatched brackets, and unnecessary extra holes in your wall.
Measuring Window Width and Deciding Rod Length
Measure the full width of your window frame and add extra length on each side if you want the curtains to extend beyond the frame when open, which allows more natural light in. A general rule is to add four to eight inches on each side for a balanced, elegant look. This measurement determines both your rod length and your bracket placement.
Choosing Rod Height
Deciding how high above the window to place your rod affects how the room feels, with higher placement typically making ceilings look taller.
A common approach is to mount the rod four to six inches above the window frame, though ceiling-mounted rods are increasingly popular for a dramatic effect. Whichever height you choose, consistency between both brackets is essential for a professional finish.
Deciding Bracket Placement and Spacing
Bracket spacing depends on the length and weight of your rod, with longer or heavier rods needing a center support bracket to prevent sagging. As a general guideline, brackets should sit a few inches beyond the window frame on each side. Planning this out on paper first can save you from drilling in the wrong spot.
Marking Guidelines With Painter’s Tape and Pencil
Placing a strip of painter’s tape where you intend to drill helps prevent the plaster surface from chipping around the hole. Once the tape is in place, mark your exact drill point with a pencil directly on top of it. This small step makes a noticeable difference in how clean your finished holes look.
Using a Level for Accurate Alignment
A spirit level ensures both brackets sit at the exact same height, which is critical because even a small tilt becomes very noticeable once the rod and curtains are hung. Hold the level against your marked points before drilling to double-check alignment. Taking an extra minute here prevents having to redo the entire installation later.
Finding Studs (and What to Do If There Aren’t Any)
Locating a stud gives you the strongest possible anchor point, but plaster walls often make this more difficult than drywall.
Using a Stud Finder on Plaster
Stud finders can behave inconsistently on plaster because the dense material and metal lath sometimes interfere with the sensor’s reading. Moving the tool slowly and testing multiple times over the same area improves accuracy. If your stud finder struggles, tapping the wall to listen for a denser sound can offer a helpful secondary confirmation.
Alternative Methods
If a stud finder is unavailable or unreliable, tapping along the wall and listening for a change in sound from hollow to solid can help locate framing. A strong magnet can also be swept across the surface to detect nails or screws commonly found along stud lines. These low-tech methods have been used successfully for generations before electronic stud finders existed.
What to Do When Brackets Don’t Align With Studs?
When your ideal bracket position does not line up with a stud, a heavy-duty anchor such as a toggle bolt or molly bolt becomes your best alternative. These anchors are specifically engineered to hold significant weight without relying on a stud. This flexibility means you are never limited to only the spots where studs happen to be located.
Step-by-Step Installation Guide
This is the core process for actually mounting your curtain rod brackets onto a plaster wall.
- Mark bracket positions accurately using your measurements, pencil, and level so both sides are perfectly even before any drilling begins.
- Apply painter’s tape over each marked point to reduce the chance of the plaster chipping or cracking as the drill bit enters the surface.
- Drill a pilot hole using a masonry bit at a slow, steady speed, applying light and even pressure rather than forcing the drill forward.
- Insert the correct wall anchor for your curtain weight, tapping it gently until it sits flush with the wall surface.
- Attach the bracket securely by screwing it into the anchor, checking that it feels firm and does not wobble.
- Repeat the same process for the second bracket, and a third center bracket if your rod is long or heavy.
- Mount the curtain rod onto the installed brackets, adjusting its position slightly if needed for a perfect fit.
- Perform a final level check and gently test the stability of the rod by applying light pressure before hanging your curtains.
Following these steps in order, without skipping the tape or pilot hole stages, is what separates a clean, lasting installation from one that cracks or loosens within a few months.
Preventing Plaster Cracks and Damage
Cracking is the single biggest concern when working with plaster, but it is almost entirely preventable with the right technique.
Why Plaster Cracks Easily?
Plaster’s brittle nature means that sudden impacts or overly fast drilling create stress fractures that spread outward from the drill point. This is very different from drywall, which tends to simply crumble a little rather than crack in long lines. Understanding this brittleness is the reason every step in this guide emphasizes a slow, controlled approach.
Best Drilling Speed and Pressure Techniques
Using a slow drill speed combined with light, even pressure allows the bit to grind through the plaster gradually instead of punching through it forcefully. Many experienced installers recommend starting at a slight angle to break through the hard surface layer before straightening the drill for the rest of the hole. Patience during this stage prevents almost all cracking-related problems.
Using Painter’s Tape or Masking Film
As mentioned earlier, a piece of tape over the drill point holds the surrounding plaster fibers together as the bit passes through. This simple, low-cost trick is one of the most effective ways to keep your wall looking clean and professional. It takes only a few seconds to apply but can save you significant repair work later.
What to Do If Plaster Cracks or Crumbles?
If a small crack does appear, a bit of spackling compound or plaster repair filler can typically fix it once it has fully dried and been sanded smooth. For larger crumbling, it is often best to fill the damaged area completely, let it cure, and then re-drill in a slightly adjusted position. Keeping a small repair kit on hand before you start is a smart precaution for older or more fragile walls.
Choosing the Right Anchor for Curtain Weight
Matching your anchor to your curtain’s actual weight is what ultimately determines whether your installation holds up long term.
Lightweight Curtains
Sheer panels and small café curtains generally place very little strain on brackets, making plastic anchors or self-drilling anchors a perfectly adequate choice. These lighter fabrics rarely require reinforced hardware. This makes them one of the easiest curtain types to install for beginners.
Medium-Weight Curtains
Cotton or linen curtains sit in the middle range and often benefit from a slightly more robust anchor, such as a larger plastic anchor or a light-duty toggle bolt. This balance provides extra security without requiring the most heavy-duty hardware available. Most standard living room or bedroom curtains fall into this category.
Heavy Curtains and Drapes
Blackout curtains, thermal drapes, or double-layered fabrics carry considerably more weight and pull harder on brackets over time, so toggle bolts or molly bolts are strongly recommended. Skipping this step with heavier fabric is one of the most common reasons brackets eventually fail. Investing in the right anchor here prevents having to redo the entire job later.
Weight Capacity Overview
| Curtain Type | Recommended Anchor | Typical Support Level |
| Sheer or café curtains | Plastic or self-drilling anchor | Light support |
| Cotton or linen curtains | Larger plastic anchor or light toggle | Moderate support |
| Blackout or thermal drapes | Toggle bolt or molly bolt | Heavy-duty support |
Troubleshooting Common Issues
Even with careful preparation, a few common problems can still arise during or after installation.
Anchor Won’t Stay in Place
This usually happens when the drilled hole is slightly too large for the anchor, causing it to spin freely instead of gripping the plaster. Switching to a slightly larger anchor size or adding a dab of adhesive can often resolve this without needing to relocate the hole. If the plaster around the hole has crumbled, filling and re-drilling nearby is usually the more reliable fix.
Plaster Crumbling Around the Hole
Crumbling is often a sign that the drill moved too quickly or that the plaster in that section is already weakened. Filling the area with a plaster repair compound, letting it fully cure, and re-drilling a fresh pilot hole typically solves the problem. Taking your time on the second attempt almost always produces a cleaner result.
Bracket Wobbling After Installation
A wobbling bracket usually means the anchor is not fully seated or the screw was not tightened enough. Removing the bracket, checking the anchor’s position, and retightening everything carefully will typically fix this issue. If the wobble persists, upgrading to a heavier-duty anchor is the safest long-term solution.
Rod Sagging in the Middle
Long rods without a center support bracket are prone to sagging, especially with heavier curtains. Adding a third bracket at the midpoint distributes the weight more evenly and eliminates most sagging issues. This is a simple fix that many people overlook during the initial planning stage.
Fixing a Stripped Screw Hole
When a screw hole becomes stripped and no longer holds firmly, inserting a wooden toothpick or matchstick coated in wood glue before reinserting the screw can restore some grip. For a more permanent fix, filling the hole completely and drilling a fresh one nearby is usually more reliable. This is a quick and inexpensive fix that avoids replacing the entire anchor system.
Alternative Mounting Options (No-Drill Methods)
For renters or those hesitant to drill into plaster, several no-drill alternatives can still achieve a functional, attractive result.
Adhesive Hooks and Command Strips
Heavy-duty adhesive hooks can support very lightweight curtains without any drilling at all, making them a popular choice for temporary setups or rental properties. Their main limitation is weight capacity, since most are not rated for medium or heavy drapes. They also require a clean, smooth surface to bond properly.
Tension Rods
Tension rods fit snugly within a window frame using spring pressure rather than brackets, making them ideal for lightweight curtains or short-term arrangements. They are quick to install and remove, though they are generally unsuitable for very wide windows or heavy fabrics. Many people use them as a practical short-term solution while planning a more permanent installation.
Magnetic Curtain Rods
Magnetic curtain rods work only on metal surfaces, such as a metal door frame, and are not typically suitable for plaster walls themselves. They are worth mentioning as an option for specific situations, such as covering a metal door rather than a window. For most plaster wall installations, though, they are not a practical primary choice.
Maintenance & Long-Term Care
A little ongoing attention keeps your curtain rod installation secure for years after the initial setup.
Periodically Checking Bracket Tightness
Checking your brackets every few months for any looseness helps you catch small problems before they turn into bigger repairs. A quick gentle tug on the rod is usually enough to reveal whether tightening is needed. This small habit extends the lifespan of your entire installation.
Signs You Need to Reinforce or Replace Anchors
Visible gaps around the bracket, a rod that shifts position on its own, or small cracks forming near the screws are all signs that your anchor may need reinforcement or replacement. Addressing these early prevents the anchor from failing completely and damaging the wall further. Replacing an anchor early is always easier than repairing a larger hole later.
Repainting or Patching Small Holes When Removing Rods
If you ever remove a curtain rod, filling the old holes with spackling compound and repainting the area restores the wall to a clean finish. Allowing the filler to dry completely before sanding and painting ensures a smooth, invisible repair. This makes future changes to your window treatments much easier to manage.
Frequently Asked Questions
Can I use the same anchors as drywall?
Standard drywall anchors are not ideal for plaster, since plaster’s density and brittleness require anchors designed to handle a harder, sometimes hollow surface, such as toggle bolts or self-drilling anchors made for masonry-type materials.
How do I avoid cracking old, brittle plaster?
Drilling slowly, using painter’s tape over the mark, and applying light, even pressure are the most effective ways to protect fragile, aging plaster from cracking.
What’s the best anchor for heavy curtains?
Toggle bolts and molly bolts offer the strongest hold for heavy drapes, since they distribute weight across a wider area behind the wall surface.
Can I hang curtains without drilling at all?
Yes, adhesive hooks or tension rods work for lightweight curtains, though they are not suitable for heavier fabrics or long-term heavy use.
How do I patch a mistake hole in plaster?
A plaster repair compound or spackling filler, applied and sanded once fully dry, can neatly patch small mistake holes before repainting.
Conclusion
Successfully learning how to hang curtain rods on plaster walls comes down to preparation, patience, and choosing the correct anchor for your curtain’s weight.
By marking carefully, drilling slowly, and protecting the plaster surface with tape, you can avoid the cracking and crumbling that often frustrate first-time installers. With the right tools and a methodical approach, your curtain rods will stay secure, level, and damage-free for years to come.
Related Articles
Can You Paint Over Popcorn Ceiling? Safe Steps & Costs Explained
How Much Does It Cost to Install a Ceiling Fan? Price Guide
How Do You Remove Smoke Stains From Walls? Complete Step-by-Step Guide