You can insulate basement walls by first addressing moisture issues, then installing a suitable insulation material such as rigid foam board or spray foam, and finishing with a vapor barrier and interior wall covering. This process not only improves energy efficiency but also helps prevent mold growth and creates a more comfortable, usable basement space.
Why Basement Insulation Matters
Basement walls are in direct contact with cold, damp soil, making them one of the biggest sources of heat loss and moisture problems in a home. Proper insulation reduces energy bills significantly while also protecting the space from condensation and mold growth over time.
What the Process Involves
Insulating basement walls isn’t just about adding material to the surface; it requires careful moisture control, correct material selection, and proper installation techniques. Skipping any of these steps can trap moisture inside the wall assembly and lead to bigger problems down the road.
Assessing Basement Conditions Before Insulating
Before starting any insulation project, it’s essential to evaluate the current condition of the basement walls. This step determines which materials and methods will work safely in your specific situation.
Checking for Moisture Problems
Look for signs of water intrusion such as damp spots, efflorescence, or a musty smell, since insulating over an active moisture problem can trap water and cause serious damage. Any leaks or drainage issues should be fully resolved before installing insulation materials against the walls.
Evaluating Wall Material
Basement walls are typically made of poured concrete, concrete block, or occasionally stone, and each material has slightly different insulation requirements. Concrete block walls, for example, may need additional attention at the hollow cores where cold air can bridge through more easily than solid poured concrete.
Testing for Radon and Ventilation
Since insulation work often involves sealing up walls more tightly, checking radon levels and ensuring proper ventilation beforehand is an important safety step. Addressing these concerns early prevents air quality issues once the basement is insulated and closed up.
Choosing the Right Insulation Material
Different insulation materials offer varying levels of moisture resistance, R-value, and ease of installation. Selecting the right one depends on your budget, basement condition, and whether you’re doing the work yourself.
Rigid Foam Board Insulation
Rigid foam board, particularly extruded polystyrene (XPS), is a popular choice for basement walls because it resists moisture well and provides a solid R-value without absorbing water like fiberglass can. It’s relatively easy to cut and install directly against concrete walls, making it a practical option for many do-it-yourself projects.
Spray Foam Insulation
Closed-cell spray foam offers excellent moisture resistance and air sealing properties, filling gaps and cracks that rigid boards might miss around uneven wall surfaces. While it tends to cost more than other options, its combination of insulation and vapor barrier in one application makes it a strong long-term choice.
Fiberglass Batt Insulation
Fiberglass batts are more affordable but generally not recommended for direct contact with basement walls since they can absorb moisture and lose effectiveness, potentially promoting mold growth. If used, fiberglass should only be installed within a properly framed and moisture-protected wall assembly rather than directly against concrete.
Insulation Material Comparison
The table below compares common basement wall insulation materials to help you decide which option best suits your project.
| Insulation Type | R-Value per Inch | Moisture Resistance | Ease of DIY Installation |
| Rigid Foam Board (XPS) | 5.0 | High | Moderate |
| Closed-Cell Spray Foam | 6.0–7.0 | Very High | Difficult, often professional |
| Fiberglass Batts | 3.0–3.5 | Low | Easy but not recommended alone |
| Mineral Wool Batts | 3.0–3.5 | Moderate | Moderate |
Choosing a material with strong moisture resistance is especially important for basement walls, given their constant exposure to below-grade dampness.
Step-by-Step Basement Wall Insulation Process
Once you’ve selected the right material, following a proper installation sequence ensures the insulation performs effectively for years to come. Each step builds on the previous one to create a complete, moisture-safe wall assembly.
Step One: Clean and Prepare the Walls
Remove any dirt, loose debris, or old paint from the basement walls, and repair small cracks with hydraulic cement to prevent water seepage. A clean, dry surface ensures better adhesion for foam board or spray foam applications.
Step Two: Install a Moisture Barrier if Needed
Depending on the insulation type chosen, a plastic vapor barrier may need to be installed either before or after the insulation layer, following local building code requirements. This step is critical for preventing moisture from becoming trapped between the insulation and the concrete wall.
Step Three: Attach Rigid Foam Board or Apply Spray Foam
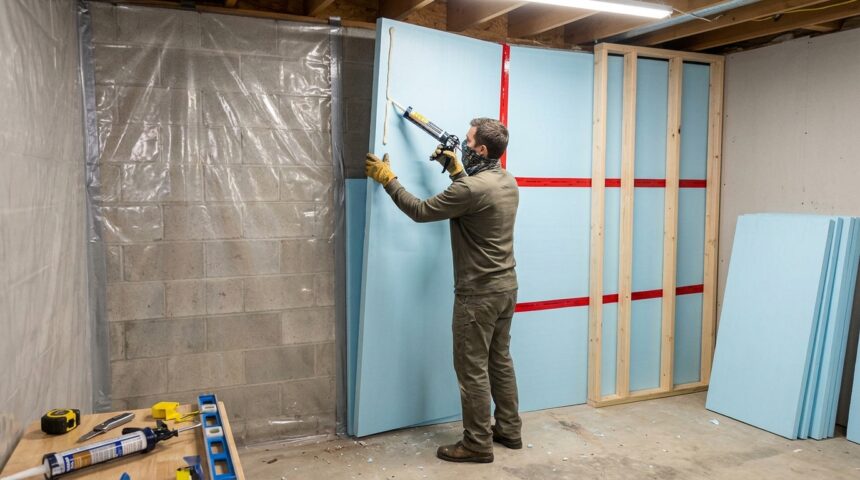
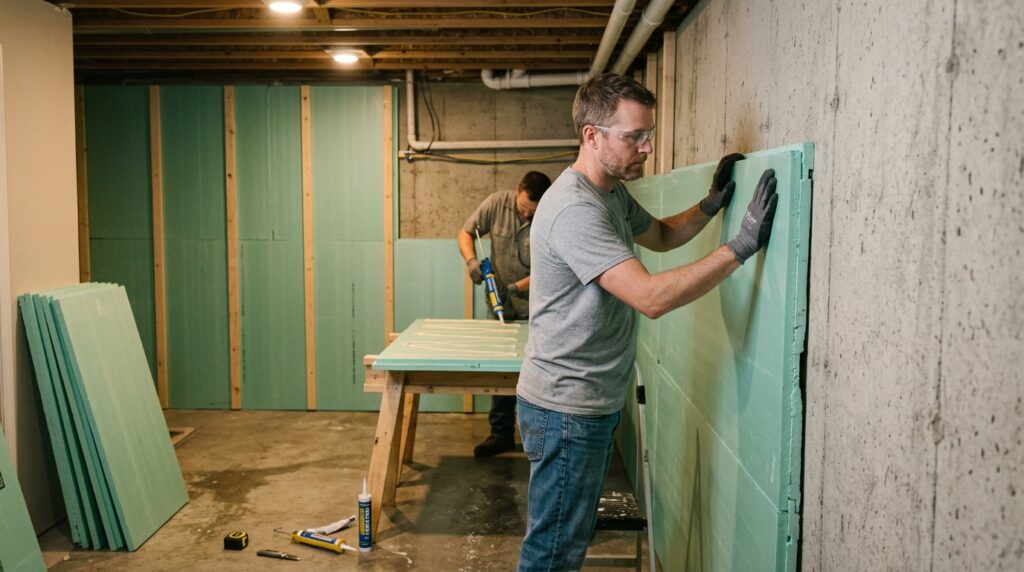
Cut rigid foam boards to fit snugly against the wall and secure them using construction adhesive or mechanical fasteners, sealing all seams with foam tape. For spray foam, professional applicators apply the material directly onto the wall surface, where it expands and hardens into a continuous barrier.
Step Four: Frame the Wall
After the insulation layer is installed, build a stud wall in front of it to provide structure for drywall and any additional insulation like mineral wool between the studs. This framed wall also creates space for running electrical wiring safely away from the insulation layer.
Step Five: Add Drywall or Wall Finish
Once framing is complete, install moisture-resistant drywall or another suitable wall covering to finish the space and protect the insulation from physical damage. Using paperless drywall in basements is often recommended since it resists mold better than traditional paper-faced options.
Building Code and Safety Considerations
Basement insulation projects often involve specific code requirements that vary by region, particularly relating to fire safety and vapor barriers. Understanding these requirements before starting prevents costly rework later.
Fire Safety Requirements
Foam insulation materials are often required to be covered with a fire-rated material like drywall, since exposed foam can pose a fire hazard if left uncovered. Checking local building codes ensures the project meets safety standards required for inspection and insurance purposes.
Vapor Barrier Placement
Incorrect vapor barrier placement can trap moisture within the wall assembly instead of allowing it to escape, leading to mold growth over time. Consulting local building codes or a professional ensures the vapor barrier is installed on the correct side of the insulation based on your climate zone.
Permit Requirements
Many municipalities require permits for basement finishing projects that include insulation and framing, especially if electrical work is involved. Checking with your local building department before starting avoids potential fines or issues when selling the home later.
Common Mistakes to Avoid
Even well-planned insulation projects can go wrong if certain common mistakes aren’t avoided. Being aware of these pitfalls helps ensure a durable, effective result.
Insulating Over Existing Moisture Problems
Installing insulation without first fixing leaks or drainage issues traps moisture against the wall, often leading to mold growth hidden behind the finished surface. Always resolve water intrusion issues completely before beginning any insulation work.
Using the Wrong Insulation Type
Choosing fiberglass batts for direct wall contact instead of moisture-resistant options like rigid foam can lead to dampness and reduced insulation performance over time. Matching the material to the specific conditions of a basement environment is essential for long-term success.
Skipping the Vapor Barrier
Omitting a vapor barrier, or installing it on the wrong side of the insulation, can cause condensation to form within the wall assembly rather than being managed properly. Following manufacturer guidelines and local codes for vapor barrier placement prevents this common and costly mistake.
Frequently Asked Questions
What is the best insulation for basement walls?
Rigid foam board and closed-cell spray foam are generally considered the best options since both offer strong moisture resistance compared to fiberglass.
Do basement walls need a vapor barrier?
In most cases, yes, though the correct placement depends on your climate zone and the type of insulation used, so checking local building codes is important.
Can I insulate basement walls myself?
Rigid foam board installation is a manageable DIY project for many homeowners, while spray foam typically requires professional equipment and application.
How much does it cost to insulate basement walls?
Costs vary widely based on material choice and basement size, but rigid foam board tends to be more budget-friendly than spray foam insulation.
Conclusion
So, how to insulate basement walls? The process starts with checking for moisture problems, choosing a suitable material like rigid foam board or spray foam, and following a proper installation sequence that includes framing and a moisture-resistant finish. Paying attention to vapor barrier placement, local building codes, and fire safety requirements ensures the project results in a warmer, drier, and more energy-efficient basement. With the right approach, basement walls can be transformed into a comfortable living space that stays protected from moisture and heat loss for years to come.
Related Articles
Beadboard Ceiling Ideas: A Complete Guide
Can You Paint Roof Shingles? Pros, Cons, and Best Practices
Wood Filler for Hardwood Floors: Your Complete Guide
Can You Paint Vinyl Cladding? Prep and Paint Like a Pro
Basement Ceiling Insulation: Complete Guide to Types, Costs & Best Options