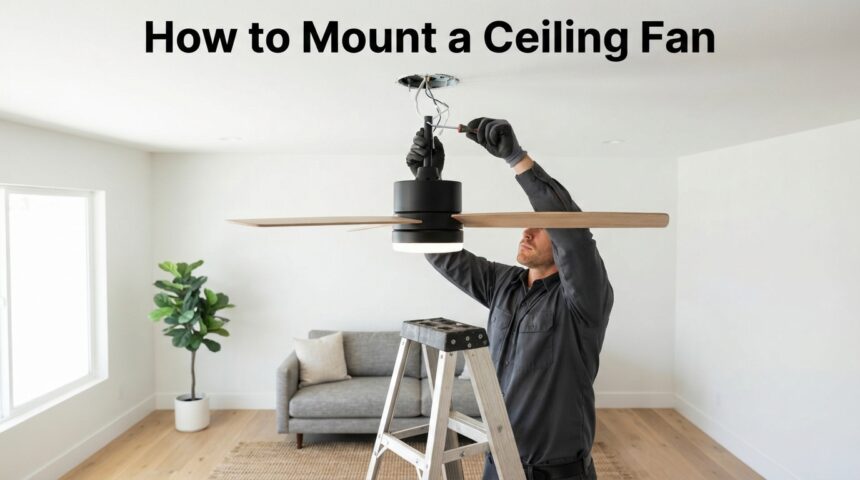
Learning how to mount a ceiling fan is one of the most practical home improvement skills a homeowner can pick up, since it saves money on installation costs and gives you full control over timing and placement.
Many people assume this task requires a licensed electrician, but with a fan-rated electrical box already in place and basic tools on hand, most homeowners can complete the job safely in an afternoon. This guide breaks the entire process into simple, manageable steps so you never feel lost along the way.
Why Install a Ceiling Fan?
Installing a ceiling fan offers more than just a breeze on a hot day. It reduces reliance on air conditioning, adds visual charm to a space, and can even raise a home’s resale appeal.
Energy Efficiency Benefits
Ceiling fans use significantly less electricity than central air conditioning units, which means running one regularly can noticeably lower monthly utility bills.
They work by circulating air rather than cooling it directly, allowing you to raise the thermostat a few degrees without sacrificing comfort. Over time, this small adjustment adds up to meaningful savings.
Improved Air Circulation
A ceiling fan keeps air moving throughout a room, preventing the stale, stuffy feeling that builds up in poorly ventilated spaces.
Consistent airflow also helps distribute heating and cooling more evenly, so every corner of the room feels the same temperature. This is especially useful in rooms with high ceilings or limited window access.
Aesthetic and Value-Adding Appeal
Beyond function, ceiling fans now come in countless styles, from sleek modern designs to classic wood-blade finishes, making them a decorative feature in their own right. Real estate professionals often note that updated fixtures like ceiling fans can subtly boost a home’s perceived value. Choosing the right style can tie a room’s whole look together.
Safety First: Before You Begin
Before you even touch a screwdriver, safety preparation is non-negotiable. Taking a few extra minutes here prevents accidents and protects both you and your home’s wiring system.
Turning Off Power at the Breaker
Always switch off the power to the room at your home’s breaker panel before starting any work, not just at the wall switch. Wall switches can be mislabeled or shared with other circuits, so the breaker is the only guaranteed way to cut power completely. Label the breaker or keep the panel door open so no one accidentally restores power while you’re working.
Testing Wires With a Voltage Tester
Even after flipping the breaker, always confirm the wires are dead using a non-contact voltage tester before touching anything.
This simple device beeps or lights up if it detects live current, giving you a clear go or no-go signal. Skipping this step is one of the most common and dangerous mistakes people make during electrical projects.
Working Safely on a Ladder
Use a sturdy stepladder placed on flat, stable ground, and avoid overreaching to either side while working overhead.
Having a second person nearby to hand you tools or steady the ladder makes the job faster and considerably safer. Never stand on the top rung, as this is where most ladder-related falls occur.
Tools and Materials You’ll Need
Having everything ready before you start prevents unnecessary trips up and down the ladder. The table below lists the essentials.
| Tool or Material | Purpose |
| Screwdriver set | Assembling brackets and blades |
| Wire strippers | Preparing wire ends for connection |
| Non-contact voltage tester | Confirming power is off |
| Sturdy stepladder | Safely reaching the ceiling |
| Wire connectors | Joining matching wires securely |
| Fan-rated electrical box | Supporting the fan’s weight and motion |
| Ceiling fan kit | Motor, blades, downrod, and light kit if included |
Gathering these items beforehand keeps the installation process smooth and avoids frustrating interruptions once you’re mid-project.
Choosing the Right Ceiling Fan Box
Not every ceiling box is built to handle a fan, and this is a detail many first-time installers overlook. Understanding the difference protects both your fan and your ceiling.
Why a Standard Light Fixture Box Won’t Work
Standard light fixture boxes are designed only to support the light weight of a fixture, not the constant motion and heavier load of a spinning fan. Using the wrong box can lead to the fan wobbling loose over time or, in worse cases, falling from the ceiling entirely. This is why checking the box type is one of the first things to confirm.
How to Identify or Install a Fan-Rated Electrical Box
A fan-rated box is usually marked with a label inside stating it is approved for fan support, often rated for a specific weight limit. If your existing box isn’t rated, you’ll need to replace it with one designed for ceiling fans, which typically involves accessing the box through the attic or ceiling cavity. This step is essential before moving forward with the rest of the installation.
Weight and Support Considerations
Most ceiling fans weigh between 15 and 50 pounds depending on size and material, so the box and its mounting hardware must be rated to handle that load safely along with the added stress of rotation.
Boxes are typically secured directly to a ceiling joist or supported with an adjustable brace bar for extra strength. Confirming this support system is solid now prevents costly problems later.
Step 1: Remove the Old Fixture (If Applicable)
If you’re replacing an existing light fixture or older fan, start by removing it carefully.
Turning Off Power
Repeat the earlier safety step here as well, confirming the breaker is off before touching any wiring connected to the old fixture. This step should never be skipped, even if you tested power earlier in a different part of the process.
Detaching the Old Fixture
Unscrew the mounting screws holding the old fixture in place, then gently disconnect the wire connectors while noting how each wire was matched. Taking a quick photo with your phone before disconnecting can be a helpful reference later. Set the old fixture aside safely once it’s fully detached.
Inspecting the Existing Box
Once the old fixture is removed, examine the electrical box closely for its weight rating label and overall condition. If it shows any signs of damage, rust, or lacks a fan rating, plan to replace it before proceeding. This inspection step protects the rest of the installation from future problems.
Step 2: Install or Confirm the Ceiling Fan Box
With the old fixture removed, your next task is making sure the box itself is ready for a fan’s demands.
Securing the Box to a Joist or Brace Bar
If a ceiling joist is directly above the box location, the box can be screwed straight into it for maximum stability. When no joist is nearby, an adjustable brace bar extends between two joists to create a secure mounting point anywhere in between. Either method should feel completely rigid with no wobble when tested by hand.
Ensuring It Can Support Fan Movement
Beyond static weight, the box must also handle the vibration and rotational force a running fan creates over years of use. A properly installed fan-rated box is engineered specifically for this kind of ongoing stress. Double-checking this now saves you from having to redo the entire installation later.
Step 3: Assemble the Mounting Bracket
The mounting bracket is the bridge between the electrical box and the fan itself, so getting this right matters.
Attaching the Bracket to the Electrical Box
Following the manufacturer’s included instructions, screw the mounting bracket firmly onto the electrical box using the provided hardware. Most brackets include a ball-and-hook design that allows the fan to hang temporarily while you finish wiring. Make sure every screw is tightened fully before moving forward.
Double-Checking Secure Fit
Give the bracket a firm tug once installed to confirm it doesn’t shift or loosen under pressure. A properly secured bracket should feel completely immovable against the ceiling. This quick check now prevents a much bigger headache once the fan is fully assembled and hanging.
Step 4: Wire the Ceiling Fan
Wiring is often the part that intimidates people most, but it’s straightforward once broken into clear matches.
Matching Wire Colors
Ceiling fan wiring generally follows a consistent color pattern: black to black (power), white to white (neutral), and green or copper to green or copper (ground). If your fan includes a light kit, there’s usually a blue or striped wire that connects separately to control the light independently from the fan. Refer to your fan’s manual, since some models vary slightly in wiring layout.
Using Wire Connectors Safely
Twist matching wires together clockwise, then cap them with a wire connector, giving each one a gentle tug afterward to confirm it’s secure. Loose connections are a common cause of flickering fans or lights down the road. Wrapping electrical tape around the base of each connector adds an extra layer of security.
Tucking Wires Into the Box
Once all connections are made, carefully fold the wires into the electrical box so nothing gets pinched when the fan’s canopy is raised into place. Wires should sit neatly without excessive strain or crowding. This small step keeps the finished installation looking clean and professional.
Step 5: Hang the Fan Motor
With wiring complete, it’s time to get the heavy motor housing safely in place.
Using the Hook Feature for Hands-Free Installation
Most modern fans include a hook or slot on the motor housing that hangs directly onto the mounting bracket’s ball. This clever design frees both your hands to finish wiring and securing the canopy without holding the fan’s full weight. It’s one of the most helpful features for solo installers.
Attaching the Downrod Securely
The downrod connects the motor to the mounting bracket and should be tightened with the included pin and screws until completely stable. Give it a gentle shake afterward to confirm there’s no play or looseness. A properly secured downrod is essential for safe, quiet operation.
Step 6: Attach the Fan Blades
Blades are usually one of the easier parts of the process, but precision still matters here.
Securing Blade Arms to the Motor
Attach each blade arm to its designated slot on the motor housing using the provided screws, making sure every connection is tightened evenly. Skipping or loosely attaching even one screw can cause noticeable wobbling later. Take your time to confirm each blade is fully seated before moving to the next.
Balancing Tips for Smooth Operation
If the fan wobbles slightly after installation, a balancing kit, often included with the fan, can help correct minor weight differences between blades. Small adhesive weights are applied to the lighter blade until the wobble disappears. This final touch makes a noticeable difference in how smoothly the fan runs long-term.
Step 7: Install the Light Kit (If Included)
Many ceiling fans come with an optional light kit that adds both function and style.
Wiring the Light Kit
Connect the light kit’s wiring harness to the corresponding blue or striped wire coming from the fan motor, following the manufacturer’s diagram closely. This connection allows the light to be controlled separately from the fan blades. Double-check the connection is snug before closing everything up.
Attaching the Glass Globe or Shade
Once wiring is complete, screw or clip the glass globe or shade into place according to the kit’s design. Handle glass components carefully to avoid cracks or chips during installation. This final piece completes the fan’s finished appearance.
Step 8: Test the Fan
The last step confirms everything you’ve built works exactly as intended.
Restoring Power
Head back to the breaker panel and switch the power back on, then return to the room to test the fan at the wall switch or remote. This moment reveals whether all your wiring connections were made correctly. If nothing happens, recheck your connections before assuming a deeper problem.
Checking Fan Speeds and Light Function
Cycle through each fan speed setting and test the light separately if your model includes one. Everything should respond smoothly and immediately without delay or flickering. This confirms both the mechanical and electrical sides of the installation are functioning properly.
Listening for Wobbling or Unusual Noise
Let the fan run on its highest setting for a few minutes while listening closely for rattling, clicking, or visible wobbling. Minor wobble can usually be fixed with the balancing kit mentioned earlier, while unusual noises may point to a loose screw somewhere in the assembly. Addressing these issues now ensures long-term reliability.
Common Mistakes to Avoid
A few recurring errors trip up even careful DIYers, so it helps to know them in advance. Using a standard light box instead of a fan-rated one is one of the most frequent and dangerous mistakes, since it can lead to structural failure over time.
Incorrect wiring, such as mismatched wire colors or loose connectors, often causes flickering or complete malfunction. Finally, skipping the blade-balancing step can leave the fan wobbling noticeably, which shortens its lifespan and creates unnecessary noise.
Maintenance Tips After Installation
Once your fan is up and running smoothly, a little ongoing care keeps it performing well for years. Wipe the blades down regularly with a soft cloth to prevent dust buildup, which can throw off balance and reduce airflow efficiency.
Periodically check that all visible screws, including blade arms and the canopy cover, remain tight over time. Many fans also include a seasonal direction switch, allowing you to reverse blade rotation for cooling in summer and gentle heat redistribution in winter.
When to Call a Professional
While mounting a ceiling fan is manageable for most homeowners, certain situations call for professional help. If your ceiling has no existing electrical box at all, running new wiring is a job better suited for a licensed electrician.
Complex wiring setups, such as fans wired into multiple switches or dimmer systems, can also be tricky for beginners to navigate safely. Lastly, any structural concerns about your ceiling’s ability to support weight should always be evaluated by a professional before installation begins.
FAQs
Do I need an electrician to mount a ceiling fan?
Not always. If you already have a fan-rated electrical box and are comfortable with basic wiring, most homeowners can complete this project themselves.
How long does it take to mount a ceiling fan?
Most installations take between one and three hours, depending on whether a new box needs to be installed first.
Why does my ceiling fan wobble after installation?
Wobbling usually comes from uneven blade weight or a loose downrod, both of which can be corrected with a balancing kit or by retightening connections.
Can I use a regular light fixture box for a ceiling fan?
No. Standard boxes aren’t built to handle a fan’s weight and motion, so a fan-rated box is required for safety.
Conclusion
Knowing how to mount a ceiling fan gives you the confidence to upgrade your home’s comfort and style without waiting on a contractor’s schedule.
By following each step carefully, from confirming a fan-rated box to testing the final result, you can complete the installation safely and enjoy reliable performance for years to come. With the right preparation, this project is well within reach for most homeowners.
Related Articles
How to Hang String Lights from Ceiling
How Much Does It Cost to Install a Ceiling Fan? Price Guide
How to Replace Screening in Window Screens: Complete Guide 2026
Why Does My Bathroom Smell Like Urine Even After Cleaning?
Cathedral Ceiling Support Box Installation Supervent: Full Guide