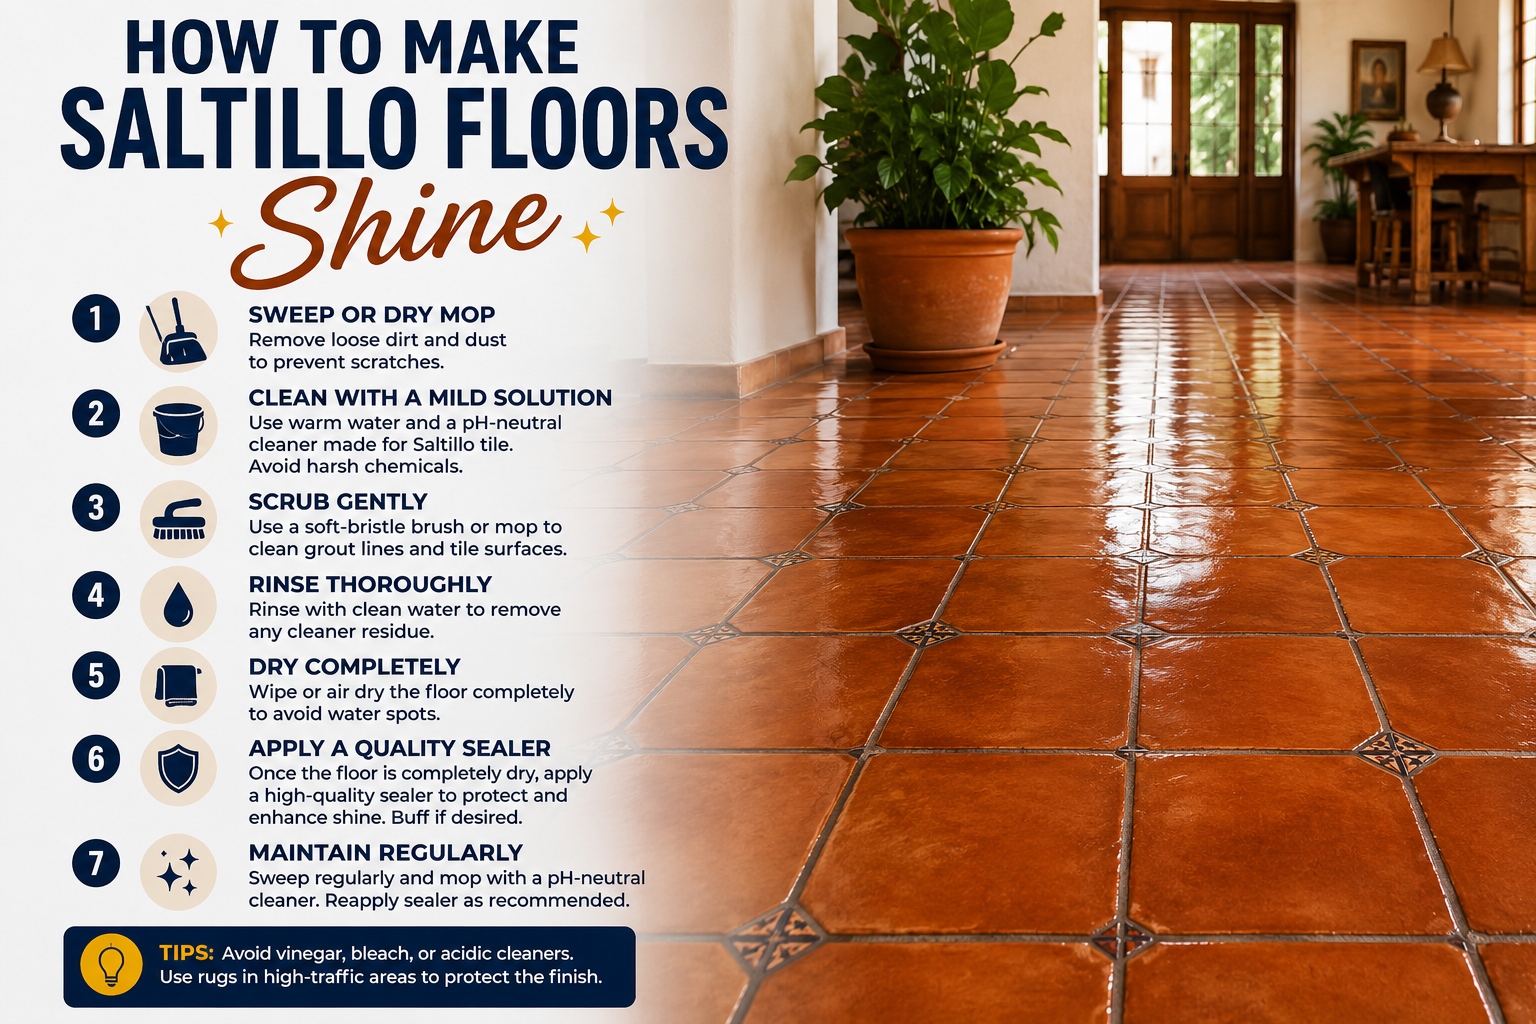
Saltillo tile is loved for its warm, earthy tones and handcrafted character, but over time, foot traffic and daily wear can leave these floors looking dull and tired. Restoring that natural shine does not require replacing the tile, but it does require a proper process that respects the clay’s porous nature.
With the right combination of cleaning, sealing, and polishing, Saltillo floors can regain their glow and stay protected for years to come.
The process generally involves removing old, degraded sealer, deep cleaning the surface, applying a fresh penetrating or topical sealer, and finishing with a polish that enhances both shine and protection. Skipping any of these steps often leads to uneven results or premature wear.
Understanding Why Saltillo Tile Loses Its Shine
Saltillo tile naturally dulls over time due to its porous surface absorbing dirt, oils, and foot traffic residue. Knowing why this happens helps explain why a multi-step restoration process works better than simple mopping.
The Role of Porosity in Dulling
Saltillo tile is made from natural clay and fired in a way that leaves the surface with tiny pores, allowing it to soak up moisture, dust, and oils from daily use.
Over time, these particles build up within the pores, creating a hazy or dull appearance that ordinary mopping cannot fully remove. This is why deeper cleaning and resealing are necessary periodically rather than relying only on surface wiping.
How Old Sealer Affects Appearance
When the original sealer applied to Saltillo tile begins to break down, it often becomes patchy, yellowed, or worn in high-traffic areas.
This uneven wear creates an inconsistent shine across the floor, making some areas look glossy while others appear flat or faded. Removing this old sealer layer is often the first step before any new shine treatment can be applied effectively.
Step One: Deep Cleaning Before Sealing or Polishing
Before any sealer or polish is applied, the floor must be thoroughly cleaned to remove built-up dirt, grease, and residue that could trap moisture beneath a new sealer layer.
Sweeping and Vacuuming First
Starting with a dry sweep or vacuum removes loose dirt and debris that could scratch the tile surface during wet cleaning. Saltillo tile often has slightly uneven edges and texture, which tends to trap dust more than smooth tile, so this step should be done regularly even outside of a full restoration.
Using pH Neutral Cleaners for Deep Cleaning
A pH-neutral cleaner mixed with warm water is ideal for breaking down grease and grime without damaging the clay surface or any remaining sealer.
Acidic cleaners, including vinegar-based solutions, should be avoided since they can react with the natural minerals in the tile and cause discoloration or etching over time.
Cleaning Grout Lines Thoroughly
Grout lines tend to hold more dirt than the tile itself, so a stiff brush combined with a baking soda and water paste can help lift embedded grime from these areas. Once the grout is scrubbed, wiping away the residue with a damp cloth ensures no leftover paste interferes with the sealing process.
Step Two: Stripping Old or Degraded Sealer
If the existing sealer on Saltillo tile has become worn, cloudy, or unevenly worn down, it usually needs to be stripped before a new finish can be applied successfully.
Identifying When Stripping Is Necessary
Signs that stripping is needed include patchy shine, white haze in certain areas, or sealer that has started peeling or flaking.
Applying new sealer over a damaged layer often traps these imperfections underneath, making the floor look worse rather than better.
Using a Sealer Stripping Solution
A stripping solution designed for natural stone or clay tile should be applied according to the product instructions, allowing it to break down the old sealer without harming the tile itself. After the solution has had time to work, the residue is typically mopped or wiped away, leaving a clean, bare surface ready for resealing.
Step Three: Applying a Fresh Sealer for Protection and Shine
Once the floor is clean and any old sealer has been removed, applying a new sealer is the foundation for restoring both protection and shine to Saltillo tile.
Choosing Between Penetrating and Topical Sealers
A penetrating sealer soaks into the pores of the tile, providing protection from within while keeping the natural matte look of the clay.
A topical sealer, on the other hand, sits on the surface and can create a higher gloss finish, which is often preferred when the goal is a noticeably shinier floor.
Applying the Sealer Evenly
Sealer should be applied using a sponge, brush, or applicator pad in thin, even coats, working in small sections to avoid pooling or streaking.
Allowing each coat to dry according to the manufacturer’s instructions before applying additional layers helps achieve a consistent finish across the entire floor.
Allowing Proper Curing Time
After sealing, the floor needs adequate time to cure fully before any foot traffic or polishing begins, as walking on it too soon can leave marks or disrupt the finish.
Curing times vary depending on the product, but patience at this stage prevents having to redo the work later.
Step Four: Polishing for the Final Shine
The final step in making Saltillo floors shine is applying a polish that enhances the gloss created by the sealer while adding an extra layer of protection.
Applying Polish Evenly Across the Floor
Polish should be applied in a thin, even layer using a microfiber pad, working in manageable sections to avoid streaking. Gentle application is key, as working the polish too aggressively into the floor can create uneven patches rather than a smooth, consistent shine.
Buffing for Added Gloss
Once the polish has been applied and allowed to set, buffing the surface with a soft pad helps bring out a deeper shine while smoothing any minor inconsistencies. This step is what gives Saltillo floors that glowing, well-maintained appearance that many homeowners aim for.
Comparing Cleaning, Sealing, and Polishing Frequency
To maintain the shine achieved through this process, ongoing care should follow a routine based on how often each task needs to be repeated.
| Maintenance Task | Recommended Frequency | Purpose |
| Sweeping or Vacuuming | Daily | Removes loose dirt and prevents surface scratching |
| Mopping with pH Neutral Cleaner | Weekly | Removes built-up grime without damaging sealer |
| Grout Cleaning | Monthly | Prevents dirt buildup in porous grout lines |
| Resealing | Every 1 to 2 years | Restores protective barrier against stains and moisture |
| Polishing | Every 2 to 6 months for high traffic areas | Maintains shine and adds protective layer |
Maintaining the Shine Over Time
Once Saltillo floors have been restored to a shiny finish, ongoing care helps extend the time between full restoration projects.
Daily Habits That Preserve Shine
Sweeping daily and placing mats at entry points reduces the amount of grit tracked onto the floor, which is one of the main causes of dulling. Wiping up spills immediately also prevents moisture from seeping into the porous tile and affecting the sealer underneath.
Avoiding Harsh Chemicals During Routine Cleaning
Using gentle, pH-balanced cleaners during weekly mopping helps preserve both the sealer and polish layers, extending the time before the floor needs to be stripped and redone.
Harsh chemicals, including bleach mixed with other cleaners, should always be avoided due to both damage risk and safety concerns.
Frequently Asked Questions
How often should Saltillo tile be resealed?
Saltillo tile generally needs resealing every one to two years, though high-traffic or moisture-prone areas may require more frequent attention.
Can I polish Saltillo tile without resealing first?
Polishing works best after sealing, as polish applied over old or damaged sealer may not adhere properly or create an even shine.
Is it necessary to strip old sealer every time?
Stripping is only needed when the existing sealer is visibly worn, patchy, or peeling, not for every routine maintenance cycle.
What cleaners should be avoided on Saltillo tile?
Acidic cleaners like vinegar and harsh chemical solutions should be avoided, as they can damage both the tile and the sealer.
Conclusion
Making Saltillo floors shine involves a careful process of cleaning, removing old sealer, applying a fresh protective coat, and finishing with polish for added gloss. With consistent maintenance and the right products, these floors can maintain their warmth, character, and shine for many years.
Related Articles
How to Clean Faux Suede Furniture Without Ruining It?
Complete Guide to Roof Ventilation for Metal Roofs: Types, Benefits, Installation & Maintenance
How to Get Urine Smell Out of Bathroom: Complete Guide
Interior Basement Waterproofing: Complete Guide to a Dry & Safe Basement
How Long Does It Take to Do a Bathroom Renovation? Timelines, Phases & What to Expect