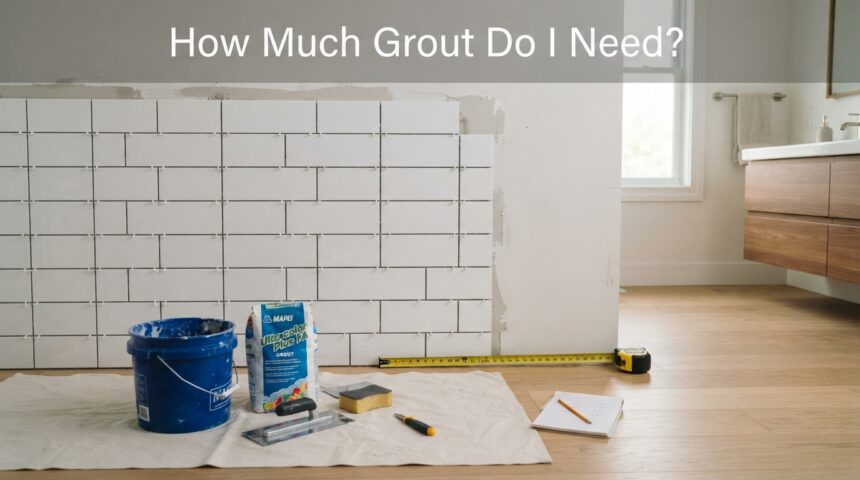
Figuring out how much grout you need before starting a tiling project saves you time, money, and unnecessary trips to the hardware store. Whether you’re tiling a small bathroom backsplash or a full kitchen floor, getting the quantity right the first time keeps your project moving smoothly.
This guide breaks the process into simple, practical steps so you can calculate grout with confidence. By the end, you’ll understand exactly what affects grout coverage and how to avoid buying too much or too little.
What Is Grout and Why the Amount Matters
Grout is the material that fills the gaps between tiles, holding them in place while sealing out moisture and dirt. Knowing how much grout you need matters because buying the wrong amount can delay your project or waste your budget.
The Role Grout Plays in Tiling
Grout does more than just fill space between tiles. It locks tiles into position, prevents water from seeping underneath, and gives the entire surface a clean, finished look. Without properly measured grout, tile edges are left exposed and vulnerable to damage.
Why Getting the Amount Right Is Important
Buying too little grout means pausing your project midway to find a matching batch, which can be difficult if colors vary between production runs. Buying too much wastes money on unused material that often can’t be returned once opened.
Key Factors That Affect How Much Grout You Need
Several variables influence your final grout total, and understanding them helps you get an accurate estimate. Tile size, joint width, joint depth, and grout type all play a role in the final number.
Tile Size and Shape
Larger tiles need less grout overall because there are fewer joints to fill across the same square footage. Smaller tiles or mosaics require significantly more grout since there are many more seams packed into the same area. This is one of the biggest factors people overlook when estimating.
Grout Joint Width and Depth
The wider and deeper your grout lines are, the more material you’ll need to fill them completely. Standard joints are often between 1/8 inch and 3/8 inch, but decorative styles can go wider. Even a small increase in joint width can noticeably raise your total grout requirement.
Total Square Footage
The overall area you’re tiling directly scales your grout needs, since more space naturally means more joints to fill. Always measure the full square footage of your project area before calculating, including any cuts or borders. Rounding up slightly here helps account for irregular spaces.
The Basic Grout Calculation Formula
Most professionals use a standard formula that factors in tile dimensions, joint width, joint depth, and total area. This formula gives a reliable estimate for how much grout you need in pounds.
The Formula Explained
The standard calculation is: (Tile Length + Tile Width) divided by (Tile Length multiplied by Tile Width), then multiplied by Joint Width, Joint Depth, 33.3, and your total square footage. This produces the approximate weight of grout required in pounds.
A Simple Example Walkthrough
For a 12-inch by 12-inch tile with a 1/8-inch joint width and depth, covering 100 square feet, the formula outputs roughly 7 to 9 pounds of grout needed. Adjusting any single variable, like tile size or joint width, shifts this number up or down. Running your own numbers through this formula ensures accuracy for your specific project.
Easy Grout Estimate Chart by Tile Size
For a quicker reference without doing the math yourself, general estimates exist based on common tile sizes. These numbers assume a standard 1/8-inch joint and 100 square feet of coverage.
| Tile Size | Estimated Grout Needed (per 100 sq ft) |
| Mosaic tiles (2″ or smaller) | 20–25 lbs |
| Small tiles (4″x4″) | 15–20 lbs |
| Medium tiles (6″x6″ to 12″x12″) | 7–12 lbs |
| Large format tiles (16″x16″ and up) | 4–7 lbs |
| Plank-style tiles | 5–8 lbs |
How to Use This Chart Effectively
This chart works best as a starting point before fine-tuning with the exact formula. If your joints are wider or narrower than 1/8 inch, adjust the estimate slightly up or down. Always cross-check with your tile manufacturer’s specific coverage guide when available.
How Joint Width and Depth Change the Amount
Joint width and depth have a direct, multiplying effect on total grout volume, even with the same tile size. A small adjustment in either measurement can meaningfully change your final total.
Narrow vs. Wide Joints
Narrow joints, such as 1/16 inch, use noticeably less grout than wide decorative joints of 1/4 inch or more. Wide joints are common with rustic or handmade tile styles where uneven edges need more filler. Always confirm your intended joint width before finalizing your grout order.
Why Joint Depth Is Often Overlooked
Joint depth typically matches tile thickness, but thicker tiles create deeper joints that require more grout to fill completely. Many people forget to factor this in and only consider width. Checking your tile’s thickness alongside its width gives a more complete picture.
Sanded vs. Unsanded vs. Epoxy Grout Coverage
Different grout types have different densities and coverage rates, which affects how much you’ll need to purchase. The type you choose depends on your joint width and the look you want.
Sanded Grout
Sanded grout is used for wider joints, typically anything above 1/8 inch, and offers strong durability for high-traffic areas. It generally provides good coverage per bag due to its sand content adding bulk. This is the most common choice for floors.
Unsanded Grout
Unsanded grout is smoother and better suited for narrow joints or delicate tile surfaces like polished stone. It tends to cover slightly less area per pound compared to sanded grout. This type is common in bathroom and shower tiling.
Epoxy Grout
Epoxy grout is highly durable and stain-resistant but usually comes with different coverage rates than cement-based grouts. It’s often sold with its own manufacturer coverage chart since formulations vary by brand. Always check the specific product packaging for accurate estimates.
Should You Buy Extra Grout
Buying a small buffer beyond your calculated estimate is a smart practice that most professional tilers recommend. It protects you from running short due to mixing errors or spills.
Recommended Buffer Percentage
Adding 10 to 15 percent extra to your total estimate covers minor waste during mixing and application. This buffer also accounts for uneven surfaces or slightly wider cuts near edges. It’s a small added cost compared to the hassle of finding matching grout later.
Keeping Extra for Future Repairs
Grout lines can crack or discolor over time, so keeping a small labeled amount aside helps with future touch-ups. Store leftover dry grout in a sealed, moisture-free container to extend its shelf life. This simple step saves you from repurchasing an entire bag for small repairs.
How to Use an Online Grout Calculator
Online calculators simplify the entire process by doing the math for you once you input your measurements. They’re especially useful for irregular or mixed-tile projects.
What Information You’ll Need
Most calculators ask for tile length, tile width, tile thickness, joint width, and total square footage. Having these measurements ready beforehand speeds up the process significantly. Double-checking your inputs prevents inaccurate results.
Why Calculators Are More Reliable
Calculators account for multiple variables simultaneously, reducing the chance of manual calculation errors. They’re particularly helpful when working with non-standard tile shapes or mixed sizes in one project. Still, comparing results with your tile brand’s own chart is a good practice.
Common Mistakes People Make When Estimating Grout
Even experienced DIYers sometimes miscalculate grout needs by overlooking a key variable. Being aware of these common errors helps you avoid unnecessary setbacks.
Ignoring Joint Depth
Many people calculate based on width alone and forget that depth significantly affects total volume. This often results in underestimating the amount needed for thicker tiles. Always include depth in your calculation.
Skipping the Extra Buffer
Ordering the exact calculated amount without any buffer often leads to running short due to real-world mixing waste. This is one of the most common and easily avoidable mistakes. A small buffer prevents unnecessary project delays.
FAQs
Does tile size really change how much grout I need?
Yes, larger tiles need less grout since fewer joints exist across the same area, while smaller tiles require noticeably more.
Can I return unused grout?
This depends on the retailer’s policy, but opened bags are typically non-returnable, which is why buffer estimates matter.
How long does grout last once opened?
Dry grout stored in a sealed, dry container can last several months to a year, though quality may gradually decline.
What happens if I don’t buy enough?
You’ll need to pause your project and source a matching batch, which can sometimes result in slight color variation.
Conclusion
Knowing how much grout you need comes down to understanding a few key variables: tile size, joint width, joint depth, and total area. Using the formula or estimate chart above, along with a small buffer, sets you up for a smooth, uninterrupted tiling project without unnecessary waste or delays.
Related Articles
Can a Nest Thermostat Replace Heating and AC?
Can You Use a Propane Heater Indoors? Safety Guide
How Big Is a 10 by 10 Storage Unit? A Complete Size Guide