If you have ever installed a toilet, replaced old flooring, or dealt with a wobbly toilet that just won’t sit right, you have probably run into the question: how high should a toilet flange be? It sounds like a small detail, but getting this measurement wrong is one of the most common reasons toilets leak, rock back and forth, or fail inspection.
A toilet flange is the connector piece that joins your toilet to the drain pipe in your floor. It might not be something you think about often, but its height plays a huge role in how well your toilet functions. Set it too low, and you risk leaks and unpleasant odors. Set it too high, and your toilet may rock, crack the wax seal, or even damage the flange itself over time.
In this guide, we will walk through everything you need to know about toilet flange height in simple, easy-to-understand language, including the correct height, how to measure it, what to do if it is wrong, and how to avoid common mistakes during installation.
Understanding Toilet Flange Basics
Before diving into the exact height requirements, it helps to understand what a flange actually does and why it exists in the first place.
A toilet flange, sometimes called a closet flange, is a round fitting that connects the base of your toilet to the drainpipe running through your floor. It serves two main jobs: it holds the toilet securely in place using bolts, and it creates a sealed connection so waste flows into the drain without leaking out onto your bathroom floor.
Flanges come in a few different materials, each suited to different types of plumbing systems:
| Flange Material | Common Use | Durability |
|---|---|---|
| PVC | Most residential homes | Good, lightweight, affordable |
| ABS | Similar to PVC, black pipe systems | Good, resistant to impact |
| Cast Iron | Older homes, older plumbing systems | Very durable but heavy and can rust |
| Stainless Steel | Repairs or reinforcement rings | Extremely durable, corrosion-resistant |
A standard flange consists of a flat ring with slots for the toilet’s mounting bolts, and a collar that fits down into or around the drain pipe. Understanding these basic parts makes it much easier to figure out why height matters so much in the next section.
The Ideal Flange Height
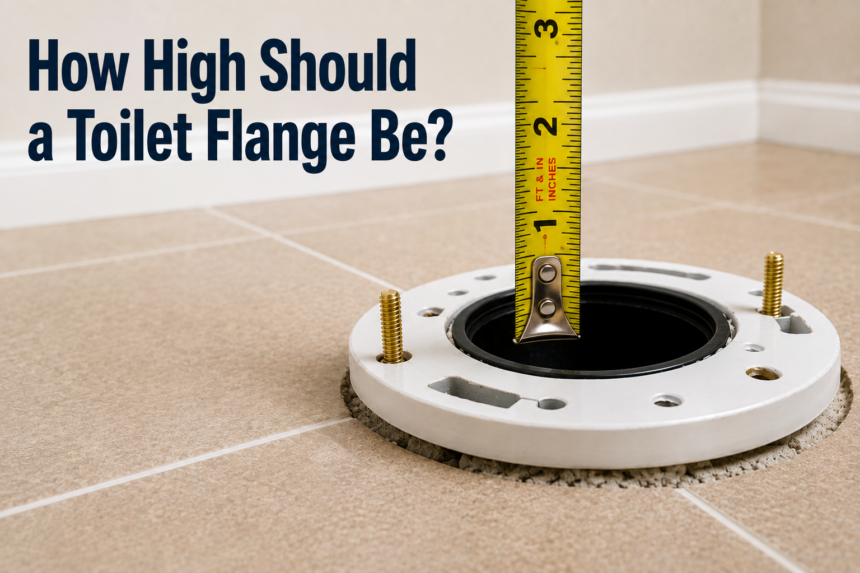
Now for the main question: how high should a toilet flange be? The general rule that plumbers follow is that the top of the flange should sit flush with, or up to one quarter inch above, the finished floor surface. This is considered the ideal range for a proper toilet seal.
The key phrase here is “finished floor,” not the subfloor. This distinction trips up a lot of homeowners and even some contractors. The finished floor refers to the surface you will actually walk on, whether that is tile, vinyl, laminate, or hardwood. The flange height should always be measured after that flooring material has been installed, not before.
Here is a simple breakdown of the acceptable range:
| Flange Position | Result |
|---|---|
| Flush with finished floor | Ideal |
| Up to 1/4 inch above finished floor | Acceptable |
| More than 1/2 inch below finished floor | Problematic, needs an extender |
| More than 1 inch above finished floor | Problematic, needs trimming or a repair |
Staying within this small tolerance window matters because the wax ring, which creates the actual watertight seal between the toilet base and the flange, is designed to work within a narrow compression range. If the flange sits too far from this ideal zone, the wax ring cannot form a proper seal no matter how carefully you install the toilet.
Flange Too Low — Problems & Solutions
One of the most common issues homeowners run into is a flange that sits too low in relation to the finished floor. This usually happens when new flooring, such as thicker tile or an extra layer of subfloor, gets added after the flange was originally installed, effectively burying it below the surface.
There are a few telltale symptoms of a flange that sits too low. You might notice the toilet rocking slightly even after tightening the bolts, a persistent bad odor near the base of the toilet, or worse, water seeping out from underneath during use. These are signs that the wax ring is not making full contact and the seal has failed.
Fortunately, this is a fixable problem without having to replace the entire flange. The most common solution is a flange extender ring, sometimes called a spacer ring. These stack directly on top of the existing flange to raise its effective height to the correct level.
They come in various thicknesses, so you can combine them to match exactly how much height you need to add. In more severe cases, a repair flange kit that sits inside the old flange can also restore a proper connection point for the toilet bolts.
Flange Too High — Problems & Solutions
On the flip side, a flange that sits too high above the finished floor creates its own set of headaches. This often happens when a subfloor is raised, when the flange was mistakenly installed before flooring was added, or simply due to an installation error.
When the flange sits too high, the toilet often will not sit flat against the floor. This causes it to rock, put uneven pressure on the wax ring, and in some cases even crack the flange itself under the toilet’s weight. Over time, this instability can also stress the water supply connection, leading to leaks in unexpected places.
The good news is that this issue is also very manageable. For PVC or ABS flanges, a plumber can carefully trim down the excess height using a saw so the flange sits within the acceptable range. Alternatively, adjustable flange kits are available that let you customize the height without needing to cut anything, which is a great option if you are not comfortable using power tools near existing plumbing.
How to Measure Flange Height Correctly?
Measuring flange height correctly is simple once you know what to look for, but it does require a bit of patience and the right approach.
You will need a tape measure, a flat straightedge or level, and good lighting to see the base of the flange clearly. Start by placing the straightedge across the finished floor so it spans the flange opening. Then measure the distance from the bottom of the straightedge down to the top surface of the flange. This tells you exactly how the flange height compares to the finished floor.
It is worth repeating that this measurement should always be taken after your finished flooring is installed, not the bare subfloor. Measuring too early is one of the most common reasons flange height ends up wrong in the first place, since the added thickness of tile, vinyl, or hardwood is easy to forget about during planning.
Step-by-Step Installation Guide
If you are installing a flange from scratch, following the right order of steps makes a huge difference in getting the height correct the first time.
Begin by preparing the drain pipe, making sure it is cut cleanly and free of debris or old adhesive. Next, dry-fit the flange onto the pipe to check its position before permanently securing anything. This is the stage where you compare the flange height against your finished floor level, adjusting with spacers or trimming as needed.
Once the height looks correct, secure the flange to the subfloor using corrosion-resistant screws, then glue or seal the flange to the drain pipe according to the manufacturer’s instructions. Finally, before you install the toilet itself, do a quick test by placing the toilet in position without the wax ring to confirm it sits level and stable.
Taking your time with this sequence prevents having to redo the work later, which is far more frustrating than simply double-checking measurements upfront.
Choosing the Right Flange Extender (if needed)
If your flange ends up too low, choosing the right extender is an important next step. Extenders generally come in two styles: solid stacking rings and adjustable spacer kits.
Solid rings are straightforward and inexpensive, and multiple rings can typically be stacked together to reach the needed height, though most manufacturers recommend not exceeding a certain number of stacked rings for structural stability.
When selecting an extender, always match the material to your existing flange where possible. Combining PVC extenders with a PVC flange, for example, ensures better compatibility and a more reliable seal than mixing materials that expand and contract differently over time.
Common Mistakes to Avoid
Even experienced do-it-yourselfers can run into trouble with flange height if a few key mistakes are overlooked. Installing the flange before the finished flooring goes in is one of the most frequent errors, since it almost guarantees the flange will end up too low once tile or flooring is added.
Ignoring the manufacturer’s specific height recommendations for a given flange model is another common issue, as not all products follow identical guidelines. Overtightening the toilet bolts to compensate for a wobble caused by incorrect flange height can crack the toilet base or the flange itself.
Lastly, using the wrong wax ring size for your flange height, such as a standard ring when an extra-thick ring is needed for a lower flange, is a frequent cause of leaks even when the flange itself is technically fine.
Tools & Materials Needed
Having the right tools on hand makes the entire process smoother, whether you are checking existing flange height or installing a new one.
Tools:
- Tape measure
- Level or straightedge
- Flashlight
- Screwdriver or drill
- Saw (for trimming, if needed)
Materials:
- Toilet flange (matching your pipe material)
- Flange extender rings or repair kit (if needed)
- Wax ring or wax-free seal
- Closet bolts
- Corrosion-resistant screws
When to Call a Professional Plumber?
While many flange height issues can be handled as a do-it-yourself project, some situations call for professional help. If the flange is cracked, severely corroded, or embedded in concrete rather than a wood subfloor, a plumber will have the right tools and experience to handle the repair safely.
Similarly, if you are dealing with a complex subfloor situation, such as uneven leveling across the bathroom or a drain pipe that is misaligned, bringing in a professional can save you from costly mistakes and repeat repairs.
Conclusion
So, how high should a toilet flange be? In short, it should sit flush with the finished floor, or no more than about a quarter inch above it, for the best possible seal and stability. Getting this measurement right, and always measuring after your flooring is finished rather than before, is the single biggest factor in avoiding leaks, wobbling, and premature wear on your toilet installation.
Whether you are fixing a flange that sits too low with an extender ring, trimming one that sits too high, or installing a brand new flange from scratch, taking the time to measure carefully and follow the proper steps will save you time, money, and frustration down the road.
FAQs
Q: How high should a toilet flange be above the finished floor? A: It should be flush with the finished floor, or at most one quarter inch above it.
Q: Can a toilet flange be too low? A: Yes, a flange that sits below the finished floor can cause leaks and an unstable toilet. Extender rings are the usual fix.
Q: How many flange extender rings can I stack? A: This varies by manufacturer, but most recommend limiting the stack height to maintain structural stability. Always check the product instructions.
Q: Do I measure flange height from the subfloor or finished floor? A: Always measure from the finished floor, since that is the surface the toilet will actually sit on.
Q: What happens if the flange is too high? A: The toilet may rock, the wax seal may compress unevenly, and the flange itself can crack under pressure over time.
Related Articles
How to Clean Faux Suede Furniture Without Ruining It?
Complete Guide to Roof Ventilation for Metal Roofs: Types, Benefits, Installation & Maintenance
How to Program a Garage Door Opener? Step-by-Step Guide for All Brands
How to Fix a Cracked Toilet Tank: Complete Step-by-Step Guide