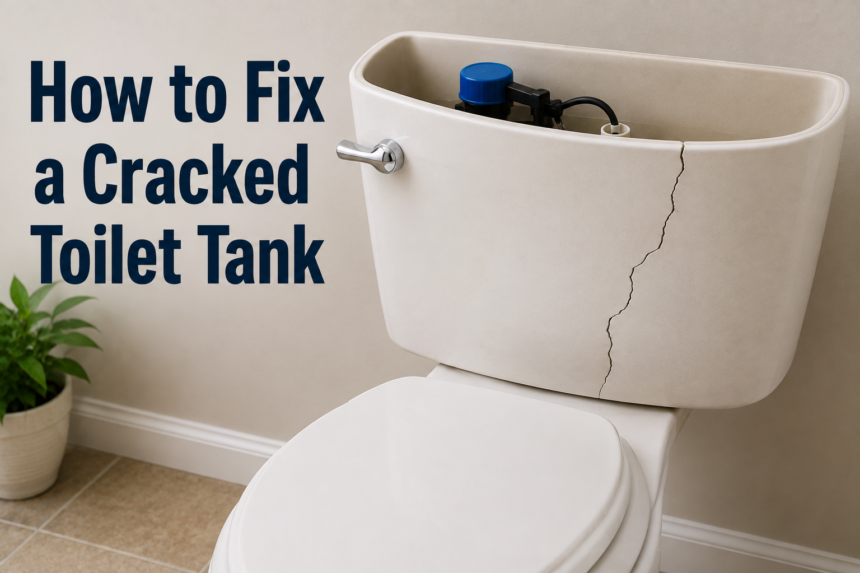
A cracked toilet tank is one of those household problems that seems small at first but can quickly turn into a bigger headache if it’s ignored. Maybe you noticed a thin line running across the porcelain, or perhaps you spotted a small puddle forming near the base of your toilet after every flush. Either way, the good news is that in many cases, you don’t need to call a plumber or replace the entire toilet right away. Learning how to fix a cracked toilet tank yourself can save you money, time, and the hassle of scheduling a repair visit.
That said, not every crack can be fixed with a quick patch job. Some cracks are cosmetic and harmless, while others signal that the tank is structurally weak and could fail without warning. This guide walks you through everything you need to know, from understanding why tanks crack in the first place to deciding whether a repair will actually hold up or whether it’s time to replace the tank entirely.
By the end of this guide, you’ll know exactly how to identify the type of crack you’re dealing with, what tools and materials to gather, and how to complete the repair safely and effectively.
Understanding Why Toilet Tanks Crack
Toilet tanks are made of vitreous china, a type of glazed porcelain that’s strong but also somewhat brittle. Over time, several factors can cause this material to weaken and eventually crack.
Age and material fatigue play a major role. Just like any material, porcelain becomes more prone to stress fractures as it ages. A toilet that’s been in use for fifteen or twenty years is naturally more vulnerable to cracking than a newer model.
Overtightening the bolts during installation is another common culprit. When a toilet tank is bolted onto the bowl, the connection needs to be snug but not overly tight. If someone tightens the bolts too much, whether during original installation or a later repair, it can put uneven pressure on the porcelain and cause hairline cracks to form around the bolt holes.
Sudden temperature changes can also stress the material. If cold water fills a tank that’s been sitting in a warm bathroom, the rapid temperature shift can cause the porcelain to contract unevenly, leading to small cracks over time. This is more common in areas with cold winters or in homes where the water supply temperature fluctuates significantly.
Physical impact is a straightforward cause. Dropping a heavy object into the tank, such as a tool during a repair, or bumping the tank hard enough during moving or renovations, can crack the porcelain instantly.
Finally, some cracks trace back to manufacturing defects. Occasionally, a tank leaves the factory with a weak spot that isn’t visible until it’s been in use for a while and finally gives way under normal pressure.
Types of Cracks: How to Identify What You’re Dealing With
Before you attempt any repair, it’s important to correctly identify the type of crack. Not all cracks are created equal, and the repair method you choose depends heavily on this assessment.
| Crack Type | Description | Repairable? |
|---|---|---|
| Hairline surface crack | Thin, shallow line on the surface glaze; doesn’t go through the tank wall | Usually yes |
| Structural or spreading crack | Wide, deep, or growing crack that affects the tank’s integrity | Usually no — replace |
| Crack near bolt holes | Small fractures radiating from where bolts attach the tank to the bowl | Sometimes, with care |
| Crack at the base or seam | Located where the tank meets the bowl or along a manufacturing seam | Often needs replacement |
To check whether a crack is actively leaking or purely cosmetic, dry the tank completely with a towel, then watch the area closely for the next hour or two after refilling. If moisture reappears along the crack line, it’s an active leak that needs immediate attention.
If the area stays dry, you may be dealing with a surface-level crack that hasn’t compromised the tank’s ability to hold water, though it’s still wise to repair it before it worsens.
Tools and Materials You’ll Need
Having everything ready before you start makes the repair process much smoother. Here’s what to gather:
- Rubber gloves and safety goggles
- A sponge, old towels, and a bucket
- Fine-grit sandpaper (220 grit works well)
- Rubbing alcohol and a clean cloth
- Waterproof epoxy putty or a porcelain repair kit
- Replacement gasket and bolts (if the crack is near the tank-to-bowl connection)
- A putty knife or small applicator tool
Most of these items are inexpensive and available at any hardware store. Porcelain repair kits and waterproof epoxy putty, in particular, are widely sold and specifically designed for this kind of household fix.
Step-by-Step Guide: How to Fix a Cracked Toilet Tank
Once you’ve confirmed the crack is repairable and gathered your materials, you’re ready to begin. Follow these steps carefully for the best results.
Step 1: Shut off the water supply. Locate the shutoff valve, usually near the base of the toilet, and turn it clockwise until the water stops flowing into the tank.
Step 2: Flush and drain the tank completely. Flush the toilet to empty most of the water, then use a sponge to soak up whatever remains at the bottom. The tank needs to be completely dry for the repair to hold properly.
Step 3: Dry and clean the cracked area. Wipe the area around the crack with a towel, then clean it thoroughly with rubbing alcohol to remove any mineral buildup, soap residue, or grime. This step is essential because epoxy won’t bond well to a dirty surface.
Step 4: Sand the surface for better adhesion. Lightly sand the area around the crack with fine-grit sandpaper. This roughens the glossy porcelain surface just enough to help the repair material grip properly. Wipe away the dust afterward.
Step 5: Mix and apply the epoxy or porcelain filler. Following the product instructions, mix the epoxy putty until it’s evenly blended. Press it firmly into the crack, making sure it fills the entire length and depth of the damage.
Step 6: Smooth and shape the repair. Use a putty knife or your gloved finger to smooth the epoxy so it blends with the surrounding surface as much as possible. This also helps prevent rough edges that could catch on cleaning cloths later.
Step 7: Let it cure fully. Curing times vary by product, but most epoxy putties need anywhere from four to twenty-four hours to fully harden. Avoid touching or using the toilet during this time.
Step 8: Slowly refill and test for leaks. Turn the water supply back on gradually and let the tank fill. Check the repaired area closely over the next day or two, especially after several flushes, to confirm there’s no seepage.
Fixing Cracks Near Bolts or Gaskets
Cracks that form around the bolt holes connecting the tank to the bowl require a slightly different approach than a straightforward surface crack. Because these bolts hold the tank under constant pressure, a simple epoxy patch often isn’t enough on its own.
In most cases, it’s worth replacing the tank-to-bowl gasket and bolts at the same time as the repair. Start by removing the old bolts and gasket, then clean the area thoroughly before applying epoxy to the crack itself. Once the epoxy has cured, install a new rubber gasket and replacement bolts, tightening them evenly and only as much as necessary. Overtightening at this stage can easily cause a new crack to form, undoing all your work.
When reassembling, alternate tightening each bolt a little at a time rather than fully tightening one side first. This keeps pressure even across the tank and reduces the risk of future cracking.
When to Repair vs. When to Replace the Tank?
Not every crack deserves a repair attempt. Knowing when to walk away from a DIY fix and invest in a new tank can save you from a much bigger mess down the road.
A repair is unlikely to hold if the crack is longer than a few inches, if it’s actively spreading, or if it’s located in a spot that bears a lot of structural weight, such as near the base or along a factory seam. In these cases, epoxy might stop the leak temporarily, but the underlying weakness in the porcelain remains, and the tank could fail unexpectedly, sometimes causing water damage to your bathroom floor or subfloor.
From a cost perspective, a porcelain repair kit typically costs a fraction of what a new toilet tank costs, making it an attractive first option for minor damage. However, if you find yourself repairing the same tank repeatedly, or if the crack keeps returning, replacing the tank becomes the more economical choice in the long run.
Safety is also a factor worth considering. A large tank full of water sitting on a cracked structure poses a real risk of sudden failure, which could lead to injury or significant water damage. When in doubt, it’s better to replace the tank than to gamble on a patch job.
How to Replace a Cracked Toilet Tank?
If you’ve determined that replacement is the safer route, the process is more involved than a repair but still very manageable for most homeowners.
Start by shutting off the water supply and draining the tank completely, just as you would for a repair. Disconnect the water supply line, then remove the bolts connecting the tank to the bowl. Carefully lift the tank away, as porcelain is heavy and can chip or crack further if handled roughly.
When choosing a replacement tank, make sure it matches your toilet’s brand and model, since tank shapes and bolt patterns vary. Many hardware stores and plumbing suppliers can help you find an exact match if you bring in the model number, which is often printed inside the tank or on the underside of the toilet lid.
Installing the new tank involves placing a fresh gasket between the tank and bowl, aligning the bolt holes, and tightening the new bolts evenly in a criss-cross pattern to avoid uneven pressure. Once secured, reconnect the water supply, turn the water back on, and check carefully for leaks before considering the job finished.
Preventing Future Cracks
Once you’ve dealt with a cracked tank, it’s worth taking a few simple precautions to avoid a repeat situation.
Avoid overtightening bolts during any future installation or repair work, since this is one of the most common causes of cracking.
Try to minimize sudden temperature changes by allowing water to reach room temperature gradually rather than letting extremely cold water rush into a tank that’s been sitting in a warm room.
It also helps to periodically inspect your toilet tank for early signs of hairline cracks, especially if your toilet is older, so you can catch and repair small issues before they grow into bigger problems.
Common Mistakes to Avoid
Even with the best intentions, a few missteps can undermine an otherwise solid repair effort.
Using a non-waterproof adhesive, such as regular super glue or standard household glue, is a common mistake. These products aren’t designed to withstand constant water exposure and will fail quickly, leading to the same leak returning within days.
Skipping the drying or curing time is another frequent error; rushing to refill the tank before the epoxy has fully hardened weakens the bond and often results in a failed repair.
Lastly, ignoring small cracks because they seem harmless at first is a mistake many homeowners make, only to find themselves dealing with a much larger crack, or a full tank failure, a few months later.
Frequently Asked Questions
Can I use super glue on a toilet tank? No. Super glue isn’t waterproof and won’t hold up against the constant moisture inside a toilet tank. Stick to epoxy putty or a dedicated porcelain repair kit designed for wet environments.
How long does an epoxy repair last? A properly applied epoxy repair on a hairline crack can last several years, though it’s not a permanent structural fix. Regularly check the area for any signs of the crack reopening.
Is it safe to use a repaired tank daily? Yes, as long as the crack was minor, the repair was done correctly, and there are no signs of leaking after testing. For larger or structural cracks, daily use of a repaired tank isn’t recommended.
How much does professional repair cost? Hiring a plumber for a toilet tank repair typically costs more than a DIY fix, since you’re paying for labor in addition to materials. Getting a quote from a local plumber is the best way to know the exact cost in your area.
Conclusion
Dealing with a cracked toilet tank doesn’t have to be stressful. In many cases, a bit of cleaning, sanding, and the right waterproof epoxy is all it takes to seal a minor crack and get your toilet back in working order. The key takeaways are simple: identify the type of crack you’re dealing with, gather the right tools, follow the repair steps carefully, and know when it’s time to replace the tank instead of patching it.
If you’re ever unsure whether a crack is safe to repair, or if the damage seems more serious than a simple hairline fracture, it’s always worth consulting a licensed plumber before attempting a fix. A little caution now can save you from a much bigger, messier problem later.
Related Articles
Laundry Room Cabinets: The Complete Guide to Storage, Style, and Smart Organization
Is It Ok to Flush Hair Down the Toilet? Here’s Why You Shouldn’t
How to Replace a Roof Vent: Guide 2026
How Do You Kill Mold in a Basement? A Complete Removal Guide