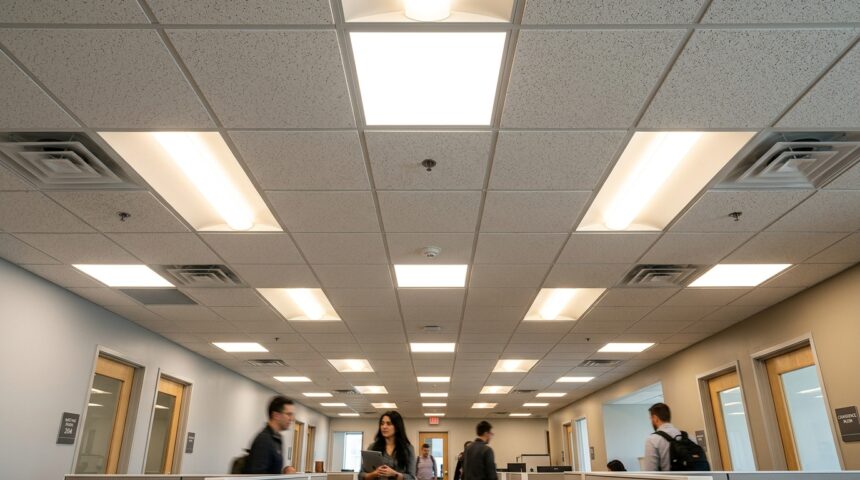
Adding can lights in ceiling tiles is a popular way to improve lighting in basements, offices, and rooms with drop ceilings without undertaking a major renovation. These recessed lighting fixtures blend seamlessly into ceiling tile grids, offering a clean and modern look while distributing light evenly across a room. This guide covers everything you need to know about can lights in ceiling tiles, from choosing the right type to installing them safely and correctly.
Understanding Can Lights for Ceiling Tiles
Can lights designed for ceiling tiles are slightly different from traditional recessed lights meant for drywall ceilings, since they need to fit within the standard grid system. Knowing the available types helps you choose the right fixture for your specific ceiling setup.
Standard Recessed Can Lights
Standard recessed can lights are cylindrical fixtures that sit inside a housing above the ceiling tile, with only the trim visible from below. These are widely used in drop ceiling systems because they fit neatly within a cut-out tile without requiring major structural changes. Most standard cans come in sizes ranging from four to six inches in diameter.
Troffer-Style Lights
Troffer-style lights are rectangular fixtures specifically designed to replace an entire ceiling tile rather than fitting inside a smaller cut hole. These are extremely common in offices and commercial spaces because they blend perfectly with the standard two-by-two or two-by-four tile grid. Troffers tend to provide broader, more even light distribution compared to round can lights.
LED Retrofit Kits
LED retrofit kits are designed to replace older fluorescent or incandescent fixtures within existing ceiling tile housings without needing a complete fixture replacement. These kits are popular for their energy efficiency and longer lifespan compared to traditional bulbs. Many homeowners choose retrofit kits specifically to upgrade outdated lighting without extensive rewiring.
Tools and Materials Needed

Before installing can lights in ceiling tiles, gathering the right tools and materials ensures the process goes smoothly without unnecessary delays or safety risks.
Basic Tools Required
You will need a tile cutting tool or utility knife, a drill, wire strippers, a voltage tester, and a stud finder if working near ceiling joists. A tape measure is also essential for accurately marking the center point of each tile before cutting. Having a stable ladder is equally important since most of this work happens above head height.
Electrical Materials
Below is a table outlining common materials required for installing can lights safely into ceiling tiles.
| Material | Purpose |
| Junction Box | Houses wire connections safely |
| Wire Nuts | Secures electrical connections |
| Electrical Cable | Powers the light fixture |
| Mounting Bracket | Holds fixture in place within tile |
Safety Equipment
Since this project involves working with electrical wiring, safety goggles, insulated gloves, and a non-contact voltage tester are strongly recommended throughout the process. Turning off power at the breaker before starting is an absolute necessity rather than an optional precaution. Working with a partner nearby is also wise when working from a ladder for extended periods.
Step-by-Step Installation Process
Installing can lights in ceiling tiles involves several careful steps, and rushing through any of them can lead to safety hazards or an uneven finished look.
Turning Off Power
Before touching any wiring, switch off the power at the circuit breaker and use a voltage tester to confirm that no electricity is running to the area you plan to work on. This step cannot be skipped under any circumstances, regardless of how confident you feel about the wiring layout. Confirming the power is off protects you from serious electrical injury.
Removing and Cutting the Tile
Carefully remove the ceiling tile where the light will be installed, then measure and mark the center point where the fixture housing needs to sit. Using a tile cutting tool, cut a hole slightly smaller than the fixture housing to ensure a snug, secure fit. Precision at this stage prevents gaps or an unstable fixture once everything is reassembled.
Running the Electrical Wiring
Run the electrical cable from the power source to the location of the new fixture, securing it along the ceiling structure to avoid sagging or interference with other components. Connect the wires to the junction box using wire nuts, making sure each connection is tight and properly insulated. Double-checking these connections before moving forward prevents flickering lights or electrical faults later.
Installing the Fixture
Once wiring is complete, insert the can light fixture into the cut tile opening and secure it using the mounting bracket or clips provided with the kit. Place the tile back into the ceiling grid, ensuring the fixture sits flush and level with the surrounding tiles. Restore power at the breaker and test the light to confirm everything is working correctly.
Choosing the Right Placement for Can Lights
Proper placement of can lights within a ceiling tile grid significantly affects how evenly a room is lit and how natural the overall lighting design feels.
Spacing Between Fixtures
Spacing can lights too closely together creates uneven bright spots, while spacing them too far apart leaves noticeable dark areas across the room. A general guideline is to space fixtures roughly four to six feet apart, depending on the ceiling height and room size. Adjusting this spacing based on furniture layout also helps ensure task areas receive adequate lighting.
Avoiding Structural Obstacles
Before finalizing placement, check for ductwork, pipes, or structural beams above the ceiling tiles that could interfere with fixture installation. Running into an unexpected obstacle mid-installation often causes delays and forces last-minute layout changes. A quick inspection above the tiles beforehand saves significant time and frustration.
Matching Light Placement to Room Function
Task-oriented spaces like kitchens or workstations benefit from more concentrated lighting directly above work surfaces, while general living areas often do better with evenly spread fixtures. Considering how the room will actually be used helps determine whether you need brighter, more frequent fixtures or a softer, evenly distributed layout. This thoughtful approach results in a more functional and comfortable lit space.
Common Mistakes to Avoid
Even straightforward lighting projects can go wrong when a few common mistakes are overlooked during installation.
Skipping the Power Check
Failing to properly verify that power is off before working on wiring is one of the most dangerous mistakes someone can make during this project. Even experienced homeowners should never skip this step, regardless of how many times they have done similar work before. A voltage tester takes seconds to use and can prevent serious injury.
Using Incompatible Fixture Sizes
Purchasing a can light fixture that does not match the standard tile size in your ceiling grid often leads to a poor fit or unstable installation. Always confirm the tile dimensions, typically two-by-two or two-by-four feet, before purchasing any fixture. Mismatched sizes are a common and easily avoidable installation error.
Overloading the Circuit
Installing multiple can lights on a single circuit without checking the electrical load capacity can lead to tripped breakers or, in worse cases, fire hazards. Calculating the total wattage of all fixtures against the circuit’s rated capacity is an essential step before installation begins. When in doubt, consulting a licensed electrician is always the safer choice.
Conclusion
Installing can lights in ceiling tiles is a practical way to modernize lighting in drop ceiling spaces without extensive renovation work. By choosing the right fixture type, following proper electrical safety steps, and planning placement carefully, you can achieve even, reliable lighting throughout the room. While simpler installations can often be handled as a DIY project, consulting a licensed electrician remains a smart choice whenever wiring complexity or safety concerns arise.
FAQs
Can I install can lights in any drop ceiling tile?
Most standard drop ceiling tiles can accommodate can lights, provided the fixture size matches the tile grid dimensions correctly.
Do can lights in ceiling tiles require a licensed electrician?
While simple installations can be done as a DIY project, hiring a licensed electrician is recommended for complex wiring or circuit concerns.
How many can lights can I put on one circuit?
This depends on the circuit’s amperage and the wattage of each fixture, so calculating total load beforehand is important to avoid overloading.
Are LED can lights better than traditional bulbs for ceiling tiles?
Yes, LED options generally offer better energy efficiency, longer lifespan, and less heat output compared to traditional incandescent or fluorescent bulbs.
Related Articles
Complete Guide to Roof Ventilation for Metal Roofs: Types, Benefits, Installation & Maintenance
How Long Does It Take to Do a Bathroom Renovation? Timelines, Phases & What to Expect
How to Measure Windows for Curtains (Step-by-Step Guide)
How to Get Urine Smell Out of Bathroom: Complete Guide
Laundry Room Cabinets: The Complete Guide to Storage, Style, and Smart Organization