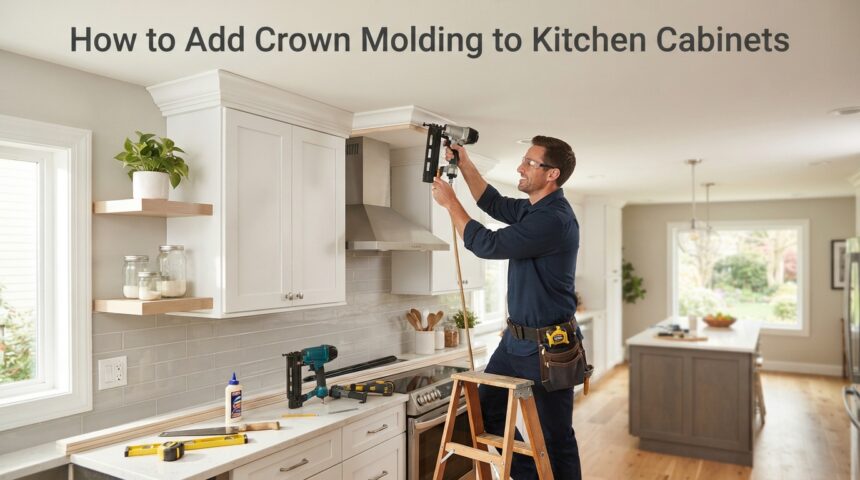
Adding crown molding to kitchen cabinets is one of the simplest ways to transform a plain kitchen into a polished, custom-built space. This detail closes the gap between your cabinets and ceiling, hides uneven lines, and gives your kitchen a finished, high-end appearance without a full renovation budget.
Whether you are working with stock cabinets or upgrading an older kitchen, learning how to add crown molding to kitchen cabinets the right way can save you hundreds of dollars in contractor fees. This guide walks you through every stage of the process in plain, easy-to-follow language, from choosing materials to the final coat of paint.
Understanding Crown Molding Basics
Before picking up a saw, it helps to understand what crown molding actually is and why it matters for cabinetry. Getting familiar with materials and styles now will make every later step easier and reduce costly mistakes.
Types of Crown Molding Materials
Crown molding is available in solid wood, MDF, polyurethane, and flexible PVC, each offering a different balance of cost, durability, and ease of cutting.
Solid wood gives the most authentic look and takes stain beautifully, while MDF is budget-friendly and paints smoothly but resists moisture poorly. Polyurethane molding is lightweight, pre-primed, and resists warping, making it a popular pick for kitchens near stoves and sinks.
Popular Crown Molding Styles
The most common profiles used on kitchen cabinets are cove, ogee, and dentil styles, each suited to a different kitchen aesthetic.
Cove molding has a simple curved profile that suits modern or transitional kitchens, while ogee and dentil styles bring a more traditional, detailed look. Matching the profile to your cabinet door style keeps the overall design consistent rather than mismatched.
Planning Your Crown Molding Project
A little planning prevents wasted material and uneven results later on. This stage is about getting accurate numbers and choosing molding that actually fits your kitchen’s proportions.
Measuring Your Cabinets Correctly
Start by measuring the total linear footage around the top of every cabinet run, including corners, using a tape measure and notepad. Always add ten to fifteen percent extra to your total to account for mitered corners and cutting mistakes. Sketching a rough floor plan of your cabinet layout also helps you visualize where inside and outside corners will fall.
Choosing the Right Molding Size
Cabinet height and ceiling gap size determine how large your molding should be, with most kitchens using pieces between two and four inches wide. A taller gap between cabinet top and ceiling generally calls for a wider molding profile to fill the space proportionally. Standing back and viewing sample pieces against your cabinets before buying in bulk is always a smart step.
Tools and Materials You Will Need
Having everything ready before you start prevents mid-project delays and frustration. Below is a simple breakdown of what a typical crown molding installation requires.
| Category | Items Needed |
| Cutting Tools | Miter saw, coping saw, miter box |
| Fastening Tools | Brad nailer, hammer, nail set |
| Measuring Tools | Tape measure, level, pencil, stud finder |
| Materials | Crown molding, wood glue, finishing nails, caulk, wood filler |
| Finishing Supplies | Sandpaper, paint or stain, paintbrush or sprayer |
| Safety Gear | Safety glasses, ear protection, dust mask |
Essential Tools for Accurate Cuts
A miter saw is the most important tool in this project since it creates the clean angled cuts crown molding requires at corners. A coping saw is equally important for inside corners, allowing one piece to fit snugly against the profile of another. Keeping blades sharp throughout the project prevents splintering and rough, uneven cut edges.
Materials Checklist Before You Begin
Beyond the molding itself, you will need wood glue for secure bonding and finishing nails sized appropriately for your molding thickness. Caulk and wood filler are essential for hiding seams, gaps, and nail holes once everything is installed. Buying slightly more material than your measurements suggest avoids mid-project trips back to the store.
Preparing Your Cabinets Before Installation
Proper preparation ensures the molding sits flush and stays secure for years. Skipping this stage is one of the most common reasons DIY crown molding projects fail.
Removing Doors and Hardware
Take off cabinet doors, drawer fronts, and any hardware near the top of the cabinets to give yourself clear, unobstructed access. This also protects glass panels or delicate finishes from accidental nail gun damage. Label each door so reinstallation later goes quickly and without confusion.
Installing a Nailer Strip
Many stock cabinets lack a flat surface at the top for molding to attach to, so a plywood or MDF nailer strip must be added first.
This strip is screwed directly into the cabinet frame and becomes the anchor point for your brad nailer later. Skipping this step often results in molding that feels loose or pulls away over time.
Measuring and Cutting the Molding
This is the most technical part of the entire process, and taking your time here pays off in the final appearance. Corners are almost always the trickiest part to get right.
Mitered Corner Cuts
Outside corners are typically handled with two pieces cut at forty-five-degree angles that meet to form a clean point.
Using a miter saw with a stop block helps ensure repeat cuts stay identical in length and angle. Always dry-fit mitered pieces before applying glue to check that the joint closes tightly.
Coped Inside Corner Cuts
Inside corners perform better with coped cuts, where one piece is cut flat and the second is shaped to follow the profile of the first.
This method holds up better than mitered inside corners, especially as wood naturally expands and contracts with humidity. A coping saw combined with light sanding on the cut edge produces the cleanest fit.
Step by Step Installation Process
With cuts ready, installation moves quickly if pieces have been dry-fitted properly beforehand. This stage brings the entire project together visually.
Dry Fitting and Gluing
Before nailing anything permanently, hold each piece in place to confirm angles line up and gaps are minimal.
Once satisfied, apply a thin, even line of wood glue along the back edge of the molding for extra holding strength. Glue also helps keep mitered joints from separating as the wood settles over time.
Nailing Technique
Secure the molding using a brad nailer angled at roughly forty-five degrees into the cabinet frame or nailer strip. Space nails every twelve to sixteen inches, and always nail near corners for extra stability. Countersinking each nail slightly below the surface makes the filling step much easier later.
Finishing Touches for a Professional Look
The finishing stage is what separates an amateur-looking installation from one that looks professionally done. These final details are quick but make a noticeable difference.
Filling and Sanding
Use wood filler to cover every visible nail hole, then allow it to dry fully before sanding the area smooth and level. Sanding lightly along seams also helps blend any slight height differences between adjoining pieces. A clean, dust-free surface at this stage ensures paint or stain goes on evenly.
Caulking and Painting
Run a thin bead of paintable caulk along the top seam where molding meets the ceiling and at any tight corner joints.
Smooth the caulk with a damp finger for a seamless finish before it fully cures. Finally, apply paint or stain that matches your cabinets, using thin coats for the most even, professional-looking result.
Common Problems and How to Fix Them
Even careful installations sometimes run into small issues, and knowing how to fix them saves time and stress. Most problems trace back to measuring or cutting inconsistencies.
Gaps and Uneven Corners
Small gaps at corners or along the ceiling line are usually fixed easily with caulk rather than removing and recutting the piece.
For larger gaps, a thin shim behind the molding can push it forward slightly to close the space. Checking cuts with a test piece before final installation prevents most gap issues entirely.
Warped Molding Pieces
Wood molding can warp slightly if stored improperly before installation, leading to bowing along its length. Adding extra nails along the warped section while the glue is still wet usually pulls it back into place. Storing unused molding flat and indoors prevents this issue from happening in the first place.
DIY Cost vs Professional Installation
Understanding the cost difference helps you decide whether this is a weekend project or one worth hiring out. Both routes have clear advantages depending on your budget and comfort level with tools.
| Cost Factor | DIY Installation | Professional Installation |
| Materials | $100–$300 | $100–$300 |
| Labor | Your own time | $300–$800+ |
| Tools | One-time purchase or rental | Included in service |
| Total Estimated Cost | $150–$400 | $500–$1,200+ |
When to Hire a Professional
If your kitchen has unusually high ceilings, uneven walls, or intricate molding styles, a professional carpenter may deliver a cleaner result faster.
Hiring out also makes sense if you lack access to a miter saw or brad nailer and do not want to invest in tools for a single project. For straightforward cabinet layouts, however, most homeowners find the DIY route manageable with patience.
Maintenance Tips for Long Lasting Molding
Once installed, crown molding requires very little upkeep beyond regular dusting with a soft cloth or microfiber duster. Wipe away kitchen grease buildup with a mild cleaner every few months to keep paint or stain looking fresh.
Touching up small chips or scratches with matching paint as soon as they appear prevents them from becoming more noticeable over time.
Frequently Asked Questions
Can crown molding be added to any kitchen cabinet?
Most stock and custom cabinets can accommodate crown molding, though a nailer strip may be required first.
Do I need special tools to install crown molding myself?
A miter saw and brad nailer are strongly recommended, though a miter box and hammer can work for smaller projects.
What is the best crown molding material for kitchens?
Polyurethane is often preferred near cooking areas since it resists moisture and warping better than solid wood or MDF.
How long does this project typically take?
Most kitchens can be completed in one to two full days, depending on cabinet layout and corner complexity.
Conclusion
Learning how to add crown molding to kitchen cabinets is a rewarding project that noticeably upgrades your kitchen’s appearance without a full remodel.
With careful measuring, the right tools, and patience during the cutting and installation stages, even first-time DIYers can achieve a clean, professional-looking finish. Take your time at each step, and your cabinets will look custom-built for years to come.
Related Articles
What Color Floor With Oak Cabinets: A Complete Pairing Guide
Are Toilet Seats Universal? Complete Guide
How to Strip Paint From Tiles: A Complete Guide 2026
How Do You Remove Smoke Stains From Walls? Complete Step-by-Step Guide
Basement Ceiling Insulation: Complete Guide to Types, Costs & Best Options