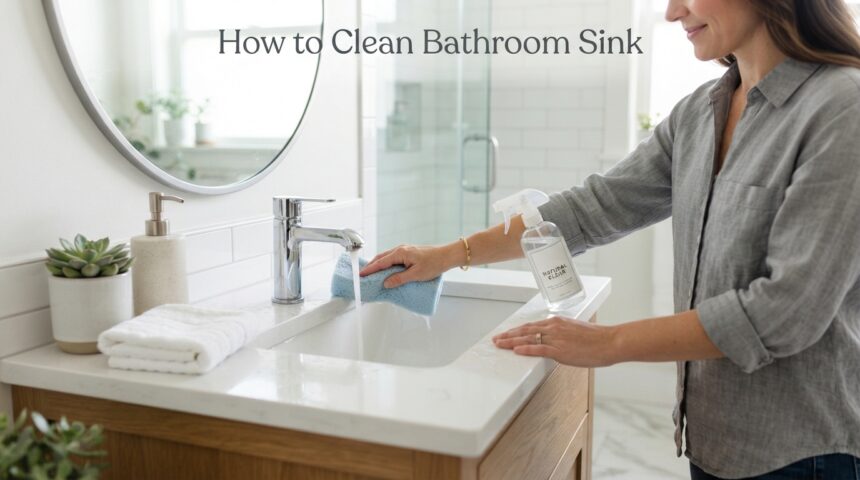
A clean bathroom sink is more than just a nice thing to look at, it is actually a basic part of keeping your bathroom healthy and germ free. Many people search for how to clean bathroom sink because soap scum, toothpaste marks, and hard water stains build up faster than expected.
This guide breaks the entire process into simple steps that anyone can follow, whether you are dealing with a porcelain basin, a stainless steel sink, or a stone surface, so your sink stays fresh, shiny, and hygienic every single day.
Understanding Your Sink Material
Before you start cleaning, it helps to know what your sink is made of because different materials react differently to cleaning products. Using the wrong cleaner on the wrong surface can cause scratches or dullness over time.
Porcelain and Ceramic Sinks
Porcelain and ceramic sinks are the most common type found in homes, and they are generally easy to maintain with mild soap and water.
These surfaces can handle baking soda and vinegar well, but harsh abrasive pads should be avoided since they can wear down the glossy finish. A soft sponge is usually enough to keep this material looking new for years.
Stainless Steel Sinks
Stainless steel sinks are durable but can show water spots and streaks quite easily. A mixture of mild dish soap and warm water works best, followed by drying with a soft cloth to prevent staining. Avoid steel wool or harsh scrubbers, as they can leave fine scratches that dull the metallic shine over time.
Granite and Composite Sinks
Granite and composite sinks are tougher than most materials but still need gentle care to avoid dulling their surface. Strong acidic cleaners like straight vinegar should be used sparingly since they can slowly wear away the sealant. A pH-balanced cleaner is the safest choice for these sinks.
Glass Vessel Sinks
Glass vessel sinks look elegant but show fingerprints, smudges, and water spots very easily. A glass cleaner or a diluted vinegar solution works wonderfully to keep them streak free. Wiping dry immediately after cleaning is important since glass tends to spot quickly if left wet.
Supplies You Will Need
Having the right tools ready before you start makes the entire cleaning process faster and much more effective. This section covers everything from basic tools to safety items you should keep nearby.
Basic Cleaning Tools
A soft sponge, an old toothbrush for tight corners, and a microfiber cloth are the essential tools for cleaning any bathroom sink.
The toothbrush is particularly useful for scrubbing around the faucet base and drain edges where grime tends to hide. Keeping these tools separate from kitchen tools helps maintain proper hygiene standards.
Common Cleaning Agents
| Cleaning Agent | Best For | Notes |
| Dish soap | Everyday grime and soap scum | Gentle on most surfaces |
| Baking soda | Stains and mild scrubbing | Safe for porcelain and ceramic |
| White vinegar | Hard water stains and mineral buildup | Avoid on natural stone |
| Commercial bathroom cleaner | Deep cleaning and disinfecting | Follow label instructions |
| Lemon juice | Rust and light stains | Natural alternative to chemicals |
Safety Items to Keep Handy
Rubber gloves protect your hands from chemical exposure and repeated water contact during cleaning sessions.
Good ventilation is also important, especially when using commercial cleaners with strong fumes, so keep a window open or a fan running. These small precautions make the cleaning process safer without adding much extra effort.
Step-by-Step Daily Cleaning Routine
A short daily routine prevents grime from building up and makes the weekly deep clean much easier to manage. This habit takes less than two minutes but saves a lot of scrubbing effort later.
Quick Wipe Down Method
After brushing your teeth or washing your face, take a few seconds to wipe the sink with a damp cloth. This simple habit removes toothpaste splashes and soap residue before they have a chance to dry and stick to the surface. Doing this consistently keeps the sink looking presentable between deeper cleaning sessions.
Removing Toothpaste and Soap Residue
Toothpaste and soap residue can dry into a stubborn film if left unattended for too long. A damp sponge with a small amount of dish soap usually removes this buildup without much effort. Focus on the edges of the drain, since residue tends to collect there the most.
Drying to Prevent Water Spots
Leaving the sink wet after use encourages water spots and mineral deposits, especially in areas with hard water. A quick wipe with a dry cloth after your last use of the day keeps the surface spot free. This step is especially important for stainless steel and glass sinks.
Deep Cleaning Process for a Spotless Sink
While daily wiping helps, a proper deep clean is essential to fully understand how to clean bathroom sink surfaces thoroughly. This weekly routine removes buildup that daily wiping alone cannot handle.
Clearing and Rinsing the Sink
Start by removing all items from around the sink, including soap dispensers, toothbrush holders, and any decorative pieces. Rinse the entire basin with warm water to loosen any surface dirt before applying cleaning products. This preparation step makes the actual scrubbing far more effective.
Applying the Cleaning Solution
Apply your chosen cleaner, whether it is a baking soda paste, a vinegar solution, or a commercial product, evenly across the sink surface. Let it sit for about five to ten minutes so it can break down grime and stains naturally. This waiting period reduces the amount of scrubbing needed afterward.
Scrubbing Systematically
Work in sections, starting with the basin walls, moving to the bottom, and finishing with the faucet base and edges. Using a soft brush or sponge in circular motions helps lift dirt without scratching the surface. Paying attention to corners and the overflow hole ensures no hidden grime is left behind.
Tackling Stubborn Stains
For tougher stains that do not come off with regular scrubbing, apply a thicker paste of baking soda directly onto the mark. Let it rest for a few extra minutes before scrubbing again with a bit more pressure. Repeating this process once or twice usually clears even old, set-in stains.
Rinsing Thoroughly
Once scrubbing is complete, rinse the sink thoroughly with warm water to remove all traces of cleaner and loosened dirt. Leftover cleaning solution can leave a filmy residue if not rinsed properly. Running water for at least thirty seconds ensures the drain area is clean as well.
Drying and Polishing
Finish by drying the sink completely with a microfiber cloth, which also helps polish the surface to a nice shine. This final step prevents water spots from forming as the sink air dries. A polished, dry sink also looks noticeably cleaner and more inviting.
Removing Specific Stains and Buildup
Different types of stains require slightly different approaches, and knowing the right method saves time and effort. This section covers the most common problem areas people face.
Hard Water Stains and Mineral Deposits
Hard water stains appear as chalky white marks around the faucet and drain area over time. Soaking a cloth in vinegar and laying it over the stain for fifteen minutes softens the deposits before wiping away. This method works well for most sink materials except natural stone.
Soap Scum Buildup
Soap scum forms a dull, slightly sticky film that collects along the sink edges and around the drain. A mixture of dish soap and warm water, combined with gentle scrubbing, usually clears this buildup effectively. Regular daily wiping also prevents this problem from becoming severe.
Rust Stains Around the Drain
Rust stains often appear near metal fixtures and can be treated with a paste of baking soda and lemon juice. Applying this paste and letting it sit for ten minutes before scrubbing helps lift the discoloration. For persistent rust, a specialized rust remover may be needed.
Mold and Mildew Around Edges
Mold and mildew tend to develop in damp corners where the sink meets the counter or wall. A diluted bleach solution or a vinegar spray can be used to kill mold spores safely. Keeping the area dry after cleaning helps prevent mold from returning quickly.
Cleaning the Faucet, Handles and Drain
The faucet and drain area often get overlooked, yet they collect just as much grime as the basin itself. This part of the guide focuses on these frequently missed spots.
Faucet Aerator Cleaning
The small mesh screen inside the faucet, known as the aerator, can collect mineral deposits that reduce water flow. Unscrewing it and soaking it in vinegar for about twenty minutes clears out most buildup. Rinsing and reattaching it afterward restores normal water pressure.
Handle and Base Grime Removal
Grime often builds up around the faucet base and handles due to constant water and soap contact. An old toothbrush dipped in soapy water works well to reach these tight, hard to clean areas. Doing this weekly keeps the fixtures looking new for much longer.
Drain Stopper and Clog Prevention
The drain stopper can trap hair, soap residue, and toothpaste over time, leading to slow drainage. Removing it occasionally to clean off buildup prevents clogs before they become a bigger plumbing issue. A simple monthly check keeps water flowing smoothly.
Natural and DIY Cleaning Solutions
Many people prefer natural alternatives over harsh chemical cleaners, especially for regular household use. These options are affordable, easy to make, and generally safer for most surfaces.
Baking Soda Paste Recipe
Mixing baking soda with a small amount of water creates a gentle yet effective scrubbing paste for most stains. This paste works particularly well on porcelain and ceramic sinks without causing scratches. It is also budget friendly and easy to keep on hand.
Vinegar and Water Solution
A simple mixture of equal parts vinegar and water in a spray bottle handles most everyday cleaning needs. It works especially well against hard water stains and light soap scum. This solution should be avoided on natural stone surfaces due to its acidity.
Lemon Juice for Stains
Lemon juice offers a natural, pleasant smelling alternative for tackling rust and light discoloration. Its acidity helps break down stains similarly to vinegar but leaves a fresher scent behind. It works best when combined with a bit of baking soda for extra scrubbing power.
Disinfecting the Sink Properly
Cleaning removes visible dirt, but disinfecting is a separate step needed to kill germs and bacteria that can linger on the surface. Understanding when and how to disinfect completes the full sink care routine.
When Disinfecting Is Necessary
Disinfecting becomes especially important after illness in the household or during flu season when germs spread more easily. A weekly disinfecting routine is generally sufficient for most households under normal circumstances. High traffic bathrooms may benefit from more frequent disinfecting.
Choosing Safe Disinfecting Products
Look for disinfectants labeled safe for the specific sink material to avoid damaging the surface over time. Diluted bleach solutions work well for porcelain, while alcohol based sprays are gentler on stone and composite surfaces. Always check product labels before applying anything new.
Common Mistakes to Avoid
Even with good intentions, certain habits can actually damage your sink or make cleaning less effective. Being aware of these mistakes helps you get better results with less effort.
Using steel wool or overly abrasive scrubbers on delicate surfaces is one of the most common errors people make. Mixing bleach with vinegar or ammonia based products creates dangerous fumes and should always be avoided.
Skipping the final drying step allows water spots to form, undoing much of the cleaning effort. Ignoring the small overflow hole near the top of the sink allows grime and odor to build up unnoticed over time.
Maintenance Tips for a Lasting Clean
Consistent small habits make a much bigger difference than occasional deep cleaning sessions alone. A simple schedule helps keep the sink in great condition with minimal effort.
| Frequency | Task |
| Daily | Quick wipe down after use |
| Weekly | Full deep clean with scrubbing |
| Monthly | Drain stopper and aerator cleaning |
| As needed | Stain treatment and disinfecting |
Following a schedule like this ensures your bathroom sink stays consistently clean without requiring long, tiring cleaning sessions.
Frequently Asked Questions
How often should I clean my bathroom sink?
A quick daily wipe combined with one thorough weekly clean is enough to keep most sinks in great condition.
Can I use vinegar on all sink materials?
Vinegar is safe for porcelain, ceramic, and stainless steel, but it should be avoided on natural stone due to its acidity.
What removes hard water stains best?
A vinegar soak followed by gentle scrubbing is one of the most effective natural methods for hard water stains.
Is baking soda safe for daily use?
Yes, baking soda is gentle enough for regular use and works well on most sink surfaces without causing damage.
Conclusion
Keeping a bathroom sink clean does not require expensive products or complicated steps, just a consistent routine and the right techniques for your sink material.
By following this guide on how to clean bathroom sink surfaces properly, from daily wiping to weekly deep cleaning and occasional stain treatment, you can maintain a fresh, hygienic, and good looking sink with minimal effort over time.
Related Articles
What Color Floor With Oak Cabinets: A Complete Pairing Guide
How to Remove Paint from Cement Floor: Easy Step-by-Step Guide
How Do You Remove Tile From a Bathroom Wall? Step-by-Step Guide