Peeling leather furniture is one of the most common problems homeowners face, especially with sofas, chairs, and recliners that get daily use. The good news is that in most cases, you can restore the look and feel of your furniture without replacing it entirely.
This guide walks you through how to repair leather furniture that is peeling, whether you own genuine leather or a bonded/faux leather piece. You will learn why peeling happens, what tools you need, and how to apply a lasting fix step by step.
Understanding Your Leather Type
Before you attempt any repair, you need to know exactly what kind of leather your furniture is made from. Genuine leather and bonded leather peel differently and require different repair methods.
Genuine Leather
Genuine or top-grain leather is made from real animal hide and tends to crack rather than peel in large sheets. It usually feels soft, has natural grain variations, and responds well to fillers, dyes, and conditioners. Repairs on genuine leather can look nearly invisible when done correctly.
Bonded or Faux Leather
Bonded leather is made by bonding scraps of leather fiber to a fabric backing, then coating it with a polyurethane layer.
This coating is what peels, since it is only glued onto the surface rather than being part of a natural hide. Repairs on this material are more visible and often act as a patch rather than a permanent fix.
Why the Repair Approach Differs
Genuine leather repairs focus on refilling and recoloring the hide itself, while bonded leather repairs focus on replacing the missing coating layer. Knowing this difference early saves time, money, and frustration during the repair process.
Why Leather Furniture Peels
Understanding the root cause of peeling helps prevent it from happening again after your repair is complete. Several everyday factors contribute to this common issue.
Natural Wear and Aging
Over years of sitting, leaning, and general contact, the surface coating or hide naturally breaks down. Areas like armrests and seat cushions peel first since they receive the most friction and pressure daily.
Sun and Heat Exposure
Direct sunlight and nearby heat sources dry out the natural oils in leather, making it brittle. This dryness causes the surface to crack and eventually peel away in small flakes over time.
Lack of Conditioning
Leather needs regular moisture just like skin does. Without conditioning every few months, the material loses flexibility, which leads directly to cracking and peeling of the outer layer.
Chemical and Cleaning Damage
Harsh cleaning products, alcohol-based sprays, and even some oils can strip protective coatings. This chemical damage weakens the surface and speeds up the peeling process significantly.
Tools and Materials Needed
Having the right supplies ready before you start makes the entire repair process smoother and more effective. Below is a simple table outlining what you will need.
| Tool/Material | Purpose |
| Rubbing alcohol | Cleans the surface before repair |
| Fine sandpaper (400-600 grit) | Smooths edges of peeling areas |
| Leather filler compound | Fills cracks and bare spots |
| Leather dye or paint | Matches the original color |
| Leather sealant | Protects and finishes the repair |
| Leather conditioner | Maintains flexibility long-term |
| Sponge applicator | Applies filler and dye evenly |
Where to Buy Repair Supplies
Most leather repair kits containing these items are available at furniture stores, hardware stores, or online marketplaces. Buying a complete kit is often more cost-effective than purchasing each item separately.
Step-by-Step Repair for Genuine Leather
Genuine leather repairs follow a clear process that restores both appearance and durability. Each step should be done carefully and allowed to dry fully before moving forward.
Prepare and Clean the Surface
Start by wiping the peeling area with rubbing alcohol to remove oils and dirt. Gently peel away any loose flakes with your fingers, then lightly sand the edges so the surface is smooth and even for filler application.
Fill and Blend the Damaged Area
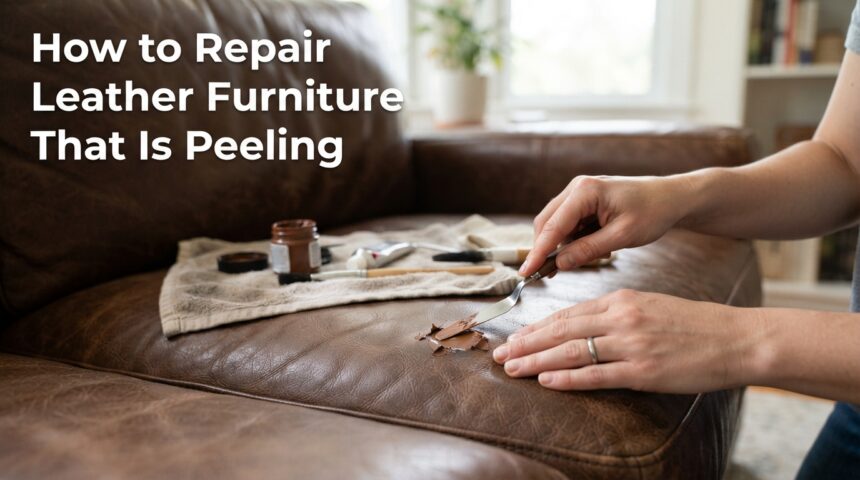
Apply the leather filler compound directly onto cracks or bare patches using a sponge applicator or palette knife. Build it up in thin layers, letting each layer dry before adding more, until the area is level with the surrounding leather.
Color Match and Seal
Once the filler is dry and sanded smooth, apply leather dye in thin coats until the color matches the rest of the furniture. Finish with a leather sealant to protect the repair, then apply conditioner for long-term softness.
Step-by-Step Repair for Bonded or Faux Leather
Bonded leather requires a slightly different approach since you are repairing a coating rather than a natural hide. This process focuses on rebuilding the surface layer evenly.
Remove All Loose Coating
Peel away every loose or flaking piece of coating until only firmly attached material remains. Leaving loose edges behind will cause the new repair to peel again within a short time.
Apply Flexible Filler and Coating
Use a flexible bonded leather filler to cover the exposed fabric backing, building it up in thin layers. Apply a matching color coating on top once the filler has fully dried and been sanded smooth.
Seal and Set Realistic Expectations
Finish with the kit’s sealant to lock in the repair and add durability. Keep in mind that bonded leather repairs often remain slightly visible, so this method works best as a practical fix rather than a flawless restoration.
When to Repair vs When to Replace
Not every peeling issue can or should be fixed with a DIY repair. Comparing the extent of damage against your budget helps you make the right decision.
| Situation | Recommended Action |
| Small peeling patches (under 6 inches) | DIY repair kit |
| Large areas peeling across cushions | Professional reupholstery |
| Sentimental or antique furniture | Professional leather restoration |
| Budget-friendly quick fix needed | DIY repair kit |
Cost and Effort Considerations
DIY repair kits typically cost far less than professional reupholstery services, making them ideal for smaller issues. However, extensive peeling across multiple cushions often justifies the higher cost of professional restoration for a longer-lasting result.
Preventing Future Peeling
Once you have completed your repair, ongoing care keeps your furniture looking good and prevents the same problem from returning.
Condition Regularly
Apply a quality leather conditioner every three to six months to keep the material soft and flexible. This simple habit is the single most effective way to prevent future cracking and peeling.
Protect from Sun and Heat
Position furniture away from direct sunlight and heating vents whenever possible. If repositioning isn’t an option, use curtains or furniture covers to block harsh UV exposure during peak daylight hours.
Clean Gently and Correctly
Use only leather-safe cleaners and soft cloths, avoiding alcohol-based or ammonia-based products. Wipe up spills immediately and avoid soaking the leather, since excess moisture can also weaken its surface over time.
Common Mistakes to Avoid
Many DIY repairs fail simply because of a few avoidable errors during the process:
- Using bleach or harsh household cleaners on peeling areas
- Skipping the sanding step before applying filler
- Applying dye or paint in one thick coat instead of thin layers
- Not testing color match on a hidden section first
- Ignoring small peeling spots until they spread further
Frequently Asked Questions
Can peeling leather be reversed completely?
Genuine leather can often be restored to look nearly new, while bonded leather repairs typically remain slightly visible as a patch rather than a full reversal.
How long does a leather repair last?
A properly done repair with quality sealant can last several years, especially when combined with regular conditioning and proper furniture placement.
Is it safe to paint over peeling leather?
Yes, using a leather-specific dye or paint designed for the material is safe and is actually a required step in most professional repair processes.
How much does professional leather repair cost?
Professional repair costs vary widely based on damage size and leather type, but it is generally more expensive than a DIY kit, which usually costs a fraction of the price.
Conclusion
Learning how to repair leather furniture that is peeling doesn’t have to be complicated once you understand your leather type and follow the right steps.
Genuine leather responds well to filler, dye, and sealant, while bonded leather needs coating replacement and realistic expectations. With the right tools, careful preparation, and regular conditioning afterward, you can extend the life of your furniture significantly and avoid costly replacement.
Related Articles
How to Choose the Best Flooring for Kids: Complete Buying Guide
Can You Use Pine-Sol on Wood Floors?
How to Regrout Tile Floor: A Complete Step-by-Step Guide
How to Clean Linoleum Floors: The Complete Step-by-Step Guide