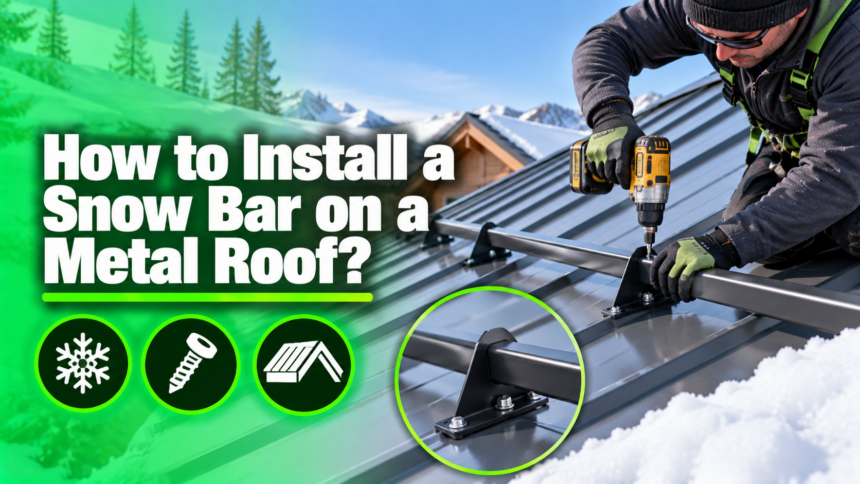
If you own a home or building with a metal roof, learning how to install a snow bar on a metal roof is one of the smartest steps you can take before winter arrives. A snow bar, also called a snow guard rail, holds accumulated snow in place so it melts gradually instead of sliding off in one dangerous sheet.
This guide walks you through every stage of the process, from understanding what a snow bar actually does, to planning your layout, gathering tools, and completing a safe, secure installation. Whether you plan to hire a professional or handle the project yourself, this article gives you the full picture in plain, easy-to-follow language.
Understanding Snow Bars and Snow Guards
A snow bar is a horizontal rail system mounted across a metal roof to control how snow and ice move down the slope. It works alongside brackets that are either clamped or screwed onto the roof panels, forming a continuous barrier.
What a Snow Bar Actually Does
A snow bar physically interrupts the downward slide of snow by acting as a fence across the roof surface.
Instead of a heavy slab of snow releasing all at once, the bar holds it back so it can melt or shed in smaller, safer amounts. This reduces sudden roof avalanches that can damage gutters, vehicles, or landscaping below.
Snow Bars vs Individual Snow Guards
Individual snow guards are small pad-like devices installed in a grid pattern across the roof, while a snow bar is a single connected rail supported by multiple brackets.
Bars tend to offer more even coverage across wide roof sections and are easier to inspect as one continuous unit. Pad-style guards, on the other hand, work well on smaller or irregularly shaped roof areas where a straight rail isn’t practical.
Common Materials Used in Snow Bars
Most snow bar systems are made from aluminum, galvanized steel, or stainless steel, chosen for their resistance to rust and cold-weather cracking.
Aluminum is lightweight and easy to handle, making it popular for DIY installations. Steel and stainless steel options are heavier but offer higher load capacity for regions with severe snowfall.
Why Snow Retention Matters on Metal Roofs
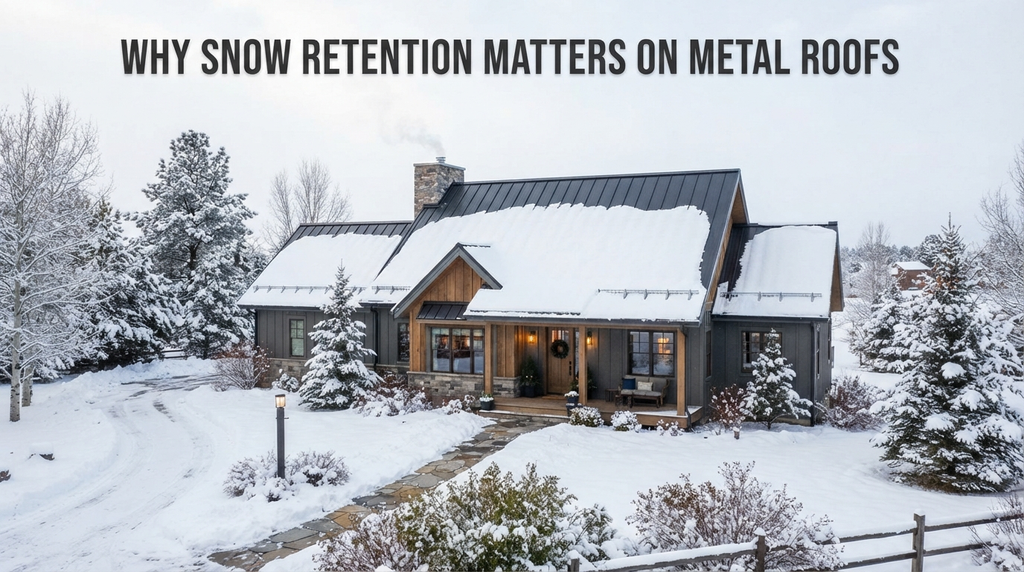
Metal roofing sheds snow far more quickly than shingles because of its smooth, low-friction surface. Without a retention system, that speed turns into a real hazard for anything or anyone standing below.
The Risk of Sudden Snow Slides
Metal panels have very little surface friction, so snow can build up and then release suddenly as a heavy, fast-moving mass.
This kind of sudden slide can dent vehicles, crush plants, break fences, or injure a person standing near the drip edge. A snow bar spreads that release out over time, making the roof far safer to be near during winter.
Property and Liability Considerations
Falling snow and ice commonly damage gutters, downspouts, HVAC units, and entryways positioned below the roofline.
Beyond direct property damage, homeowners and business owners can face liability claims if snow or ice falls on a walkway used by guests, customers, or delivery workers. Installing a snow bar is a proactive way to reduce both repair costs and legal exposure.
Types of Metal Roofs and Mounting Compatibility
The mounting method you use depends heavily on the type of metal roof you have. Getting this match right is essential for a secure, leak-free installation.
Standing Seam Roofs
Standing seam roofs have raised vertical seams that run down the slope, and most snow bar brackets for this roof type use clamp-on hardware that grips the seam without any drilling.
This preserves the roof’s watertight integrity since no holes are made in the panels. It’s generally considered the easiest and safest roof type for snow bar installation.
Corrugated and Screw-Down Panel Roofs
Corrugated and exposed-fastener panels require brackets that are screwed directly into the panel ribs, ideally anchored into the structural framing beneath.
Because this method involves penetrating the roof surface, proper sealant and butyl tape use is critical to prevent leaks. Screws should always align with existing fastener patterns whenever possible to avoid creating new weak points.
Planning Your Snow Bar Installation
Good planning prevents most of the problems that come up during installation. This stage decides how many rows you’ll need, where they go, and how far apart the brackets should sit.
Calculating Snow Load and Row Requirements
Snow load requirements vary by climate zone, roof pitch, and roof length, so manufacturers typically provide load charts to guide your calculations.
Steeper roofs and heavier average snowfall usually call for multiple bar rows rather than a single line near the eave. Checking local building codes or a manufacturer’s engineering guide before purchasing materials will save you from under-protecting the roof.
Measuring the Roof and Marking Layout Lines
Before any brackets go up, measure the full width of the roof section and locate the purlins or rafters beneath the panels if you’re working with a screw-down system.
Snap a chalk line across the roof at each planned row location to keep the brackets perfectly straight. Straight, evenly spaced brackets are what allow the bar itself to sit level and distribute weight properly.
Tools and Materials Checklist
Having everything ready before you climb onto the roof keeps the job efficient and safer. Below is a simple breakdown of what’s typically needed.
| Category | Items Needed |
| Measuring & Marking | Tape measure, chalk line, pencil, level |
| Installation Tools | Drill/driver, torque wrench, seam clamp tool |
| Materials | Snow bar brackets, horizontal bar/rail, screws or clamps, butyl tape, sealant |
| Safety Gear | Roof harness, anchor points, non-slip footwear, gloves |
Having this list ready before starting prevents repeated trips up and down the ladder, which is one of the more time-consuming parts of any roof project.
Safety Precautions Before You Start
Roof work always carries risk, and cold-weather roofing adds extra hazards like ice patches and reduced grip.
Weather and Timing Considerations
Only install snow bars on a dry, mild day, since wet or frosted metal panels become extremely slippery underfoot.
Early fall, before the first real snowfall, is generally the best time to complete this project. Avoid working during high winds, as loose materials and tools can easily become dangerous on an elevated surface.
Fall Protection and Ladder Safety
A roof harness anchored to a secure point is strongly recommended for any metal roof work, particularly on steep pitches.
Use a properly extended ladder secured at the base, and never lean or overreach while standing on the roof surface. If the roof pitch is steep or the building is more than one story, hiring a professional installer is the safer choice.
Step-by-Step Installation Guide
This is the core process for how to install a snow bar on a metal roof, broken into a clear sequence you can follow row by row.
- Mark your planned bracket rows using a chalk line based on your earlier measurements.
- For standing seam roofs, position each clamp bracket on the seam and tighten the set screws evenly, following the manufacturer’s torque specification.
- For screw-down or corrugated roofs, apply butyl tape to the bracket base, then fasten it into the panel rib and underlying framing.
- Continue placing brackets along the marked line at the spacing determined during planning.
- Slide the horizontal bar through each bracket, connecting them into one continuous rail.
- Attach end caps or locking fasteners to secure the bar and prevent it from sliding out of the brackets.
- Check the entire row with a level to confirm it sits evenly across the roof.
- Repeat the process for any additional rows required by your snow load plan.
- Apply extra sealant around any screw penetrations to guard against future leaks.
- Test the row by applying firm pressure at several points to confirm everything is securely fastened.
Working through these steps methodically, row by row, keeps the installation consistent and reduces the chance of missing a loose bracket.
Common Mistakes to Avoid
Even straightforward installations can go wrong when a few key details are overlooked.
Incorrect Spacing or Row Placement
Placing rows too far apart or too close to the eave often leaves large uncovered sections of roof exposed to sliding snow.
Always follow the manufacturer’s spacing chart rather than guessing based on the roof’s appearance. Incorrect spacing is one of the most common reasons snow bar systems fail to perform as expected.
Overtightening or Under-Sealing Brackets
Overtightening seam clamps can crush or deform the standing seam, weakening the roof’s watertight seal.
On screw-down systems, skipping butyl tape or sealant around fasteners is a frequent cause of leaks appearing months later. Following torque specifications and sealing every penetration properly avoids both problems.
Maintenance and Inspection Tips
A snow bar system needs occasional attention to keep performing well through multiple winters.
Seasonal Inspection Checklist
Before each winter season, walk the roofline and check that every bracket is still tight and the bar sits level without sagging.
Look for signs of rust, loose fasteners, or cracked sealant around screw points. Catching small issues early prevents them from turning into leaks or a failed bracket during heavy snowfall.
When to Repair or Replace
Minor issues like a loose set screw or worn sealant can usually be fixed on the spot with basic tools. However, if a bracket has cracked, corroded significantly, or pulled away from the panel, full replacement of that section is the safer option. Replacing a compromised bracket costs far less than repairing water damage from a roof leak.
DIY vs Hiring a Professional
Deciding between doing the installation yourself and calling a roofing contractor depends on your comfort with heights, your roof’s pitch, and local snow load requirements.
A single-story roof with a gentle slope and standing seam panels is a reasonable DIY project for someone comfortable with basic tools and roof safety. Steep pitches, multi-story buildings, or roofs requiring engineered load calculations are better handled by a licensed professional who can also validate the work against local building codes.
Frequently Asked Questions
How many rows of snow bars do I need?
The number of rows depends on your region’s snowfall, roof pitch, and roof length, and is best confirmed using the manufacturer’s load chart for your specific product.
Will installing snow bars void my roof warranty?
Some manufacturers allow warranty-safe installation methods, while others require certified installers for screw-down systems, so it’s worth checking your roofing warranty terms first.
Can snow bars be added to an existing metal roof?
Yes, both clamp-on and screw-down snow bar systems are commonly retrofitted onto roofs that are already installed, without needing to replace the roofing panels.
Do all metal roofs need snow guards?
Not every metal roof requires them, but any roof positioned above a walkway, driveway, or neighboring property benefits significantly from snow retention hardware.
Conclusion
Installing a snow bar on a metal roof comes down to matching the right mounting method to your roof type, planning accurate spacing, and following each installation step carefully.
Standing seam roofs favor clamp-on brackets for a leak-free result, while screw-down panels need proper sealant at every fastening point. With correct planning, the right tools, and attention to safety, a snow bar system can protect your property and the people around it for many winters to come.
Related Articles
What Is a Finished Basement? A Complete Homeowner’s Guide
What is TPO Roofing? Complete Guide to Benefits, Cost & Installation
How to Maintain a Roof in Harsh Weather Conditions: A Complete Homeowner’s Guide
How to Measure Gutter Size: The Complete Step-by-Step Guide
Do Gutter Guards Cause Ice Dams? The Truth Homeowners Need to Know