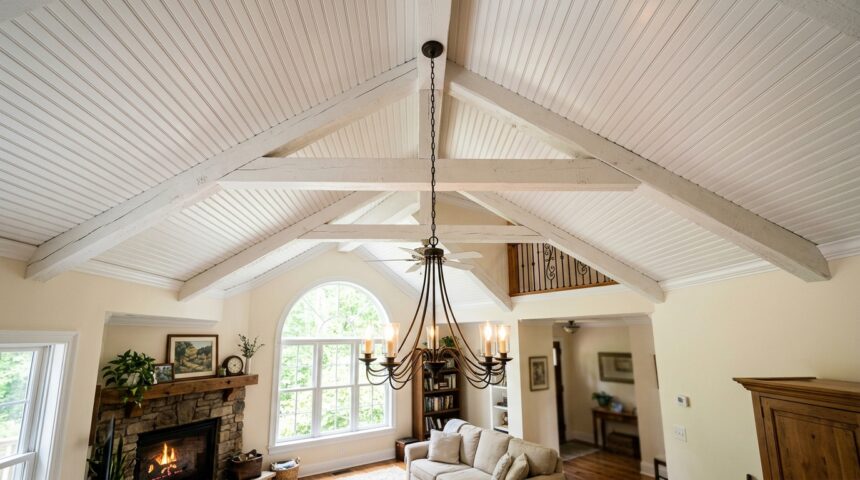
A beadboard ceiling brings a classic, cottage-style charm to any room while adding texture and visual interest that flat ceilings simply cannot offer. This paneling style, originally used on walls, has become a popular choice for ceilings in kitchens, porches, bathrooms, and living rooms.
Whether you’re renovating an older home or adding character to a new build, understanding the materials, installation process, and design options for a beadboard ceiling helps you make an informed decision for your space.
What Is a Beadboard Ceiling
A beadboard ceiling consists of narrow, vertical panels featuring small grooves or beads that create a distinctive ridged pattern overhead. This design element has been used for generations in traditional and farmhouse-style homes.
The Origin and History of Beadboard
Beadboard originated in the Victorian era, where it was commonly used on wainscoting and lower wall sections to protect against moisture and wear. Over time, homeowners began adapting it for ceilings, particularly on porches, to bring the same decorative quality overhead. Today it remains a staple of cottage, coastal, and farmhouse interior design styles.
Common Areas Where Beadboard Ceilings Are Used
Porches and sunrooms are among the most popular spots for beadboard ceilings, often finished in a soft blue or white to evoke a relaxed, airy feel. Kitchens and bathrooms also frequently feature this style since the material can handle humidity well when properly sealed. Many homeowners extend beadboard into hallways or mudrooms to create a cohesive design throughout the home.
Materials Used for Beadboard Ceilings
Choosing the right material affects durability, cost, and the overall look of the finished ceiling, so it helps to understand the available options before starting a project.
Wood Beadboard
Traditional wood beadboard, often made from pine or cedar, offers an authentic look with natural grain and warmth that other materials can’t fully replicate. It can be painted or stained to match any interior style, though it does require sealing in moisture-prone areas. Wood is generally considered the most premium option among beadboard materials.
PVC and Vinyl Beadboard
PVC beadboard panels are a popular alternative for bathrooms, kitchens, and porches because they resist moisture, warping, and insect damage far better than wood. These panels are lightweight and easy to install, making them a practical choice for humid climates or high-traffic areas. They also require little to no maintenance once installed.
MDF Beadboard
Medium-density fiberboard beadboard offers a smooth, consistent finish at a lower cost than solid wood, making it a budget-friendly option for interior rooms. However, MDF is more susceptible to moisture damage, so it’s best suited for dry areas like living rooms or bedrooms. It takes paint very well, giving it a clean, finished appearance.
Design Styles and Color Options
The right color and finish can completely transform the mood of a room, and beadboard ceilings offer plenty of flexibility in this regard.
Classic White Beadboard Ceilings
White remains the most popular choice for beadboard ceilings because it brightens a space and pairs well with virtually any interior design style. This clean, timeless look works particularly well in kitchens and bathrooms where a fresh, airy feel is desired. It also makes smaller rooms feel more open and spacious.
Coastal Blue and Porch Ceiling Trends
A soft blue, often referred to as “haint blue,” has long been used on porch ceilings, originally believed to ward off insects and evil spirits in Southern tradition. Today it remains popular purely for its calming, sky-like effect that complements outdoor living spaces. This color choice has become nearly synonymous with Southern and coastal-style porches.
Stained Wood Finishes
For a warmer, more rustic aesthetic, some homeowners choose to leave the wood beadboard natural or apply a stain rather than paint. This approach highlights the wood grain and adds a cozy, cabin-like atmosphere to a room. It pairs especially well with farmhouse or rustic interior themes.
Step-by-Step Installation Process
Installing a beadboard ceiling requires careful measuring, cutting, and attachment to ensure a clean, professional-looking result.
Measuring and Planning the Layout
Before cutting any panels, it’s important to measure the ceiling carefully and plan the layout so that the beadboard pattern appears symmetrical from the room’s main entry point. Planning ahead reduces waste and avoids awkward, uneven panel cuts at the edges. Many professionals recommend starting from the center of the ceiling and working outward for the best visual balance.
Cutting and Fitting Panels
Panels are cut to size using a table saw or circular saw, with careful attention paid to matching the groove pattern between adjacent pieces. Any electrical fixtures or vents in the ceiling need to be measured and cut around precisely before installation begins. Taking time during this stage prevents costly mistakes once panels are attached.
Attaching Panels to the Ceiling
Beadboard panels are typically attached using construction adhesive along with finishing nails driven into the ceiling joists for added support. Working methodically from one side of the room to the other ensures the pattern lines up correctly throughout the installation. A nail gun makes this process significantly faster for larger ceiling areas.
Finishing With Trim and Paint
Once all panels are installed, trim molding is added around the edges to create a clean, finished transition between the ceiling and walls. Nail holes and seams are filled, sanded smooth, and then primed before the final coat of paint or stain is applied. This finishing step is what gives the beadboard ceiling its polished, professional appearance.
Comparing Beadboard Materials at a Glance
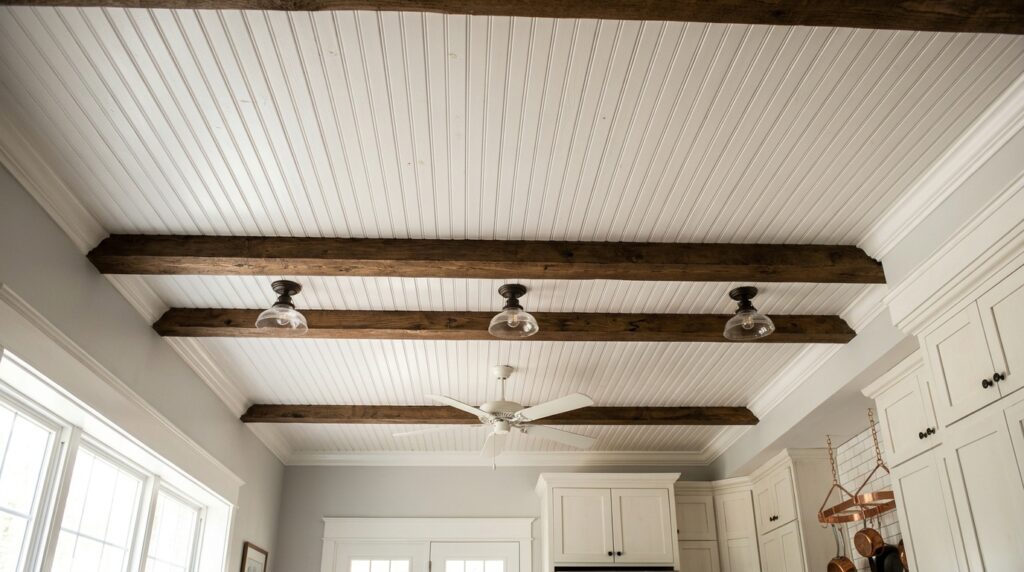
| Material | Moisture Resistance | Cost Level | Best Use Case |
| Solid Wood | Moderate (needs sealing) | Higher | Porches, living rooms, premium finishes |
| PVC/Vinyl | Excellent | Moderate | Bathrooms, kitchens, humid climates |
| MDF | Low | Lower | Dry indoor rooms, budget renovations |
This comparison makes it easier to select a material based on the specific room and climate conditions involved.
Cost of Installing a Beadboard Ceiling
The overall cost of a beadboard ceiling depends on the material chosen, the size of the room, and whether the installation is done professionally or as a DIY project.
Factors That Affect Overall Pricing
Room size directly impacts material quantity needed, while ceiling height and the presence of obstacles like vents or light fixtures can increase labor time. Higher-end wood materials naturally cost more than PVC or MDF alternatives. Professional installation adds labor costs but often ensures a more precise, long-lasting finish.
DIY vs Professional Installation
Homeowners comfortable with basic carpentry tools can often install beadboard ceilings themselves, particularly in smaller rooms with straightforward layouts. However, larger or more complex ceilings with multiple fixtures may benefit from professional installation to avoid costly mistakes. Weighing personal skill level against project complexity helps determine the most practical approach.
Maintenance and Care Tips
Keeping a beadboard ceiling looking its best requires only a few simple maintenance habits over time.
Regular Cleaning
Dusting the ceiling periodically with a soft brush or vacuum attachment prevents buildup that can dull the painted finish over time. In kitchens, occasional wiping with a mild cleaner helps remove any grease residue that may accumulate. This simple routine keeps the ceiling looking fresh for years.
Checking for Moisture Damage
In bathrooms and porches, it’s worth periodically inspecting the beadboard for signs of warping, peeling paint, or discoloration caused by humidity. Catching moisture issues early allows for prompt repairs before they spread to a larger area. Proper ventilation in these rooms also helps extend the life of the material significantly.
How Beadboard Ceilings Compare to Other Ceiling Treatments
Many homeowners consider alternatives like shiplap, tongue-and-groove planks, or coffered ceilings when planning a ceiling upgrade. While these options offer their own aesthetic appeal, beadboard remains uniquely suited for creating a traditional, cottage-inspired look with its distinctive narrow grooves. It also tends to be more budget-friendly than coffered ceiling designs while still delivering significant visual impact.
Conclusion
A beadboard ceiling is a timeless design choice that adds character, texture, and warmth to virtually any room in the home. From classic white finishes in kitchens to calming blue tones on porches, this versatile material suits a wide range of interior styles and budgets. With the right material selection and careful installation, a beadboard ceiling can become a standout feature that enhances both the beauty and value of a home for years to come.
FAQs
What is the best material for a beadboard ceiling in a bathroom?
PVC or vinyl beadboard is generally the best choice for bathrooms since it resists moisture and humidity far better than wood or MDF options.
How much does it cost to install a beadboard ceiling?
Costs vary based on material and room size, but PVC options tend to be more affordable while solid wood installations cost more due to material and labor.
Can beadboard ceilings be installed over an existing ceiling?
Yes, in many cases beadboard panels can be installed directly over an existing ceiling as long as the surface is flat and structurally sound.
Why is blue such a popular color for porch ceilings?
Blue, often called “haint blue,” has traditional roots in Southern culture and remains popular today for its calming, sky-like appearance on porch ceilings.
Related Articles
Electrician for Flickering Lights: Complete Guide 2026
Roofing Maintenance for Extreme Temperatures : Complete Guide
Cathedral Ceiling Support Box Installation Supervent: Full Guide
Laundry Room Cabinets: The Complete Guide to Storage, Style, and Smart Organization
Cracks in Garage Floor: Causes, Types & Complete Repair Guide