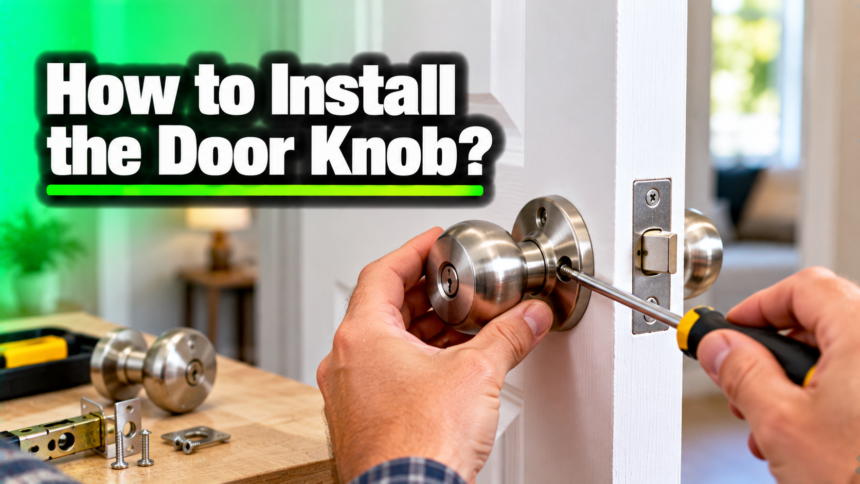
Installing a door knob takes about 15 minutes and two screwdrivers. You slide the latch into the hole on the edge of the door, push the two knob halves through the big hole so they lock together, drive in the screws, then fit the strike plate on the door frame. The one part that trips people up is buying a knob that matches the holes already cut in the door, so get the sizing right and the rest is easy.
This guide walks you through the whole job, from picking the right knob to testing that the door shuts and latches cleanly.
Which type of door knob do you need?
Before you buy, know which of the four common types fits the room. They all install the same way, but they do different jobs.
- Passage knob: turns from both sides and does not lock. Good for hallways, closets, and rooms that never need privacy.
- Privacy knob: has a push-button lock on the inside and no key. This is the one for bedrooms and bathrooms.
- Keyed entry knob: locks with a key from the outside. Use it on front, back, and side doors that open outside.
- Dummy knob: does not turn and has no latch. It is a fixed pull for pantry doors or one side of a double door, and it mounts with just two screws.
Get the sizing right before you buy
The most common mistake is buying a knob that does not fit the holes in your door. Three measurements decide the fit: the backset, the bore holes, and the door thickness. Check them before you spend any money.
The backset is the distance from the edge of the door to the center of the big hole where the knob sits. In homes you will find one of two standard backsets: 2 3/8 inches (60 mm) or 2 3/4 inches (70 mm). The quickest way to check is to look at your old latch, since many have the number stamped right on them.
If not, measure from the door edge to the center of the knob hole. Most new knobs come with an adjustable latch that fits both sizes, so you are usually covered either way. Lowe’s has a short guide on how to determine your backset if you want a visual.
The bore holes are the two holes already cut in the door. The large hole on the face, called the cross bore, is a standard 2 1/8 inches (54 mm) across. The smaller hole on the edge of the door, where the latch goes, is 1 inch (25 mm). Nearly every knob sold for interior and exterior doors is built for these two sizes, so a standard door and a standard knob will line up.
Door thickness matters too. Standard interior doors are 1 3/8 inches thick, and exterior doors are usually 1 3/4 inches. Most knobs adjust to fit anywhere in that range, but a very thick or very thin door is worth checking against the box.
Here are the standard numbers in one place:
| Measurement | Standard size | What it is |
| Cross bore (face hole) | 2 1/8 in (54 mm) | The big hole for the knob body |
| Edge bore (latch hole) | 1 in (25 mm) | Holds the latch on the door edge |
| Backset | 2 3/8 in or 2 3/4 in | Door edge to center of the big hole |
| Interior door thickness | 1 3/8 in (35 mm) | Bedrooms, bathrooms, closets |
| Exterior door thickness | 1 3/4 in (44 mm) | Front and back doors |
| Knob height | About 36 in from the floor | Measured to the center of the knob |
What you need before you start?
Most door knob jobs use just a few basic tools. Gather these first so you are not hunting for a screwdriver halfway through:
- A Phillips-head screwdriver (the star-shaped one)
- A flat-head screwdriver for prying and for any slotted screws
- A tape measure
- Your new door knob set, with its latch, strike plate, and screws
- A pencil, in case you need to mark screw spots
A cordless drill with a screwdriver bit speeds things up, but it is not required. If the door has never had a knob and you are starting from bare wood, you will also need a hole saw and a spade bit, which is covered further down.
How to install a door knob step by step?
With the right knob in hand, the job is quick. Follow these steps in order.
1. Remove the old knob and latch
If there is an old knob in place, take it off first. Look on the neck of one knob for a small slot or a tiny hole. Push a flat-head screwdriver into the slot, or press a paperclip into the pinhole, and pull the knob off. On many builder-grade knobs the two screws are visible on the inside plate instead, so back those out, pull both halves off, then remove the two screws on the door edge and slide the latch out. Take off the old strike plate on the frame last.
2. Slide in the new latch
Put the new latch into the 1 inch hole on the edge of the door. The slanted, angled side of the latch bolt must face the direction the door closes. If it faces the wrong way the door will not shut, so check this now. Push the latch in until its faceplate sits flush with the door edge, then drive in the two small screws to hold it.
3. Test the latch spring
Before going further, press the latch bolt in with your finger a few times. It should slide in smoothly and pop back out on its own. Doing this now saves you from taking everything apart later if the latch is stiff or fitted backward.
Tip: Drop the old screws into a small dish or cup as you go. The screws that come with a new knob are not always the right length for your latch, and an old one often saves the day.
4. Fit the outside knob
Pick up the knob half that has the two long rods or posts sticking out. On a keyed knob this is the keyed side, which goes outside. Line those rods up with the holes in the latch and push the knob into the big bore hole. Hold it in place with one hand.
5. Attach the inside knob and screw it together
From the other side, fit the second knob half over the rods. Line up the screw holes, start both screws by hand so you do not cross-thread them, then tighten them evenly, a little on each side at a time. Keeping them even stops the knob from sitting crooked. Snug is enough, since overtightening can bind the knob and make it turn stiffly.
6. Fit the strike plate
Move to the door frame. Set the strike plate over the hole where the latch lands and drive in its two screws. The curved lip of the strike plate should face the direction the door opens, so the latch slides across it and drops into the hole.
7. Test the door
Close the door slowly and watch the latch meet the strike plate. It should slide in and hold with a clean click. Turn the knob from both sides to check the latch pulls all the way back. If it all works, you are done. For hardware that fits a specific brand, Schlage’s installation manuals and templates cover the small differences between models.
What to do if you are drilling a new door?
A brand new slab door with no holes needs two cuts before any of the steps above. Most knob sets include a paper template for this. Tape it to the door at your chosen height, usually 36 inches from the floor to the center of the knob, and mark the two hole centers.
Use a 2 1/8 inch hole saw for the face hole. Drill from one side until the pilot bit pokes through, then finish the cut from the other side. This stops the wood from splintering as the saw breaks through. Next, use a 1 inch spade bit to drill the latch hole straight in from the door edge until it meets the big hole.
Set the latch in place, trace around its faceplate with a pencil, and chisel a shallow recess so the plate sits flush with the edge. Once the holes are cut, follow the standard steps above.
How to fix a door that will not latch?
If the door swings shut but does not catch, the latch and the strike plate are not lined up. This is the most common problem after a fresh install, and it is usually a small fix.
First, find where the latch is hitting. Rub a little pencil lead or lipstick on the end of the latch bolt, close the door, and open it again. The mark left on the strike plate shows where the latch is landing. If the mark is above or below the hole, the strike plate needs to move up or down. If it is off to one side, the plate moves in or out.
For a tiny gap, you can file the edge of the strike plate hole a little to widen it. For a bigger miss, unscrew the strike plate and shift it. Sometimes the door has sagged on its hinges instead, which drops the latch below the hole. Tightening the top hinge screws can pull the door back up into place.
A knob that turns but does not pull the latch back usually means the two halves are not fully connected, or the screws are too tight. Loosen the screws a little, make sure the rods are seated in the latch, then retighten them evenly.
Keep the new knob turning smoothly
A knob that was fitted well can still work loose over months of daily use. A quick check now and then keeps it solid and saves you a bigger repair later.
- Tighten the screws. The two screws that hold the knob halves together back out slowly as the door gets used. A quarter turn every few months keeps the knob from wobbling.
- Check the set screw. Knobs with a hidden release usually have a small set screw on the neck. If the knob feels loose but the main screws are tight, snug this one with a small screwdriver or hex key.
- Keep the latch clean. Dust and grit make a latch stick. A little dry graphite on the bolt keeps it sliding freely. Skip oil, since oil traps dust and makes the sticking worse over time.
- Watch the strike plate. If the door starts to rattle or catch, the plate screws may have loosened. Retighten them before the latch drifts out of line.
Checked once or twice a year, a knob rarely fails without some warning first, like a wobble or a stiff turn that gives you time to fix it.
Conclusion
Installing a door knob comes down to matching the hardware to the holes already in your door, then fitting the latch, knobs, and strike plate in the right order.
Check the backset and bore sizes before you buy, keep the angled latch facing the way the door closes, and tighten the screws evenly. Close the door and listen for a clean click. If it latches on the first try, the job is done right.
Frequently asked questions
How long does it take to install a door knob?
About 15 to 20 minutes for a replacement on a door that already has holes. Drilling a brand new door adds another 20 minutes or so for the two cuts and the latch recess.
Do I need to drill to install a door knob?
No, not if the door already has the two standard holes. A replacement knob drops straight into the existing bore and latch holes. You only drill when fitting a knob to a blank slab door.
What size door knob do I need?
A standard knob fits a 2 1/8 inch face hole, a 1 inch edge hole, and a backset of 2 3/8 or 2 3/4 inches. Check your old latch for the backset, then match it on the box.
Why won’t my new door knob latch?
The latch and strike plate are not lined up. Mark the latch with pencil, close the door to see where it hits, then move the strike plate or tighten a loose top hinge to lift a sagging door.
Which way does the latch face?
The angled, sloped side of the latch bolt faces the way the door closes, so it slides across the strike plate. If the door will not shut, the latch is usually in backward.
Related Articles
How Wide Is a Door? Standard Door Widths & Sizes
How to Set Up a KLLOQUE Fingerprint Door Knob?