Learning how to clean linoleum floors properly is not complicated once you understand what this flooring is made of and how it reacts to water, chemicals, and daily foot traffic. Linoleum is a durable but sensitive surface, and using the wrong products or too much water can dull its shine or damage the seams over time.
This guide walks you through daily habits, deep cleaning steps, natural cleaning solutions, stain removal, and long-term care so your floor stays bright and undamaged. By the end, you will have a clear routine that fits your home and keeps your linoleum looking new for many years without unnecessary guesswork.
Understanding Your Linoleum Floor
Before you start cleaning, it helps to know what type of linoleum you have, since the finish decides which products are safe. A quick check now saves you from accidental damage later.
Linoleum vs Vinyl Flooring
Many homeowners confuse linoleum with vinyl because they look similar at first glance. Linoleum is made from natural materials like linseed oil, cork dust, and wood flour, while vinyl is a synthetic plastic product.
This difference matters because linoleum reacts more strongly to harsh chemicals and excess moisture than vinyl does.
Waxed vs No-Wax Finishes
Older linoleum floors usually have a wax coating that needs periodic reapplication to stay shiny. Newer floors often come with a factory-applied no-wax or urethane finish that only needs regular cleaning, not polishing.
Knowing which type you have prevents you from either over-waxing a modern floor or neglecting an older one that needs it.
Daily and Weekly Maintenance
A simple daily routine prevents most of the wear and dullness that shows up on linoleum over time. This section covers the small habits that make deep cleaning easier later.
Sweeping and Dust Mopping
Loose dirt and grit act like sandpaper on linoleum if left to sit, slowly scratching the surface with every step. A soft-bristle broom or a dry microfiber mop used daily or every other day removes this grit before it causes visible wear.
Safe Vacuuming Practices
Vacuuming works well too, but only with a soft brush attachment rather than a beater bar, which can scuff or tear the surface. Canister vacuums with a bare-floor setting are generally the safest choice for linoleum.
Doormats and Furniture Pads
Placing doormats at entry points reduces the amount of dirt, sand, and moisture tracked onto the floor from outside. Felt pads under furniture legs prevent scratches and indentations, especially under heavier items like sofas or dining tables.
Deep Cleaning Routine
Once a week or every two weeks, depending on foot traffic, your linoleum needs a more thorough clean beyond sweeping. The steps below explain how to clean linoleum floors deeply without leaving damage behind.
Preparing the Right Cleaning Solution
A mild solution of warm water with a few drops of dish soap works for most linoleum floors without stripping the finish. Some people prefer a diluted vinegar solution, but this should be used sparingly since too much acidity over time can wear down wax finishes.
Mopping Technique That Protects the Floor
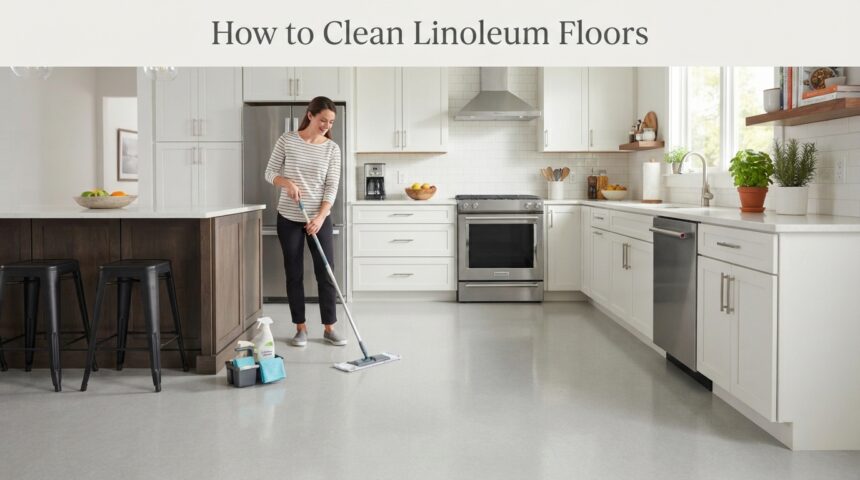
Wring your mop until it is only slightly damp, since standing water can seep into seams and cause warping or lifting at the edges. Work in small sections, mopping with the grain of the flooring pattern rather than in random circular motions.
Rinsing to Remove Soap Residue
Skipping the rinse step leaves a soapy film that attracts dirt faster and makes the floor look hazy rather than clean. A second pass with a mop dipped only in plain water removes this residue and restores natural shine.
Drying the Floor Properly
After mopping, dry the floor with a clean, soft towel or allow it to air dry with good ventilation in the room. Leaving puddles or damp patches for extended periods is one of the most common causes of long-term linoleum damage.
Natural and DIY Cleaning Solutions
If you prefer to avoid store-bought chemicals, several household ingredients clean linoleum effectively when used correctly. These options are budget-friendly and generally gentle on most finishes.
Vinegar and Water Solution
A mix of one part white vinegar to four parts warm water cuts through everyday grime without leaving a strong residue. This solution should not be used daily on waxed floors, as repeated exposure to acid can gradually dull the wax coating.
Baking Soda Paste for Stubborn Spots
For dried food stains or light scuff marks, a paste made from baking soda and a small amount of water works as a gentle abrasive. Apply it with a soft cloth, let it sit briefly, then wipe away without scrubbing too hard.
Mild Dish Soap Mixtures
Plain dish soap diluted in warm water remains one of the safest and most widely recommended options for regular linoleum cleaning. It lifts grease and everyday dirt without being harsh enough to strip most finishes.
Commercial Cleaning Products
Store-bought cleaners can save time, but not every product on the shelf is safe for linoleum flooring. Choosing correctly protects your floor’s finish for years to come.
What Makes a Cleaner Linoleum-Safe
Look for cleaners labeled specifically for linoleum or no-wax vinyl floors, as these are formulated to avoid stripping natural finishes. pH-neutral cleaners are generally the safest bet across both waxed and unwaxed surfaces.
Products and Ingredients to Avoid
Ammonia-based cleaners, bleach, and strong alkaline solutions can break down the protective coating and cause premature yellowing or dulling. Abrasive powders and steel wool pads should also be avoided since they physically scratch the surface.
Stain and Spot Removal
Even with regular cleaning, spills and marks happen, and knowing the right removal method for each type saves your floor from permanent damage.
| Stain Type | Recommended Method |
| Scuff marks | Rub gently with a small amount of rubbing alcohol on a soft cloth |
| Grease or oil | Apply diluted dish soap, let sit briefly, then wipe with a damp cloth |
| Ink or marker | Dab rubbing alcohol on a cotton ball and blot, avoid scrubbing |
| Rust spots | Use a paste of baking soda and water, applied gently with a soft brush |
| Mold in seams | Wipe with a diluted vinegar solution and dry the area completely |
Handling Scuffs and Grease Stains
Scuff marks respond well to rubbing alcohol applied with light pressure, while grease stains need a slightly stronger soap solution to break down oils. Always wipe the area dry afterward to prevent new marks from forming on the damp surface.
Removing Ink, Rust, and Mold
Ink stains lift more easily when caught early, so blotting rather than scrubbing prevents the color from spreading further into the material. Rust and mold both respond to gentle, slightly acidic solutions, but the seam area should be dried thoroughly afterward to stop mold from returning.
Restoring Shine to Older Floors
Over time, even well-maintained linoleum can lose some of its original shine, especially in high-traffic areas of the home.
When Re-Waxing Is Necessary
If your floor looks dull even after cleaning and has a traditional wax finish, it is likely time to reapply a floor polish. This is usually needed once or twice a year depending on how much foot traffic the room receives.
Applying Polish and Buffing Correctly
Apply a thin, even layer of linoleum-safe polish using a clean applicator, then allow it to dry fully before walking on it. Buffing with a soft cloth or buffing machine afterward brings back a smooth, even shine without residue.
Common Mistakes to Avoid
Many people unintentionally shorten their floor’s lifespan through small, repeated mistakes during cleaning.
Using Too Much Water
Over-wetting is the single most common issue, since excess water seeps into seams and joints, leading to warping or lifting over time. Always use a damp, not soaked, mop and dry the surface promptly.
Choosing Harsh Chemicals or Tools
Reaching for whatever cleaner is available, rather than checking if it’s safe for linoleum, often leads to gradual discoloration or a stripped finish. The same applies to abrasive scrubbing pads, which cause fine scratches that dull the surface permanently.
Long-Term Care and Prevention
Consistent care habits, rather than occasional deep cleans alone, keep linoleum looking new for the longest possible time.
Protecting Against Sun and Scratches
Direct sunlight can cause gradual discoloration, so curtains or UV-protective window film help in rooms with large windows. Furniture pads and rugs in high-traffic zones reduce scratching from chair legs and foot traffic.
Seasonal Deep-Clean Scheduling
Setting a seasonal reminder for a more thorough clean, beyond the regular weekly routine, catches buildup in corners and seams that daily mopping misses. This is also a good time to check for early signs of damage before they worsen.
Troubleshooting Common Problems
Sometimes a floor develops issues despite regular care, and identifying the cause early prevents further damage.
Yellowing or Sticky Residue
Yellowing is often linked to sun exposure or the use of ammonia-based cleaners, while sticky residue usually points to inadequate rinsing after mopping. Switching cleaning products and adding a rinse step typically resolves both issues.
Frequently Asked Questions
How often should linoleum be deep cleaned?
A thorough deep clean once a week is generally enough for most households, alongside daily sweeping to manage loose dirt.
Can you steam clean linoleum?
Steam cleaning is not recommended, as the high heat and moisture can weaken the adhesive underneath and cause the flooring to lift.
Is vinegar safe for all linoleum floors?
Vinegar is safe in small, diluted amounts, but frequent use on waxed floors can gradually dull the finish, so it should be used occasionally rather than daily.
How long does linoleum flooring typically last?
With proper care, linoleum can last twenty to forty years, making consistent, gentle cleaning a worthwhile long-term investment.
Conclusion
Cleaning linoleum floors well comes down to a simple principle: use gentle products, avoid excess water, and stay consistent with daily and weekly habits.
Compared to generic cleaning guides that recommend the same steps for all floor types, this approach specifically respects linoleum’s natural composition and finish sensitivity. Following these steps protects your investment and keeps the floor looking fresh for decades.
Related Articles
Bathroom Vanity Cabinet Sizes: Complete Guide 2026
Complete Guide to Roof Ventilation for Metal Roofs: Types, Benefits, Installation & Maintenance
How to Insulate a Vaulted Ceiling: Complete Step-by-Step Guide
Lamp Floor Arc: A Complete Guide 2026
Cracks in Garage Floor: Causes, Types & Complete Repair Guide