If you are planning a renovation or fixing damaged tiles, you have probably asked yourself how do you remove tile from a bathroom wall without wrecking the surface underneath. The truth is that this task is very doable at home if you follow the right order of steps.
You need a few basic tools, some patience, and a bit of care around plumbing and electrical fixtures. This guide walks you through every stage, from safety preparation to the final cleanup, in simple and easy wording. By the end, you will feel confident enough to remove old, cracked, or outdated tiles yourself, saving both time and money.
Safety First
Before you touch a single tile, safety should be your top priority since dust, sharp edges, and old materials can cause real harm. The next few points explain exactly what precautions to take before starting the job.
Protective Gear Needed
Wearing the right gear protects you from flying debris and sharp tile edges during removal. Safety goggles guard your eyes, thick gloves protect your hands, and a dust mask keeps harmful particles out of your lungs. Knee pads are also helpful if you are working near the floor for long periods.
Turning Off Water and Electricity
If the tiled wall is near a sink, shower, or any electrical outlet, always turn off the water supply and electricity first. This prevents accidental leaks or shocks while you are prying and cutting near pipes or wiring. It only takes a few minutes but adds a strong layer of safety to the whole project.
Checking for Asbestos
Homes built before the 1980s may have tile adhesive or backing materials containing asbestos, which is dangerous when disturbed. If your bathroom is older, it is wise to get a sample tested before starting any demolition work. When asbestos is confirmed, hiring a certified professional is the safer route.
Ventilation Tips
Good airflow keeps dust from settling in your lungs and makes the work area more comfortable overall. Open windows, turn on exhaust fans, and consider using a portable air purifier during the job. Taking short breaks outside the bathroom also helps you avoid prolonged dust exposure.
Tools and Materials Checklist
Having the correct tools ready before you begin saves time and prevents unnecessary trips to the hardware store. Below is a simple table listing what you will need for a smooth tile removal process.
| Category | Items Needed |
|---|---|
| Hand Tools | Hammer, wide chisel, pry bar, putty knife |
| Power Tools | Oscillating multi-tool, angle grinder (optional) |
| Safety Supplies | Goggles, gloves, dust mask, knee pads |
| Cleanup Supplies | Drop cloths, heavy-duty trash bags, shop vacuum |
Keeping these items within reach speeds up the process and reduces frustration once the actual demolition begins.
Preparing the Bathroom
Proper preparation protects the rest of your bathroom from dust, scratches, and accidental damage while you work. The following steps show how to set up the space correctly before removing any tile.
Clearing the Space
Remove towels, rugs, toiletries, and any movable items from the bathroom before starting. A clear, open space gives you more room to move around safely and reduces the chance of tripping over objects. It also keeps your belongings free from dust and debris.
Protecting Floors, Tub, and Fixtures
Lay thick drop cloths over the bathtub, floor, and any fixtures that are staying in place. Taping cardboard or plywood over the tub is especially helpful since falling tiles can crack or scratch the surface. This small step can save you from costly repairs later on.
Removing Trim, Fixtures, or Accessories
Take down towel bars, soap dishes, mirrors, or any trim pieces attached near the tiled area. Doing this beforehand prevents accidental breakage and gives you full access to every tile you plan to remove. Store the removed items safely so they don’t get lost or damaged.
Setting Up Proper Lighting
Bathrooms often have limited natural light, so bring in a portable work lamp for better visibility. Good lighting helps you spot grout lines, cracks, and adhesive more clearly while working. It also reduces the risk of injury from misjudging tile edges in dim conditions.
Step-by-Step Tile Removal Process
This is the core part of the guide where you actually answer the question of how do you remove tile from a bathroom wall in practice. Each step below builds on the last, so it is best to follow them in order.
Scoring the Grout Lines
Use a grout saw or an oscillating tool to cut along the edges of the tiles you want to remove first. Scoring loosens the bond between tiles and makes prying much easier afterward. This step also helps prevent damage to tiles you intend to keep nearby.
Starting at a Corner or Edge Tile
Begin at a corner or an edge tile since these are usually the easiest to loosen first. Once one tile comes off cleanly, it creates space to work the chisel under the neighboring tiles. This approach reduces breakage and gives you a steady rhythm for the rest of the wall.
Prying Tiles Off One by One
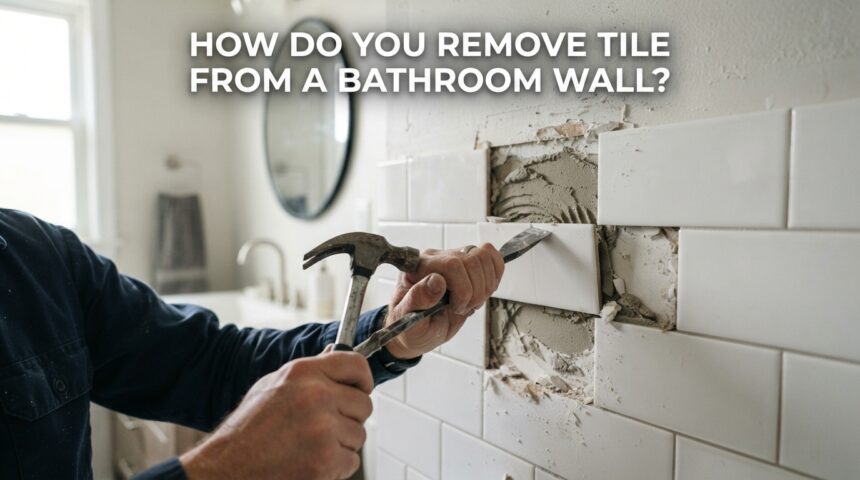
Place a wide chisel at a slight angle behind the tile and tap it gently with a hammer. Work slowly and pry each tile off individually rather than rushing through multiple tiles at once. Going tile by tile keeps the wall surface underneath in better condition.
Handling Stubborn or Glued Tiles
Some tiles may be firmly bonded and refuse to budge with a simple chisel and hammer method. In these cases, an oscillating multi-tool with a scraper blade can cut through the stubborn adhesive layer. Apply steady pressure rather than force to avoid damaging the drywall or backer board.
Removing Broken or Shattered Pieces
Tiles sometimes crack or shatter during removal, leaving sharp fragments on the wall or floor. Carefully pick up broken pieces with gloved hands and sweep smaller shards immediately to avoid injury. Keeping a dustpan nearby throughout the process makes this cleanup much faster.
Dealing With Adhesive, Thinset, and Mortar
Once the tiles are off, a layer of old adhesive or mortar usually remains stuck to the wall. The next steps explain how to clear this residue completely before moving forward.
Scraping Off Leftover Adhesive
Use a flat scraper or putty knife to remove chunks of dried mastic, thinset, or mortar from the surface. Work in small sections and apply steady pressure rather than digging too deep into the wall. This keeps the underlying material intact for the next stage.
Using a Grinder for Tough Spots
For thick or stubborn mortar patches, an angle grinder with a sanding disc can speed up the process significantly. Move the grinder steadily across the surface and avoid staying in one spot too long to prevent gouging. Always wear eye protection since this step creates a lot of fine dust.
Sanding the Wall Smooth
After most of the adhesive is gone, hand-sand any remaining rough patches until the wall feels even. A smooth surface is important whether you plan to retile, paint, or install new paneling later. Wipe the wall down with a damp cloth once sanding is complete.
Assessing the Wall Underneath
Before deciding your next move, it is important to check the true condition of the wall behind the tiles. This section explains what to look for and when extra help might be needed.
Checking for Water Damage or Mold
Look closely for soft spots, discoloration, or a musty smell, which are all signs of hidden moisture problems. Water damage often develops slowly behind tile and can weaken the wall structure over time. Addressing it early prevents bigger and more expensive repairs down the road.
Deciding Whether to Keep or Replace the Backer Board
If the board underneath feels solid and shows no damage, it can usually be reused for new tile or paneling. However, soft, crumbling, or water-stained boards should always be replaced for long-term safety. This decision directly affects how smoothly your next renovation step will go.
Signs You Need a Professional
Extensive mold growth, structural softness, or exposed wiring are strong signs that a professional should step in. Attempting major repairs without proper experience can lead to costly mistakes or safety hazards. When in doubt, a quick consultation can save you significant trouble later.
Removing Backer Board if Necessary
Sometimes the board behind the tile is too damaged to keep and must be taken out completely. The following points explain how to handle this stage safely.
Types of Backer Board
Cement board, drywall, and greenboard are the most common materials found behind bathroom tile. Cement board is the most durable, while drywall and greenboard are more prone to moisture damage over time. Knowing which type you have helps you decide the right removal approach.
Unscrewing or Prying Off Damaged Sections
Remove screws or nails holding the board in place, then gently pry damaged sections away from the studs. Work carefully to avoid damaging the wooden framework, since you will likely reuse it for the new wall covering. Keep a bucket nearby to collect debris as you go.
Exposing the Studs
Once the board is fully removed, you should be left with a clean framework of wall studs. Inspect the studs for any rot or damage before installing new backer board or wall panels. This is also a good time to check for hidden plumbing or wiring issues.
Cleanup and Disposal
After the demolition work is done, thorough cleanup makes the space safe and ready for the next phase. Sweep and vacuum all dust, tile fragments, and adhesive chips from the floor and surrounding surfaces. Bag the debris in sturdy contractor bags, since sharp tile edges can easily tear thin plastic. Many local municipalities have specific rules for disposing of construction waste, so it is worth checking guidelines beforehand to avoid fines.
Preparing the Wall for the Next Step
Once the wall is clean and stable, a bit of prep work ensures your next project goes smoothly. The following sections cover patching, sealing, and choosing your next wall finish.
Patching Holes or Damage
Fill any small holes, dents, or gaps with an appropriate patching compound before moving forward. Let the patch dry fully and sand it flush with the surrounding surface for an even finish. This step is essential whether you plan to paint or install new tile.
Priming or Sealing the Surface
Apply a coat of primer or sealer suited to your wall material to improve adhesion for the next covering. This also helps protect against future moisture problems in a high-humidity space like a bathroom. Allow the primer to dry completely as instructed on the product label.
Choosing Your Next Wall Option
At this point, you can decide between retiling, painting with moisture-resistant paint, or installing waterproof wall panels. Each option has different costs and durability levels, so choose based on your budget and long-term plans. A well-prepared wall makes any of these choices easier to execute.
Common Mistakes to Avoid
Many homeowners rush certain steps, which often leads to extra work or unexpected damage later. Below are frequent mistakes worth keeping in mind.
- Skipping safety gear or utility shut-off before starting demolition
- Using excessive force that cracks the underlying wall structure
- Ignoring the possibility of asbestos in older bathroom tile
- Overlooking signs of water damage or mold during inspection
Avoiding these common errors keeps the project safer and helps you finish with better long-term results.
Frequently Asked Questions
How long does tile removal take? A standard bathroom wall can take a few hours to a full day, depending on tile size and adhesive strength.
Can I remove tile without damaging the wall? Yes, working slowly with a chisel and steady technique greatly reduces the risk of damaging the wall underneath.
Do I need a professional for this job? Small bathrooms are usually manageable as a DIY project, but asbestos concerns or major damage call for professional help.
How much does it cost to remove bathroom tile? DIY removal mainly costs the price of tools, while hiring a professional typically depends on wall size and labor rates in your area.
Conclusion
Now you have a complete answer to how do you remove tile from a bathroom wall, from safety prep to final wall assessment. Following each stage carefully protects both your safety and the condition of the wall underneath. With the right tools and a patient approach, this project is well within reach for most homeowners planning a bathroom update.
Related Articles
How Often Should You Clean Your Bathroom? A Complete Guide
How to Maintain Home Plumbing Systems Complete guide 2026
How Wide Is Steel Roofing? Complete Panel Width Guide