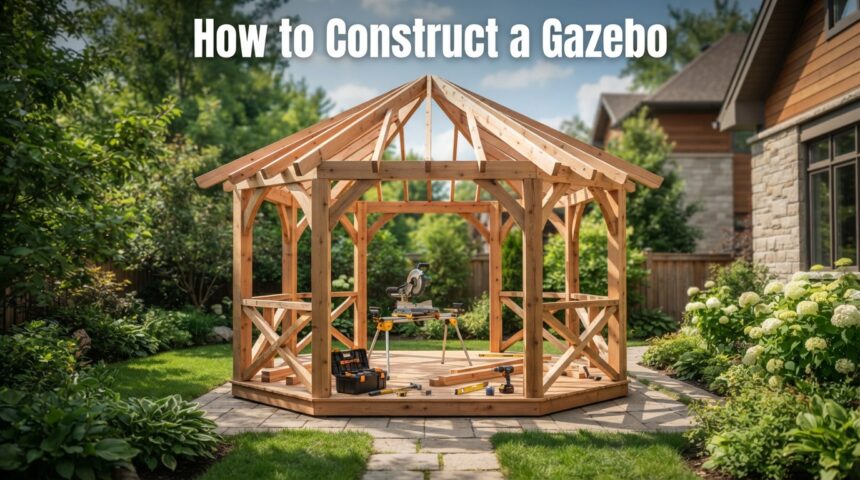
Knowing how to construct a gazebo starts with five simple jobs: plan the size, check local rules, build a solid base, raise the frame, and cover it with a roof. Most beginners can finish a small gazebo in a few days with basic tools and a helper.
The key is patience during layout and foundation work, because a level base makes every later step easier. This guide explains each stage in plain words so you always know what to do next. You will also find material lists, cost ranges, and common mistakes to avoid. By the end, you will be ready to start your own gazebo project with confidence.
What You Should Know Before You Start
A gazebo is a freestanding, roofed shelter with open sides, built for shade and relaxing outdoors. Before you learn how to construct a gazebo, you need to pick the type that suits your yard and your skills.
Gazebo Shapes and Roof Styles
Square and rectangular gazebos are the easiest to frame, so they suit first-time builders. Hexagonal and octagonal designs look more graceful but need angled cuts and a center ring to hold the rafters. Hip roofs shed water well, while gable roofs give more headroom inside.
Best Materials for a Gazebo
Wood such as cedar or pressure-treated pine looks warm and is easy to cut and fasten. Metal and aluminum frames resist rot and insects but allow fewer design changes. Vinyl needs almost no care, though it usually costs more and comes in limited sizes.
Kit or Custom Build
A kit arrives with pre-cut parts and instructions, which saves time and lowers the chance of mistakes. A custom build gives you full control over size and style, but it demands more planning and cutting skill. Choose a kit for a quick weekend project and a custom plan when you want something unique.
Planning Your Gazebo
Good planning prevents most building problems later. Answer the points below before you buy any material.
Size and Budget
Think about what will sit inside. A dining set needs roughly 12 by 12 feet, while two lounge chairs fit comfortably in 8 by 8 feet. Add 10 to 15 percent to your budget for small extras like screws, gravel, and delivery, and sketch your design so you can list every part.
Permits and Safety Checks
Many areas require a permit once a structure passes a certain size, so call your local building office first. Also confirm property line setbacks and any neighborhood association rules. Contact the utility locator service before digging so buried pipes and cables are marked.
Choosing the Right Location
Pick flat ground that drains well and stay away from low spots where water collects. Consider the sun, wind, and view, and keep the structure clear of overhanging branches. Make sure you can carry lumber and concrete to the spot without trouble.
Materials and Tools
Having everything ready saves many trips to the store and keeps the work moving. The table below lists the core items for a wooden gazebo.
| Item | Common Choice | Purpose |
| Posts | 4×4 or 6×6 pressure-treated | Main vertical support |
| Beams and headers | 2×6 or 2×8 lumber | Tie posts together and carry the roof |
| Rafters | 2×6 lumber | Form the roof frame |
| Foundation | Concrete, gravel, post anchors | Stable, dry base |
| Roofing | Shingles, metal panels, cedar shakes | Weather protection |
| Hardware | Galvanized bolts, screws, brackets | Strong, rust-resistant joints |
| Flooring | Deck boards or pavers | Walking surface |
Tools You Will Need
You will need a post-hole digger, a level, a tape measure, a framing square, a circular saw, and a cordless drill. String and stakes help with layout, and a sturdy ladder is essential for roof work. Wear gloves, safety glasses, and ear protection whenever you cut or drill.
Choosing Wood and Hardware
Cedar and redwood resist rot naturally, while pressure-treated pine gives good protection at a lower price. Use only galvanized or stainless fasteners, since ordinary screws rust and stain the wood. Buy about 10 percent extra lumber to cover bad boards and cutting errors.
How to Construct a Gazebo Step by Step
These steps follow the real order of the job, from empty ground to a finished roof. Complete each one fully before moving on.
Step 1: Mark the Layout
Place stakes at the four corners and run string between them to outline the gazebo. Measure both diagonals of the rectangle, and adjust until they match, which proves the corners are square. Mark each post position with spray paint.
Step 2: Prepare the Ground and Build the Foundation
Clear grass and roots, level the area, and spread compacted gravel for drainage. Dig footing holes below your local frost line, about 12 inches wide, then fill them with concrete and set post anchors. Let the concrete cure for at least two days before adding weight.
Step 3: Set the Posts
Attach each post to its anchor and check it with a level on two adjacent sides. Hold the post steady with temporary braces made from scrap wood. Cut all posts to the same height so the beams sit flat.
Step 4: Install Beams and Bracing
Bolt the beams across the tops of the posts to form a strong square or ring. Add diagonal or lower cross-braces to stop the frame from swaying in wind. Confirm the beams are level before you tighten every bolt.
Step 5: Build the Floor
Frame the floor with joists spaced 16 inches apart and fix them to the posts or footings. Lay deck boards with small gaps so rainwater can drain away. If you prefer pavers, set them on a firm bed of gravel and sand.
Step 6: Frame the Roof
Cut the rafters to the same length and angle, and fasten them to the beams and the center ring or ridge board. Keep the spacing even, usually 16 to 24 inches apart. Ask a helper to hold rafters while you fix them, since this step is difficult alone.
Step 7: Cover the Roof
Nail plywood sheathing over the rafters, then add a waterproof underlayment. Install shingles, metal panels, or cedar shakes from the bottom edge upward so water flows down and off. Finish with metal flashing at the joints and trim along the edges.
Step 8: Add Railings and Steps
Fit railings between posts at a comfortable waist height, leaving a gap for the entrance. Build one or two steps if the floor sits above the ground. Do a final walk-around and tighten any loose bolt or screw.
Finishing Touches
Small details turn a plain frame into a place you want to spend time in. Handle protection first, then comfort.
Paint, Stain, and Seal
Sand rough spots, then apply exterior stain or paint to every surface, including the cut ends of the boards. Seal the wood again every two to three years to prevent cracks and fading. Choose light colors if your yard gets strong afternoon sun.
Lighting and Comfort
Solar string lights are the easiest option, and they need no wiring. For outlets or ceiling fans, hire a licensed electrician to keep the setup safe and legal. Add mosquito netting, curtains, and outdoor furniture to complete the space.
Time and Cost
The time and price of your project depend on size, material, and who does the work. The table gives typical ranges, though local prices vary.
| Build Type | Approximate Time | Approximate Cost (USD) |
| Small DIY wood gazebo | 2 to 5 days | $800 to $3,000 |
| Ready-made kit | 1 to 3 days | $500 to $4,000 |
| Large custom build | 1 to 2 weeks | $3,000 to $8,000 |
| Hired contractor | 3 to 7 days | $5,000 to $15,000 |
Weather delays, permit waiting time, and concrete curing can add extra days. Buying lumber in bulk and doing the painting yourself are easy ways to save money.
Mistakes to Avoid and Care Tips
A few careless choices can weaken an otherwise good build. Learn them early, then protect your work with simple care.
Common Building Mistakes
Building on uneven or soggy ground is the top cause of leaning frames. Shallow footings, weak hardware, and thin roof framing also fail in heavy wind or snow. Skipping permits can force you to change or remove the structure later.
Simple Maintenance Routine
Sweep leaves off the roof and floor each season and wash the wood with mild soap. Inspect bolts, posts, and roofing for rust, rot, or loose parts every spring. Cover or brace the gazebo before storm season or heavy snowfall.
FAQs
Do I need a permit to build a gazebo?
It depends on your area and the gazebo size, since many places only require one above a set square footage. Call your local building office before you start to avoid fines.
Can I build a gazebo on grass?
You can, but the ground must be leveled and the posts must sit on proper footings. Setting the frame directly on soft grass leads to sinking and rot.
Can one person build a gazebo alone?
Small kits are possible for one person, but the roof frame is much safer with a helper. Lifting beams and rafters alone increases the risk of injury.
Is it cheaper to build or buy a gazebo?
Building from your own plan is often cheaper for wooden designs, though a kit saves time. Compare lumber prices and kit costs in your area before deciding.
Conclusion
Now you know how to construct a gazebo, from choosing the design to sealing the finished wood. Take your time with the layout and foundation, follow the steps in order, and never skip safety checks. With good planning and steady work, you can enjoy a strong, attractive gazebo for many years.
Related Articles
How to Choose a Contractor for Renovations?
Laundry Room Cabinets: The Complete Guide to Storage, Style, and Smart Organization
How Far Apart Should Roof Rafters Be? 16 vs 24 Inch Guide
How Do You Install Joist Hangers? A Simple Step-by-Step Guide