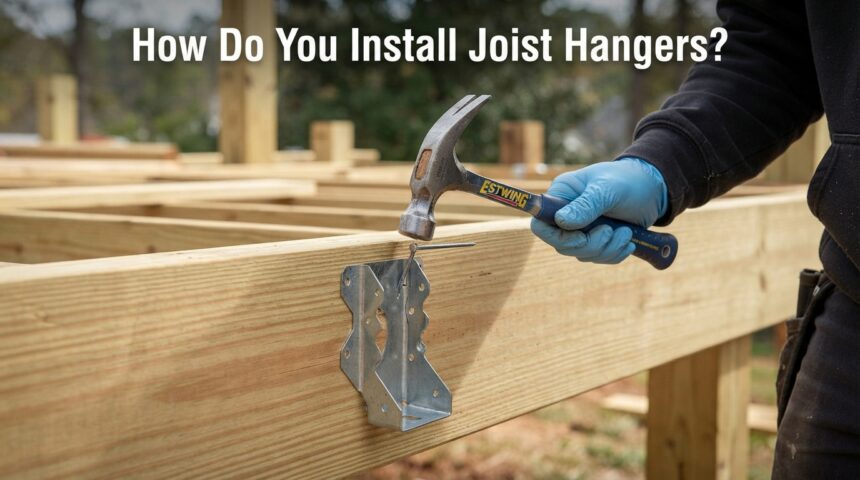
To install joist hangers, first mark the joist layout on the ledger or beam. Cut each joist square so it fits snugly into the hanger. Position the hanger flush with the top of the ledger and fasten it using the manufacturer’s specified nails or structural screws. Slide the joist fully into the hanger, then fasten through the side flanges, filling every required hole. Finally, check that everything is level, tight, and complete.
Joist hangers are small pieces of metal, but they carry a great deal of responsibility. Whether you are building a deck, framing a floor, or adding a porch, the way you connect each joist decides how safe and long-lasting the structure will be. Many people wonder how do you install joist hangers without making costly errors, and the good news is that the process is simple once you know the rules. This guide explains each part in plain language so you can work with confidence.
What Is a Joist Hanger and Why Does It Matter?
A joist hanger is a metal connector that holds the end of a joist against a beam, ledger, or header. Understanding its role helps you see why correct installation is so important.
What a Joist Hanger Does
The hanger cradles the joist end and passes its weight into the supporting member. It is usually made from galvanized or stainless steel so it can resist rust. You will find it in decks, floors, ceilings, and porches.
Why It Is Better Than Nailing Alone
Nails driven at an angle through a joist can pull loose over time. A hanger spreads the load across many fasteners and keeps the joist from twisting or sagging. Most building codes also require hangers for these connections.
Types of Joist Hangers
Different framing jobs call for different hanger styles. Choosing the right one is the first step in learning how do you install joist hangers properly.
| Hanger Type | Best Used For | Key Advantage |
| Face-mount | Decks and general framing | Easy to install and widely available |
| Top-flange | Joists sitting on top of a beam | Rests on the beam for extra stability |
| Concealed-flange | Exposed beams where looks matter | Clean appearance with hidden flanges |
| Skewed | Joists meeting at an angle | Handles non-square connections |
| Sloped | Roof or pitched framing | Fits angled joists |
| I-joist | Engineered lumber | Designed for I-joist shapes |
Face-Mount Hangers
These are the most common type and attach to the face of a ledger or beam. The flanges fold over the face and are nailed in place. They suit most beginner projects.
Top-Flange and Concealed-Flange Hangers
Top-flange hangers rest on top of the supporting beam, which adds stability. Concealed-flange hangers hide their flanges inside the joist for a neater look. Both are chosen for specific structural or visual needs.
Skewed, Sloped, and I-Joist Hangers
Skewed and sloped hangers are made for angled connections, such as a stair landing or roof frame. I-joist hangers fit engineered joists that have a different shape from solid lumber. Always match the hanger to the exact joist you are using.
Tools and Materials You Need
Gathering everything before you begin saves time and prevents mistakes. You will need a tape measure, pencil, speed square, level, and saw for cutting joists square. A hammer or framing nailer and a drill or impact driver are used for fastening. Safety glasses, gloves, and ear protection should be worn throughout the job.
Along with tools, you need the hangers themselves and the correct fasteners. Buying a few extra hangers is wise, since a bent one should never be reused.
How to Choose the Right Hanger and Fasteners
Selecting matching parts is just as important as the installation itself. A perfect installation with the wrong parts can still fail.
Match the Hanger to the Joist Size
The hanger must fit the joist width and depth, such as a 2×8 hanger for a 2×8 joist. A hanger that is too big leaves gaps, and one that is too small will not seat properly. Check the label and the manufacturer’s load table before buying.
Pick the Right Coating for the Wood
Pressure-treated lumber contains chemicals that corrode ordinary steel. For this reason, use hot-dip galvanized or stainless steel hangers when working outdoors. The coating on the fasteners should match the hanger to avoid corrosion between different metals.
Use the Correct Fasteners
Use 10d x 1½” joist hanger nails or structural screws approved by the manufacturer, such as Simpson Strong-Drive SD screws. Drywall screws and standard deck screws are too brittle and can snap under load. The wrong fastener can lower the hanger’s strength dramatically.
Step-by-Step: How Do You Install Joist Hangers?
This section answers the main question in order. Follow each step carefully and do not skip the checks.
Step 1: Prepare and Mark the Layout
Inspect the ledger or beam to make sure it is solid and firmly attached. Then mark each joist position, most often 16 inches on center, though 12 or 24 inches may apply depending on your plan. Draw clear lines so every hanger lands in the right spot.
Step 2: Cut and Test the Joists
Cut each joist end square so it sits fully against the back of the hanger. The gap between the joist and hanger should be no more than about 1/8 inch. A loose fit weakens the connection, so test one joist before cutting the rest.
Step 3: Position and Attach the Hanger
Set the hanger at your mark with the top flange flush against the top of the ledger, unless your plans say otherwise. Tack it with a few fasteners, check its position, and then fasten the back flanges. Use the exact fastener type listed by the manufacturer.
Step 4: Set and Fasten the Joist
Push the joist all the way to the back of the hanger and make sure its top is level with the ledger. Fasten through the side flanges into the joist, filling every required hole. Where the hanger has angled holes, drive the fasteners at the intended angle.
Step 5: Double-Check Your Work
Confirm that the joist is level, snug, and fully nailed or screwed. Fasteners should sit flush with the metal, not sunk in or sticking out. Move down the line and inspect each hanger the same way.
Installing Joist Hangers on Different Structures
The basic method stays the same, but the surface you attach to changes the details. Knowing these differences helps you adapt the steps to your own project.
Deck Ledger to House
A deck ledger must be securely bolted to the house rim before any hanger goes on. Hangers are then fastened to the ledger face. Never rely on a weak ledger, since every joist depends on it.
Wood Beams and Floor Frames
In a floor frame, hangers attach to a solid beam or header between supports. Double joists need a matching double hanger. Follow the manufacturer’s schedule for the number and length of fasteners.
Concrete, Masonry, and Steel
Connecting to concrete or masonry requires special anchors or embedded hangers rather than nails. For steel beams, use hangers made for steel with the fasteners the manufacturer lists. Standard wood-frame hangers should not be used here.
Common Mistakes to Avoid
Most joist hanger problems come from small errors made during the work. Avoiding them protects both safety and your investment.
| Mistake | Why It Is a Problem |
| Using the wrong nails or screws | Reduces load capacity and may cause failure |
| Leaving holes empty | Weakens the connection |
| Big gaps around the joist | Lets the joist shift and sag |
| Mixing different metals | Causes rapid corrosion |
| Reusing bent hangers | Lowers strength and fit |
| Attaching to a weak ledger | Puts the whole frame at risk |
Overdriving or underdriving fasteners is another frequent error. Overdriven nails can damage the metal, while underdriven ones do not hold the hanger tightly.
Inspection, Codes, and Maintenance
Finishing the installation is not the end of the job. A final check and regular care keep the connections dependable for years.
Inspect Before You Cover Up
Walk the whole frame and look for gaps, twisting, and missing fasteners. If your project needs a permit, schedule the inspection before covering the framing. Fix any mistake right away.
Follow Local Building Codes
Codes set the required hanger types, fasteners, and load ratings in your area. Contact your local building department early to learn what applies. Following the manufacturer’s instructions usually keeps you in line with code.
Keep Hangers in Good Condition
Check outdoor hangers once or twice a year for rust, loose fasteners, or wood damage. Replace any hanger that shows heavy corrosion. Regular attention prevents small issues from becoming safety risks.
Cost and DIY Considerations
Joist hangers are inexpensive, typically costing a few dollars each depending on size and coating. Structural screws cost more than nails but can be easier to drive. A small deck project can usually be handled by a careful beginner.
Larger jobs are different. Second-story decks, long spans, or structural repairs are best left to a licensed professional. When you are unsure, paying for expert advice costs far less than fixing a failed connection.
Frequently Asked Questions
Can I use regular screws to install joist hangers?
No. Ordinary deck or drywall screws are not designed to carry structural shear loads. Use only the joist hanger nails or structural screws the manufacturer approves.
Do I need to fill every hole in the hanger?
Yes, unless the manufacturer says otherwise. Each hole is counted in the hanger’s load rating, so leaving some empty lowers its strength.
Can I reuse a joist hanger?
It is best not to. Removing a hanger can bend the metal or enlarge the holes, which weakens the connection.
How many nails does a joist hanger need?
The number depends on the hanger model and size. Check the manufacturer’s fastener schedule printed on the product or its instructions.
Conclusion
Knowing how do you install joist hangers comes down to a few reliable habits: choose the right hanger, use the correct fasteners, keep the joist snug, and fill every hole. Add a careful final check and follow your local code, and your framing will stay strong and safe for years. If a project feels beyond your skill, consult a professional before you begin.
Related Articles
Can a Nest Thermostat Replace Heating and AC?
Roofing Maintenance for Extreme Temperatures : Complete Guide
Do Ceiling Tiles Have Asbestos? Full Safety Guide